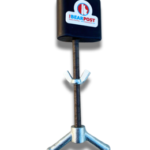
The Bear Post is a self myofascial release tool that I use to release muscle knots and trigger points.
I attach it to my weight rack at different heights depending on what body part I wanna hit.
Then I lean in to control the amount of pressure I want.
It’s solid, anchors down tightly, and hurts so good while giving my muscles much needed relief.
Let’s check it out!
Unboxing
Table of Contents
- 1 Unboxing
- 2 The Bear Post Specs
- 3 Features
- 4 The Bear Post On a Weight Rack
- 5 How Do You Perform Myofascial Release on Yourself?
- 6 The Bear Tree
- 7 The Rack Mount
- 8 The Bear Paw
- 9 On The Meander
- 10 Does The Bear Post Work?
- 11 Pros & Cons
- 12 Is The Bear Post Worth It?
- 13 The Bear Post Discount Code
- 14 The Bear Post Review
- 15 The Bear Post

I got all the Bear Post products which include The Bear Post, The Bear Tree, The Bear Paw, and the On The Meander.
The long post in the box is optional but makes it easier to adjust the Bear Post to different heights.
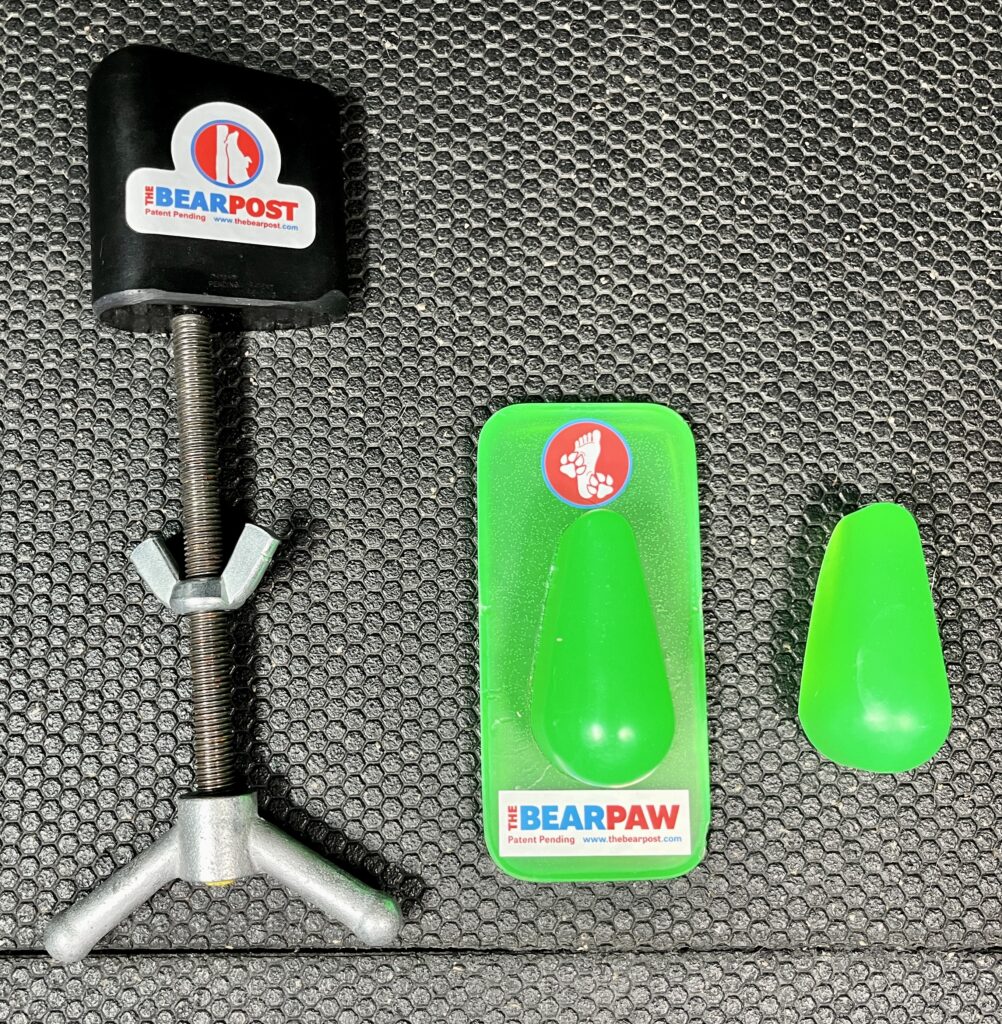
Above you can see the tools that came in the box.
From left to right, they’re the Bear Post, Bear Paw, and On The Meander.
Keep reading and I’ll show you every single one in detail and what it’s used for.
The Bear Post Specs
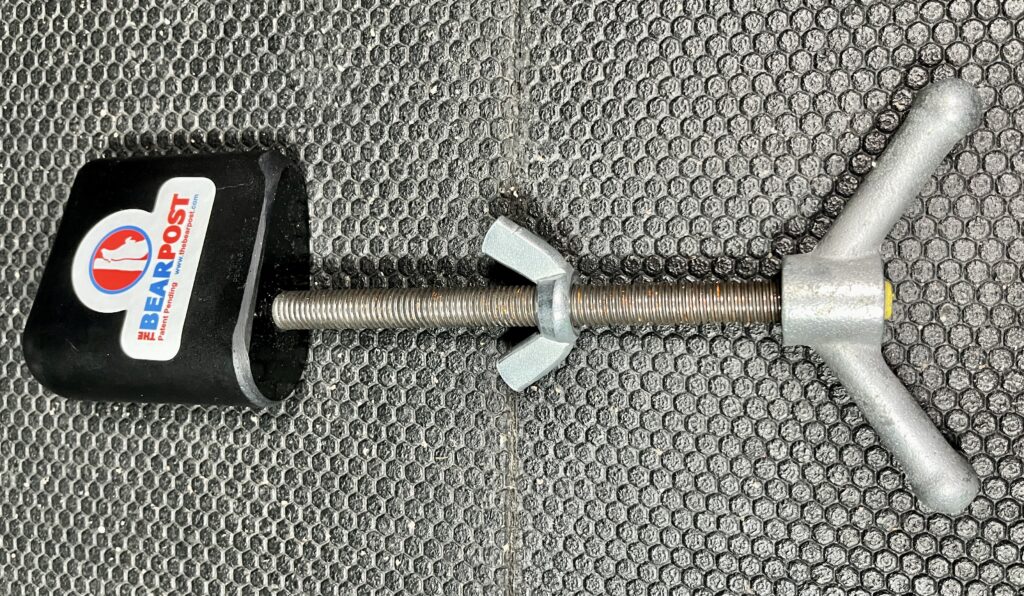
- Bar diameter: Fits 5/8″ weight rack holes
- Uses: Self myofascial release with a big end for broad areas and a small radius for precision
- Colors: Black, pink, orange ,green
- Hardware: Comes with a small and large wing nut to clamp down
Features
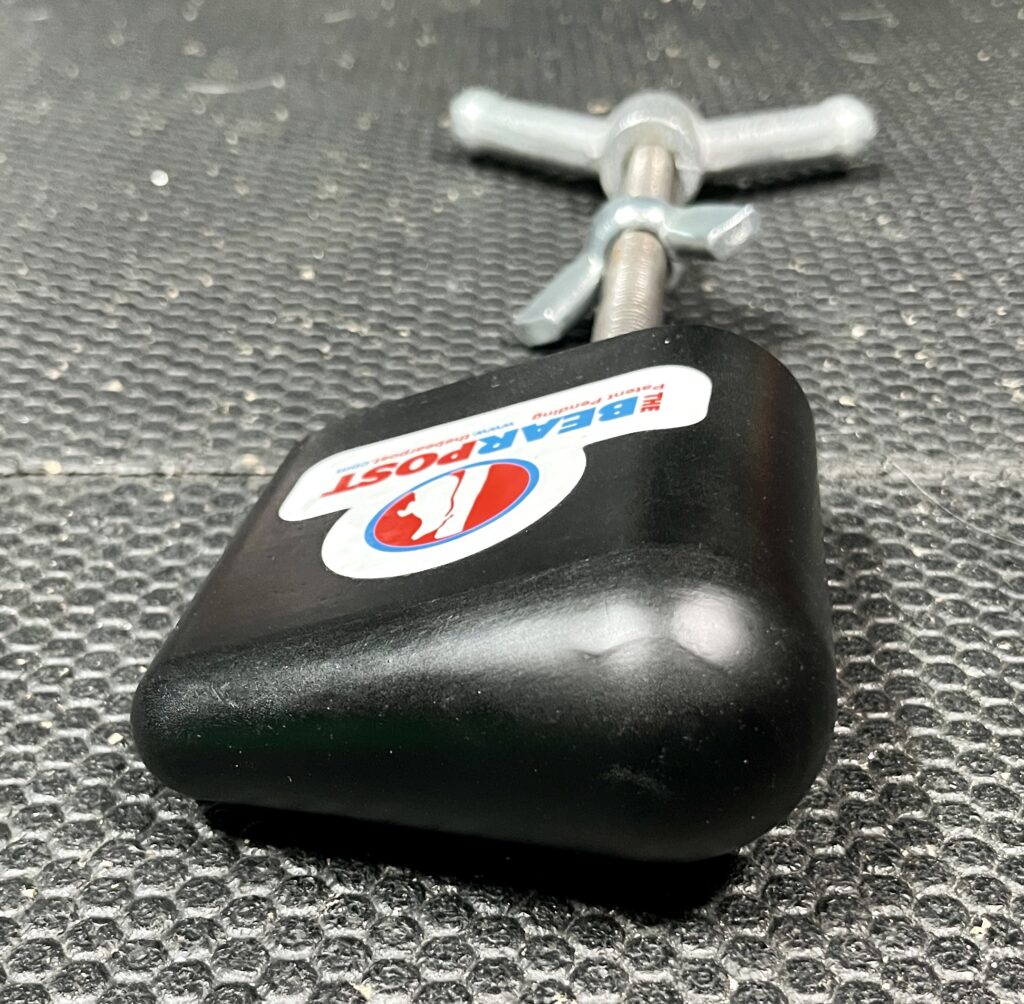
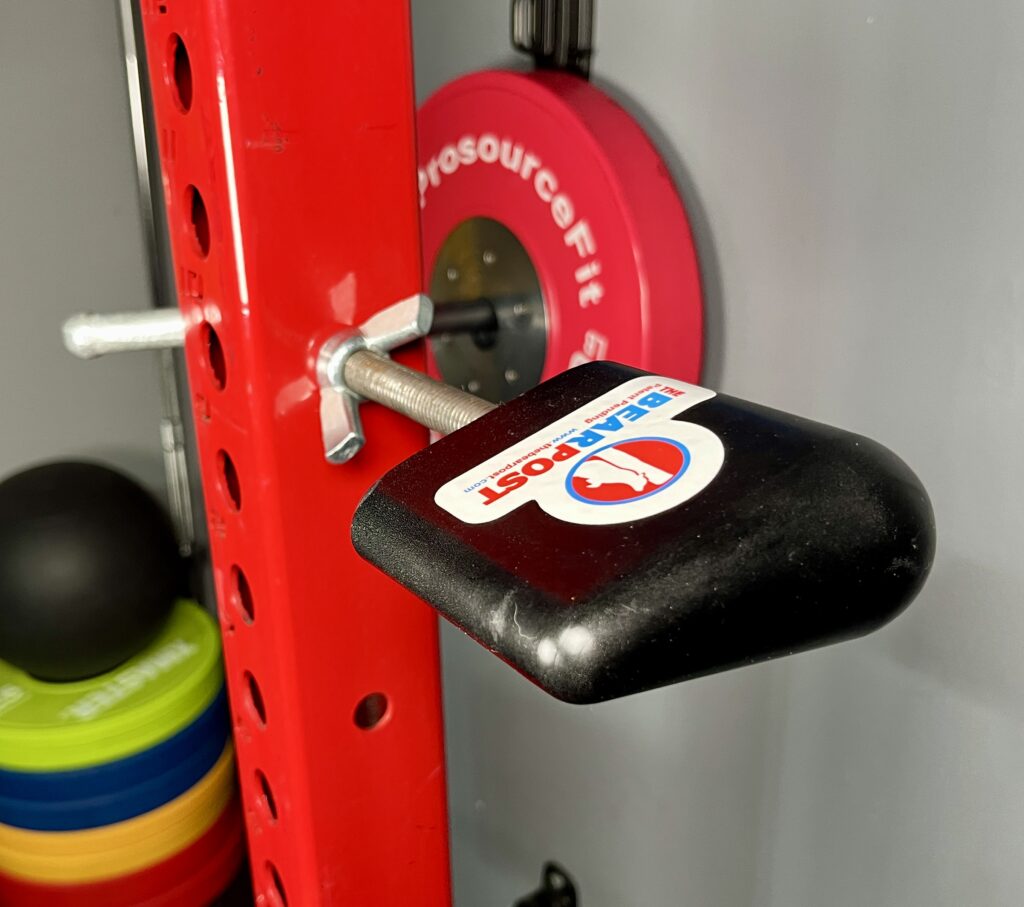
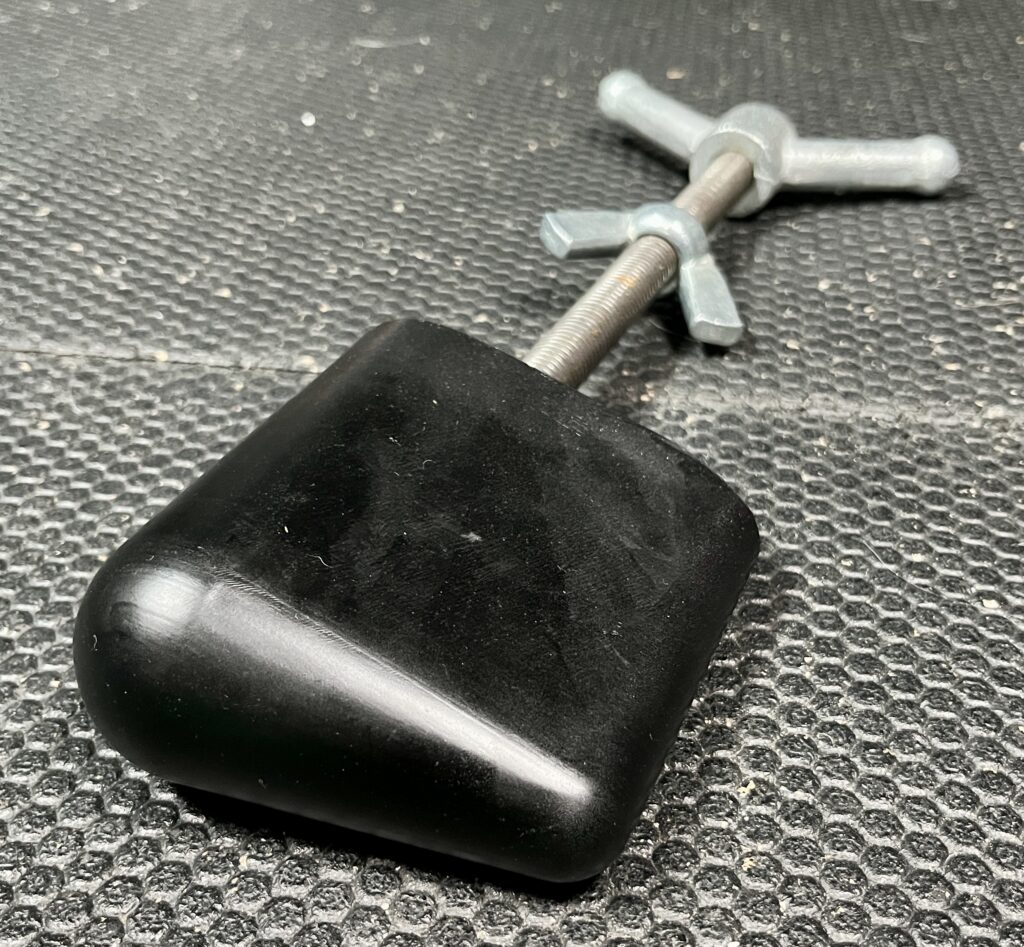
The Bear Post has a broad end and a narrow end.
With the broad end, I release big muscle groups and I use the narrow end on specific areas like trigger points.
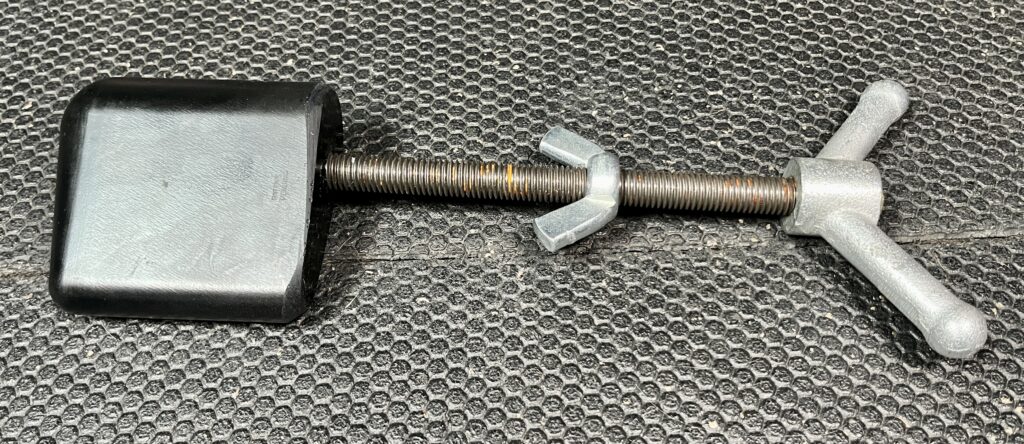
The rest of the Bear Post is the mounting hardware (small and large wing nut).
I can use mount it directly to my PRx rack through the 5/8″ holes or I can mount it to the Bear Tree for faster vertical adjustments.
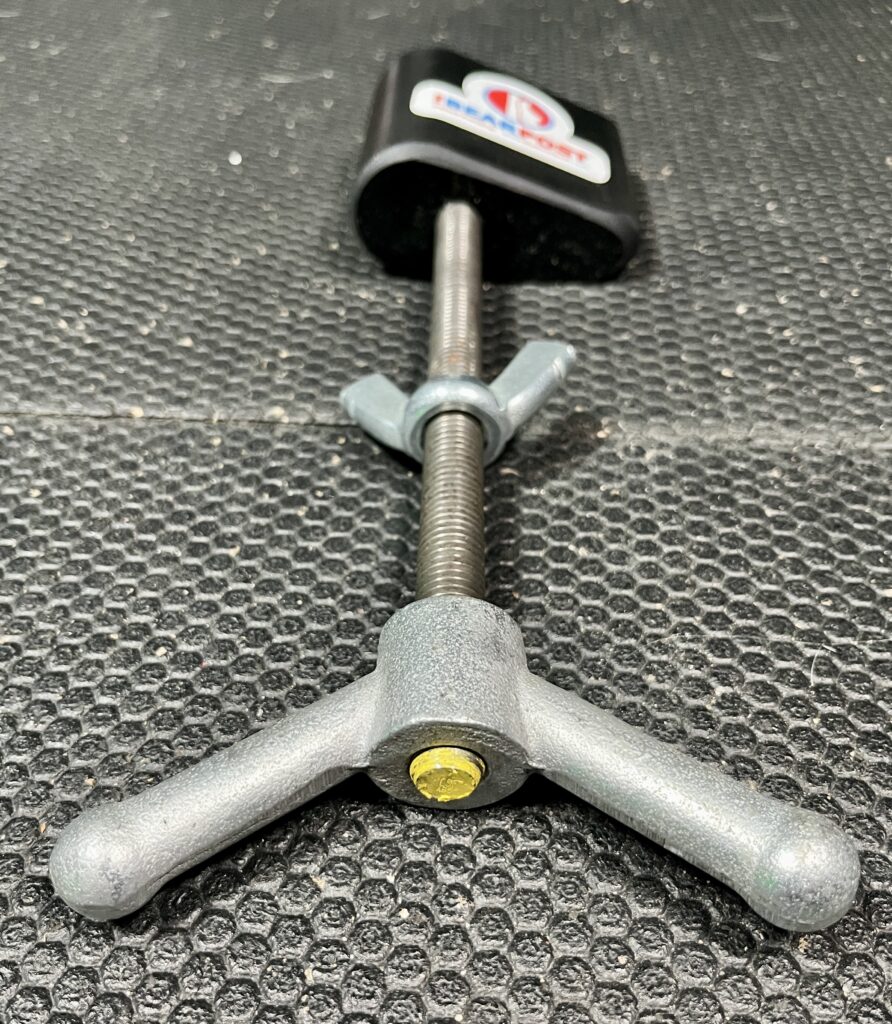
All parts of the Bear Post are solid and don’t move at all when anchored down tightly.
This gives me complete leverage to control how much I want to lean into it and dig into my muscles.
ALSO CHECK OUT: Sauna Box Reviews
The Bear Post On a Weight Rack
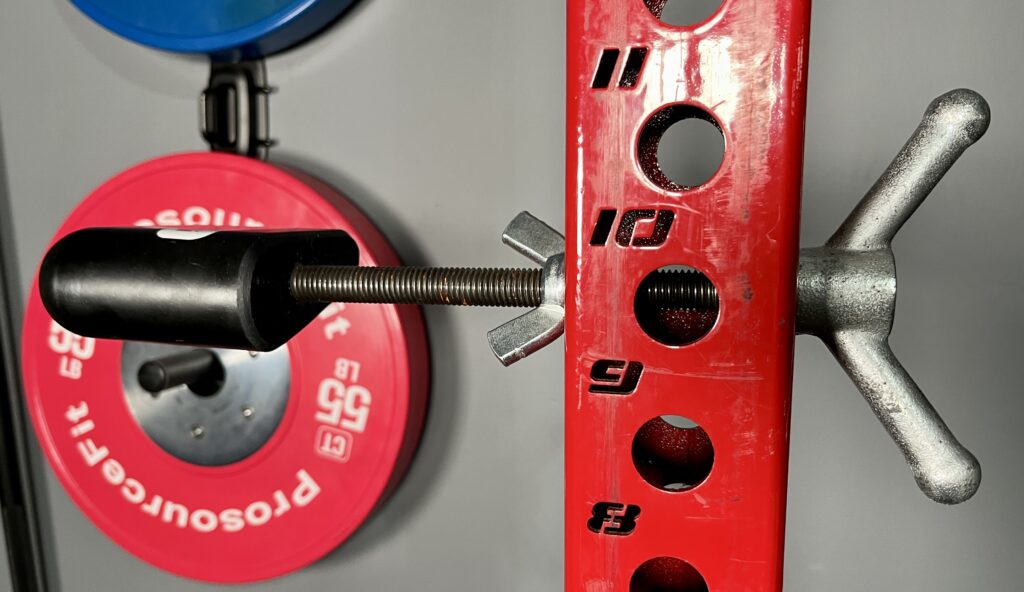
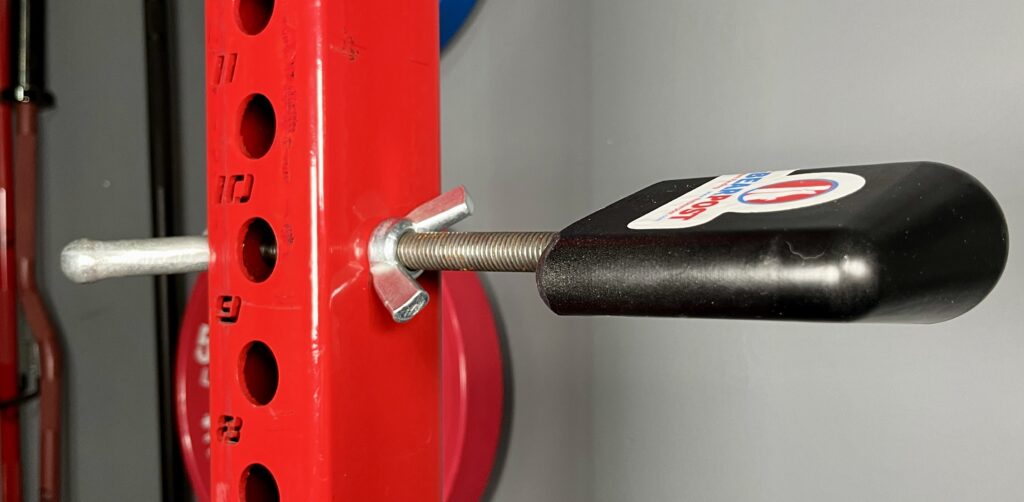
My weight rack has both 5/8″ and 1″ holes, this is the Bear Post rod going through the 5/8″ holes.
I could use the 1″ holes as well, I’d just have to get a couple washers from the hardware store.
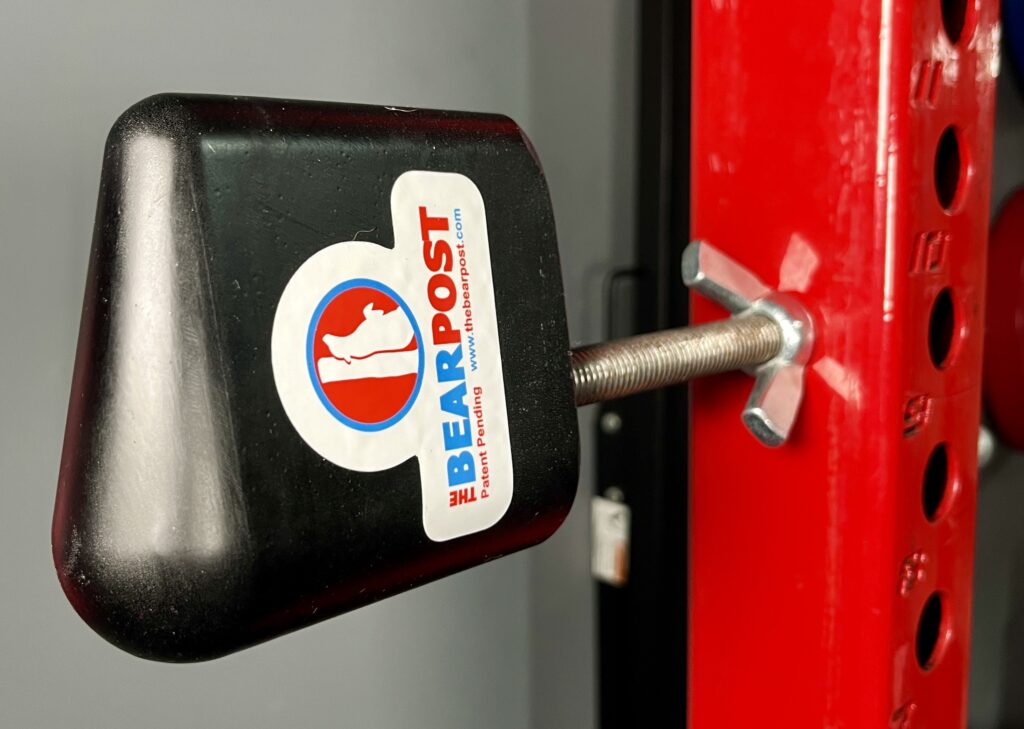
I angle the Bear Post any way I want then screw the small wing nut all the way until it hits the upright.
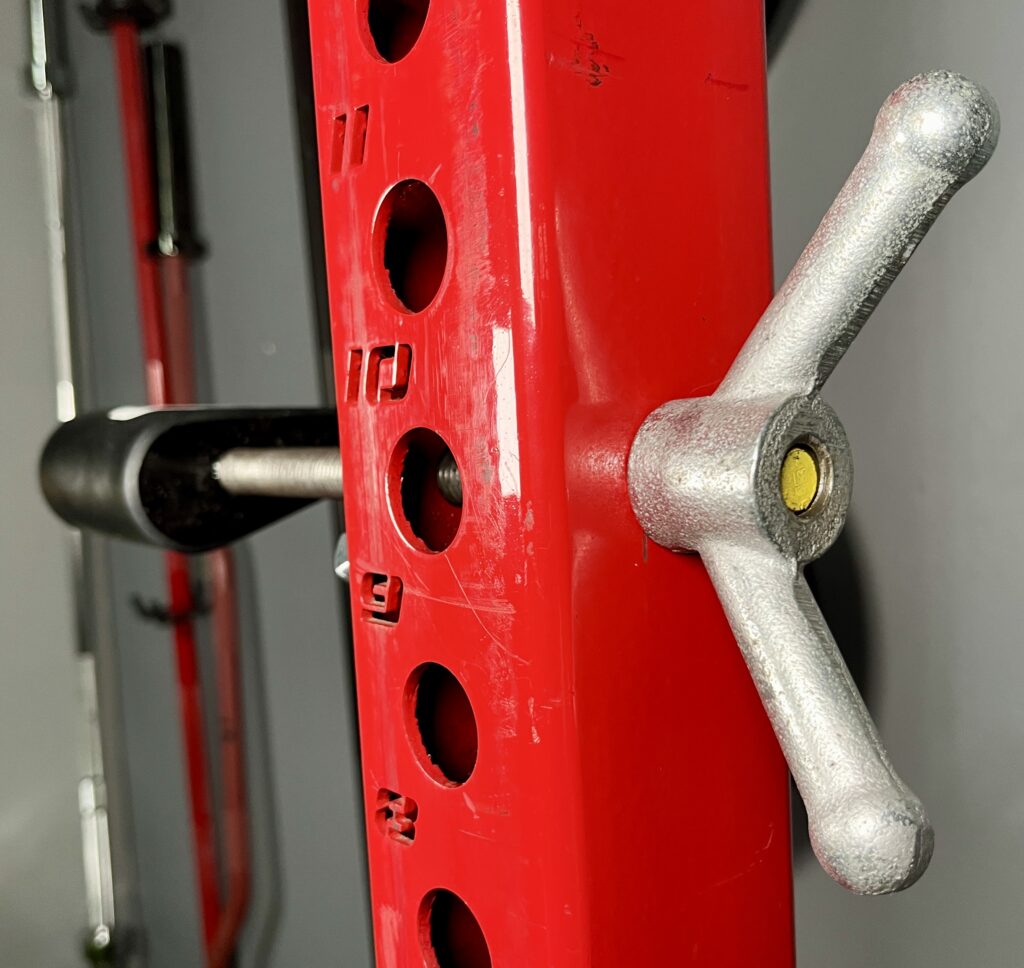
Same with the large wing nut…
Screw it all the way in so that everything is tight and nothing moves around.
Once I’m done working out an area, I unscrew the large wing nut and move it to another hole to work on a different body part.
How Do You Perform Myofascial Release on Yourself?
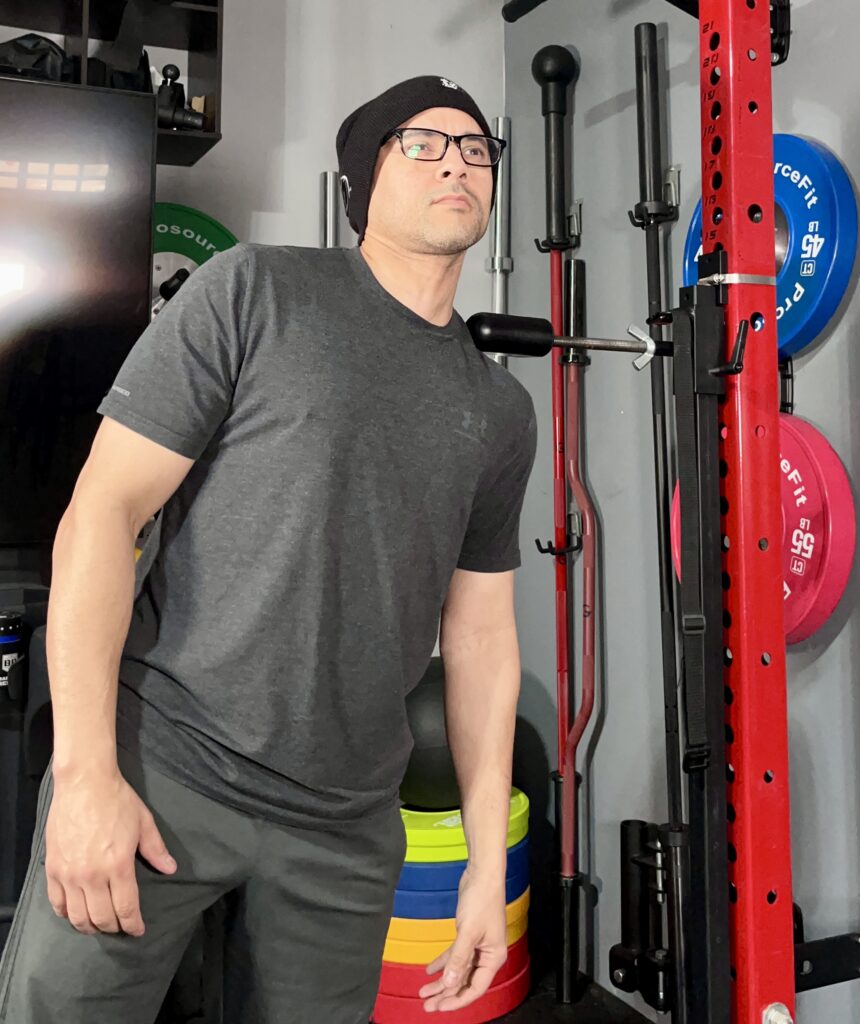
I like to start with the broad end of the Bear Post by applying light pressure to the area of stiffness/soreness.
Moving my body back and forth until I get some blood flowing and my muscles feel less tense.
Then if I need to work on specific areas, I’ll switch to the narrow end.
Self myofascial release feels good but I listen to my body and don’t overdo the amount of pressure I put on my muscles.
The Bear Tree
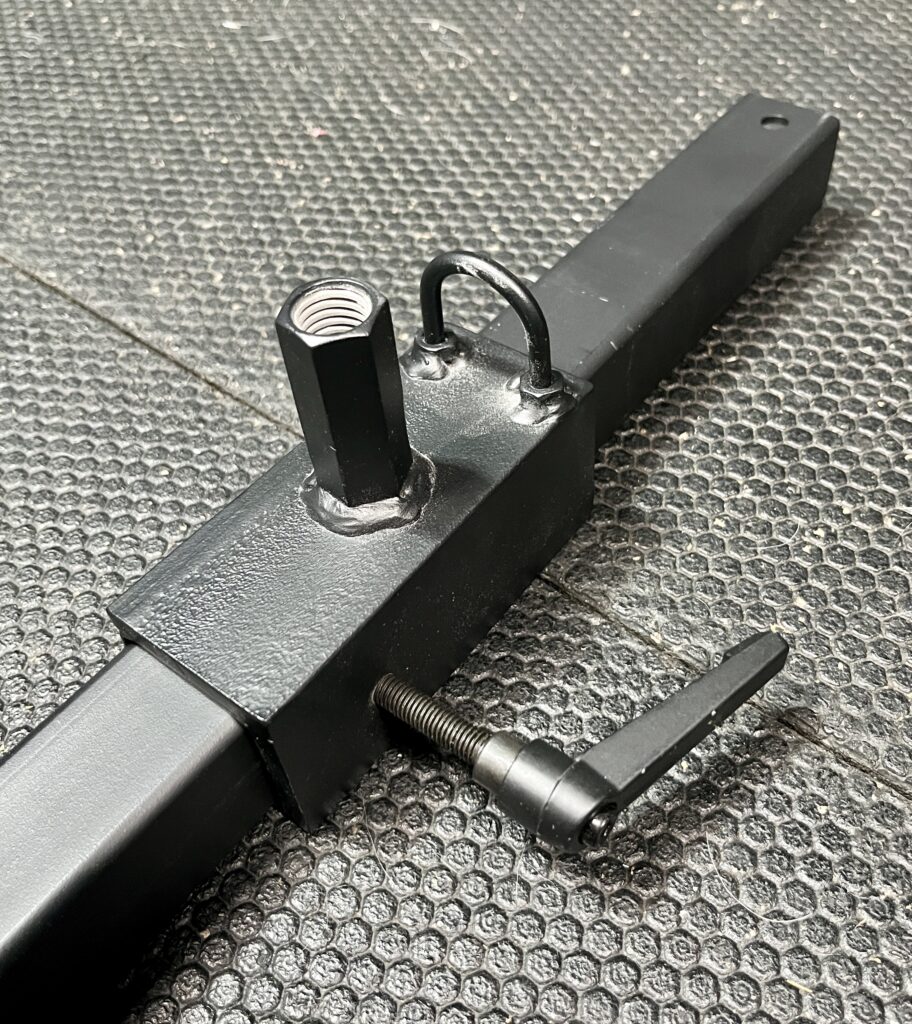
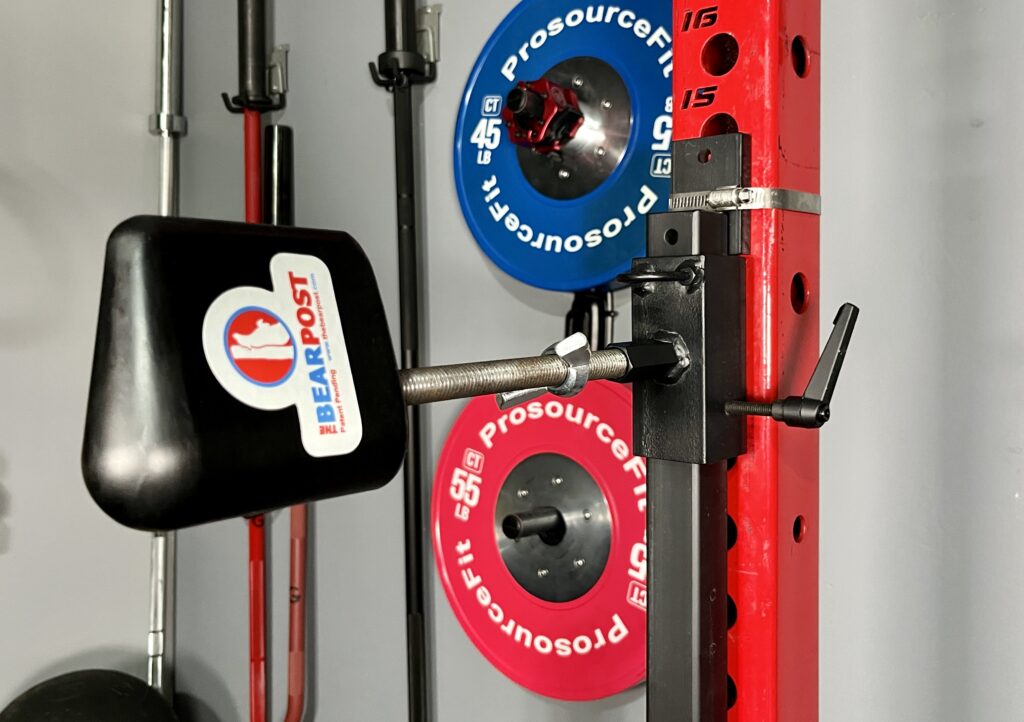
The Bear Tree is an optional wall or rack attachment that makes it faster to move the Bear Post to different heights.
It’s like taking the elevator versus taking the stairs so I pulled the trigger on it.
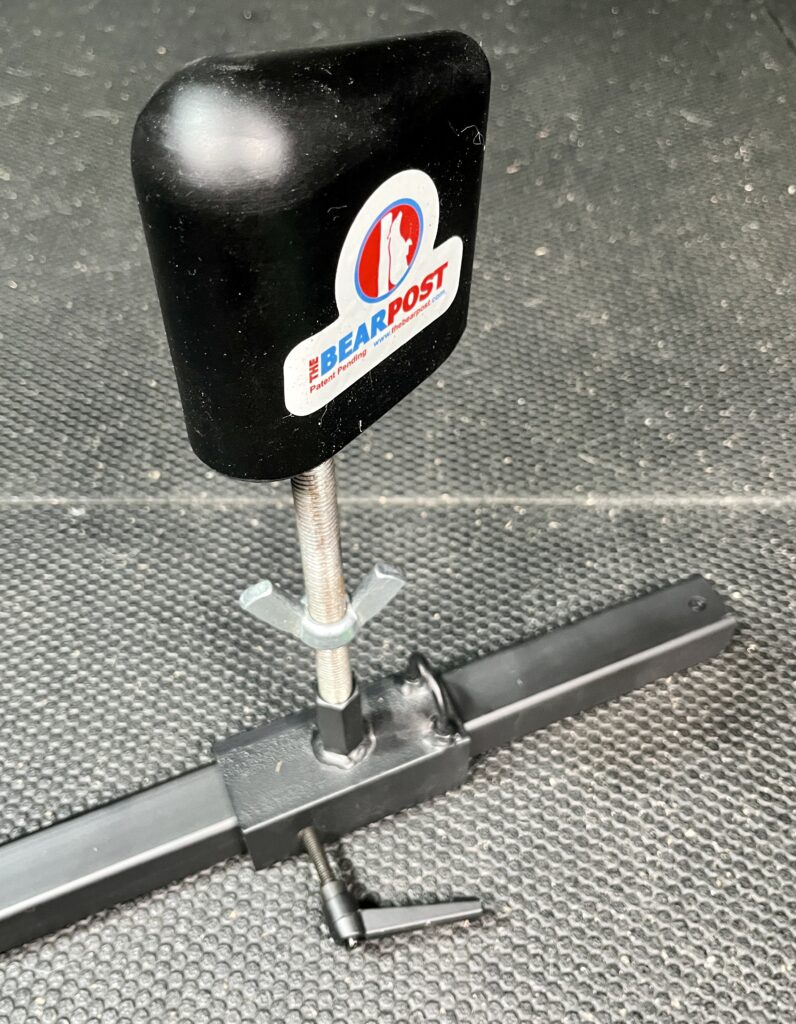
To anchor the Bear Post to the Bear Tree, I thread the metal rod into the female slot on the trolley and turn right until tight.
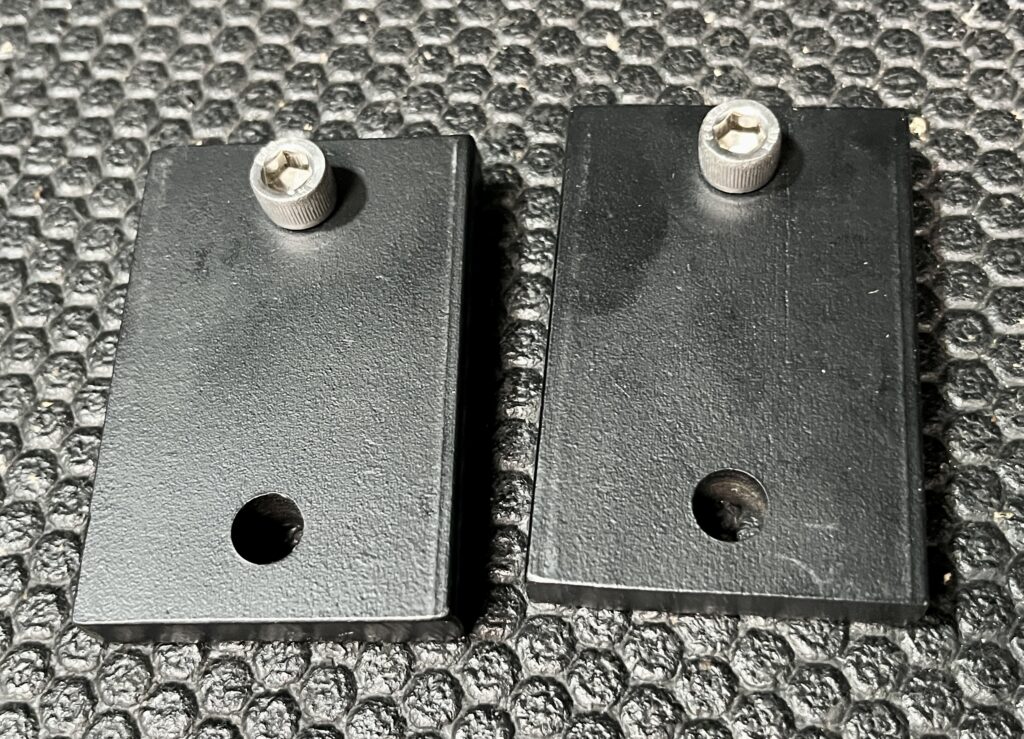
Now I attach these are spacers to the top and bottom of the Bear Tree.
This pushes the Bear Tree out a little bit so I can slide the Bear Post up and down easily.
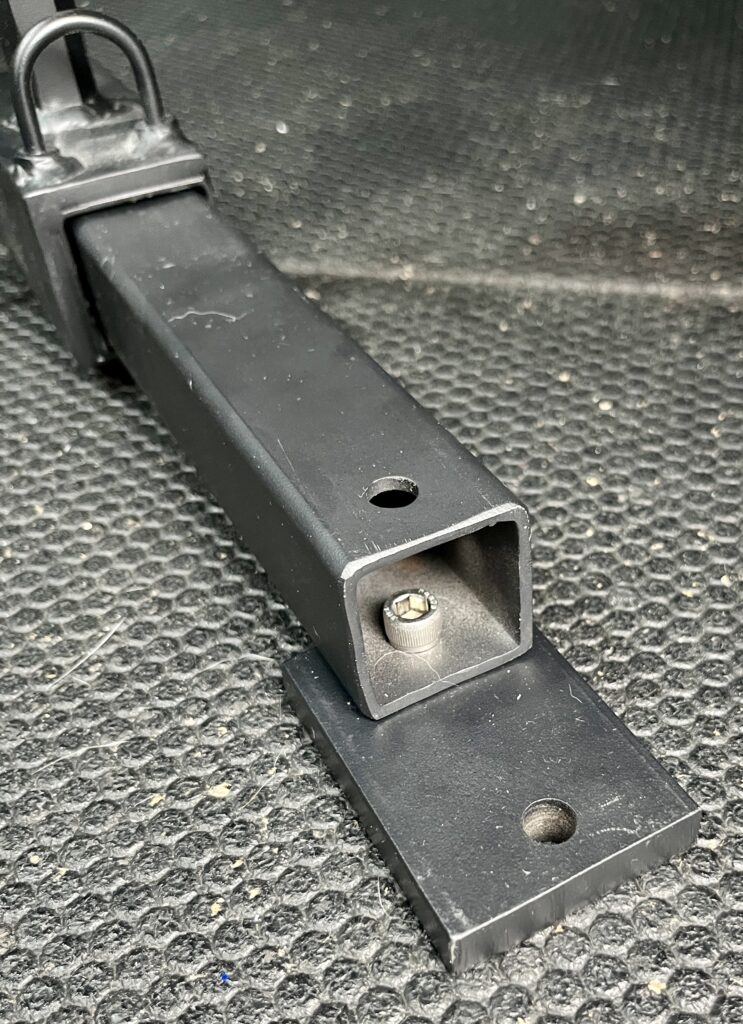
Here’s how I set up the spacers on the Bear Tree.
The bolt goes inside the Bear Tree and I tighten it using an Allen wrench through the hole on top.
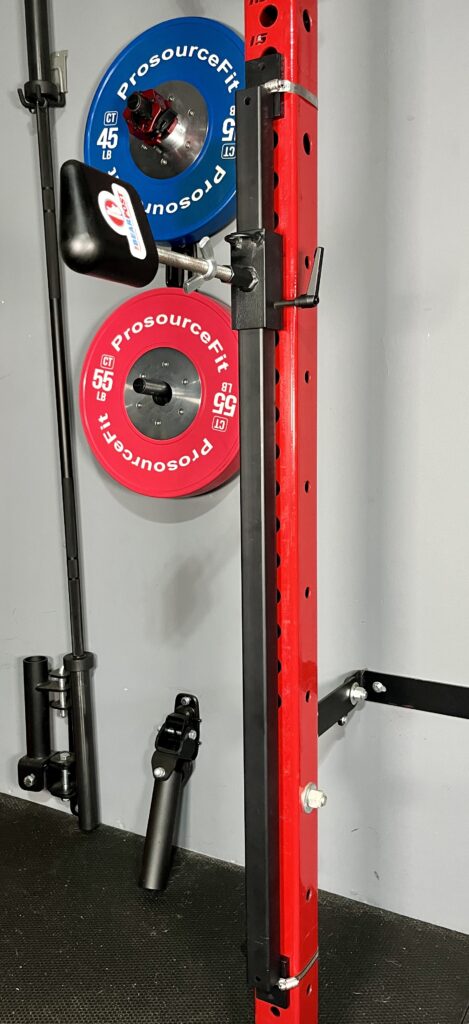
Once I get both spacers on, I just anchor it to my weight rack.
This can also be anchored to wall studs if you don’t own a rack.
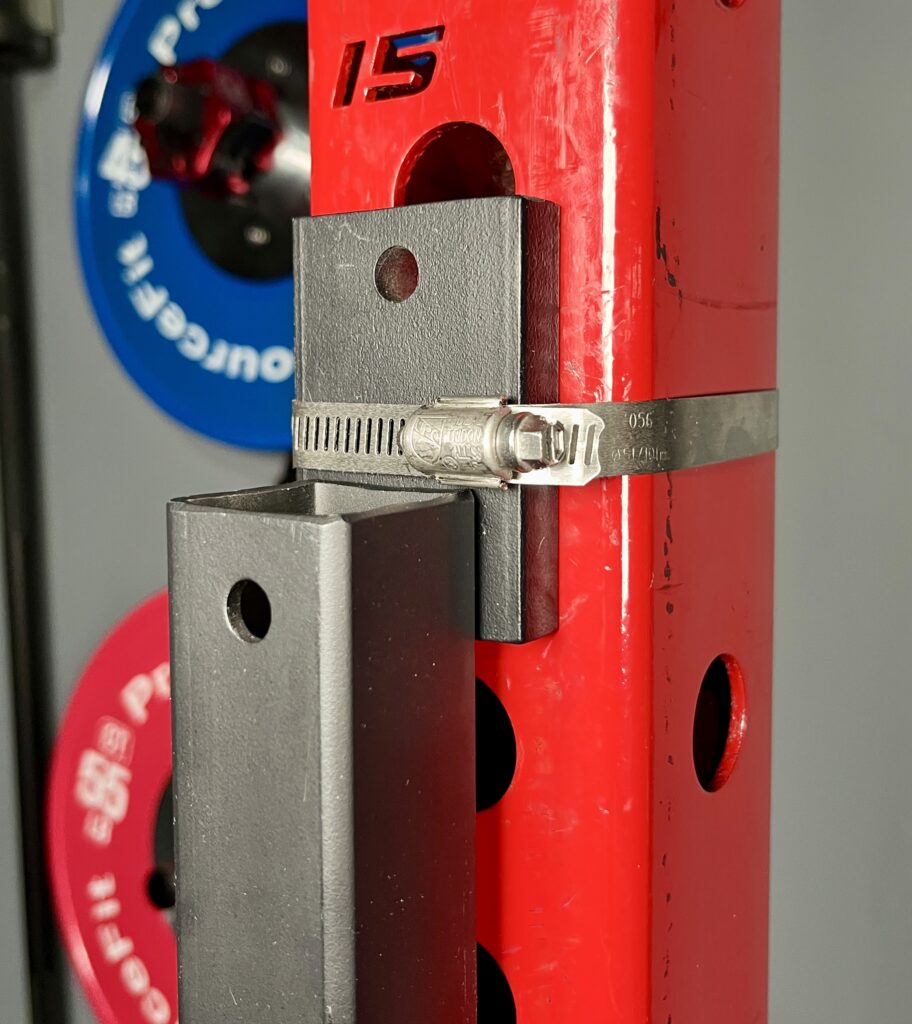
I used hose clamps on the top and bottom of the Bear Tree to secure it to my weight rack and it doesn’t move at all.
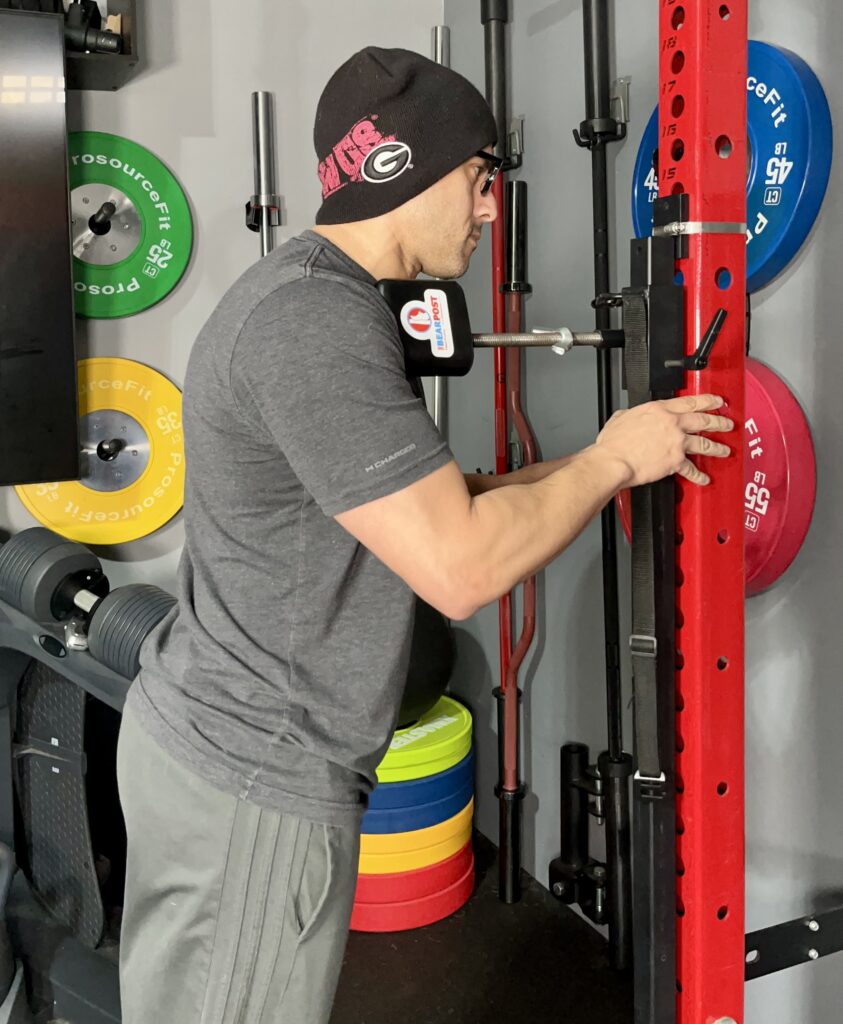
Now that it’s secured, I can start working different body parts like my chest that’s always tight.
I lean into the Bear Post and move my body around to work out areas of tightness and any trigger points.
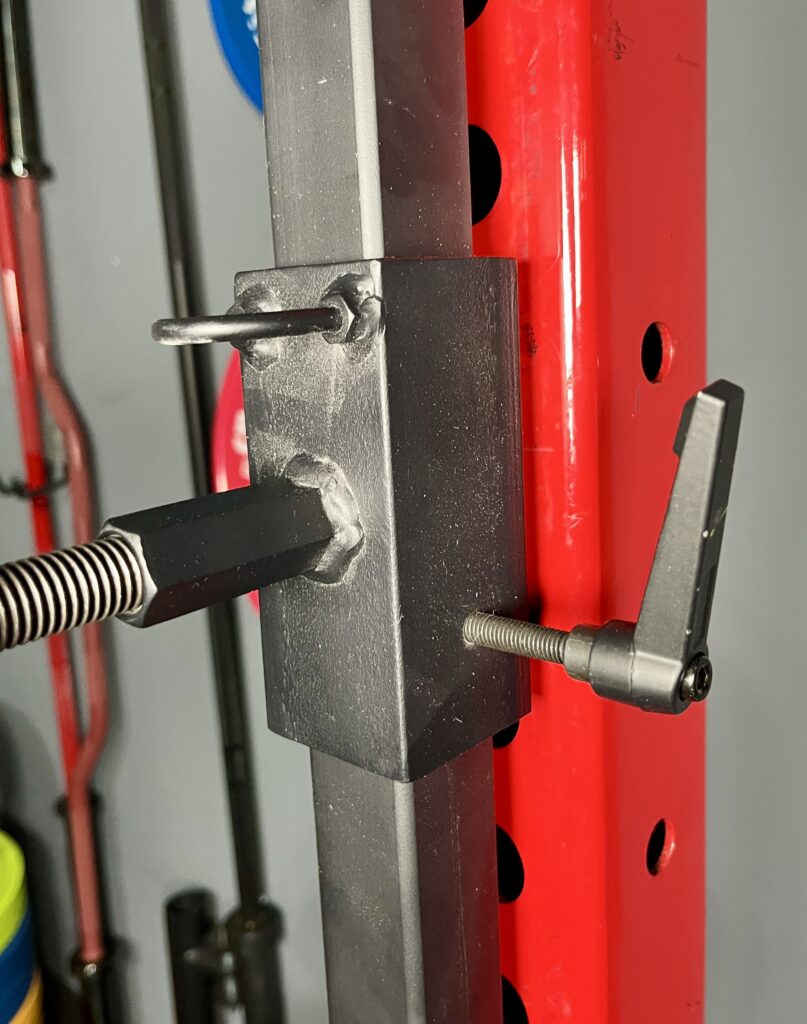
When I wanna move the Bear Post to a different height I loosen the handle and glide the trolley up and down.
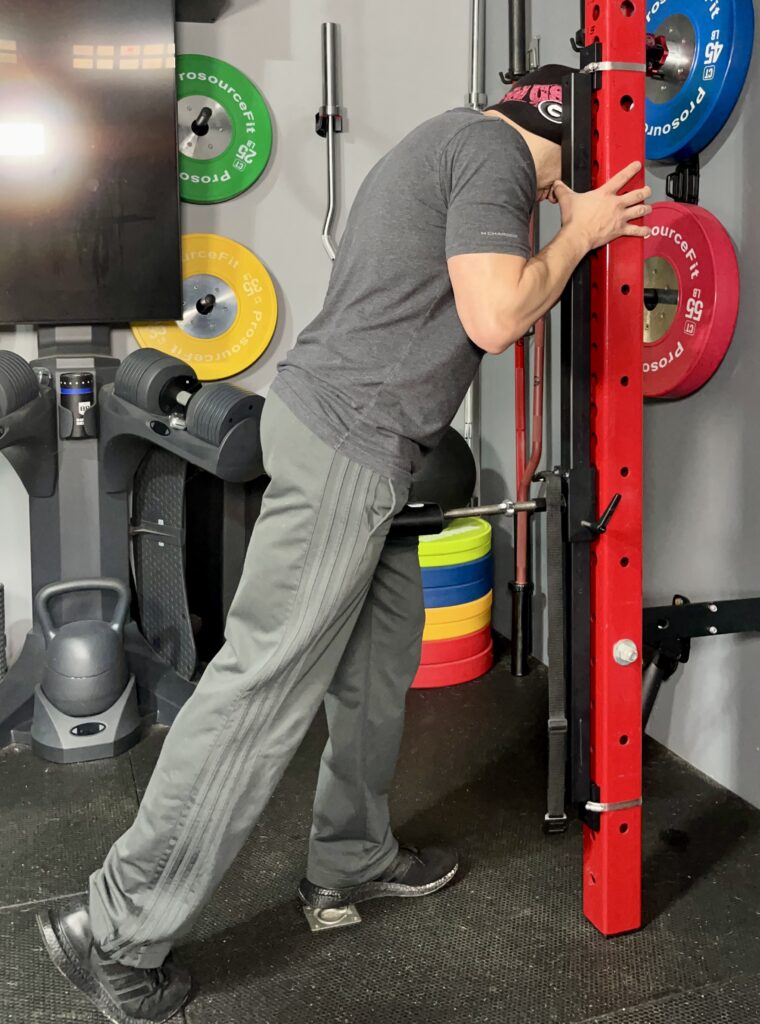
This way I can work my whole body.
Right here I’m working on my tights quads.
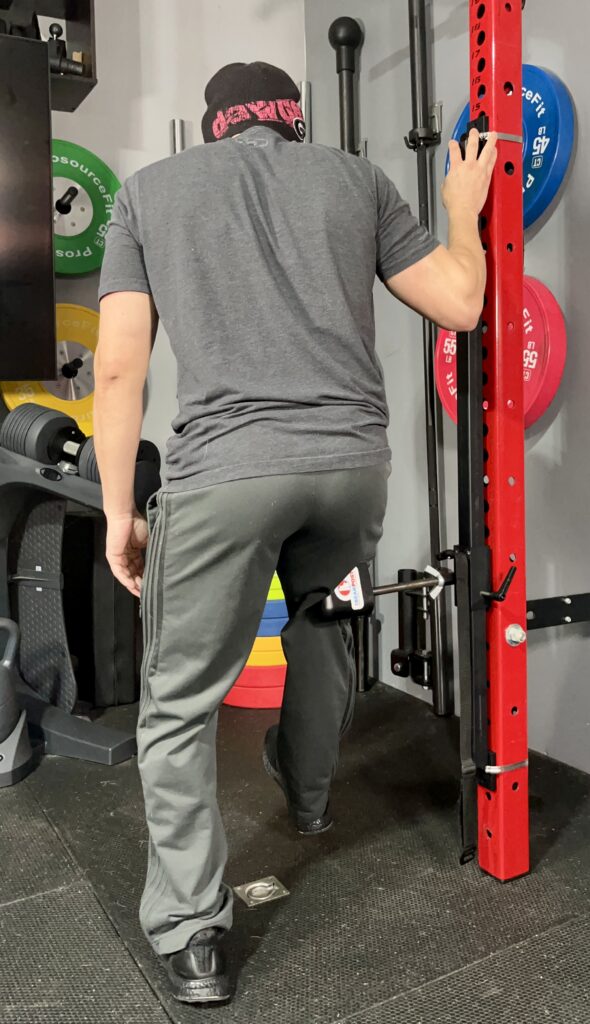
Then I flip around and get my hamstrings.
All I’m doing is sliding my muscles up and down the Bear Post.
I control the speed, pressure, tempo, and just listen to my body.
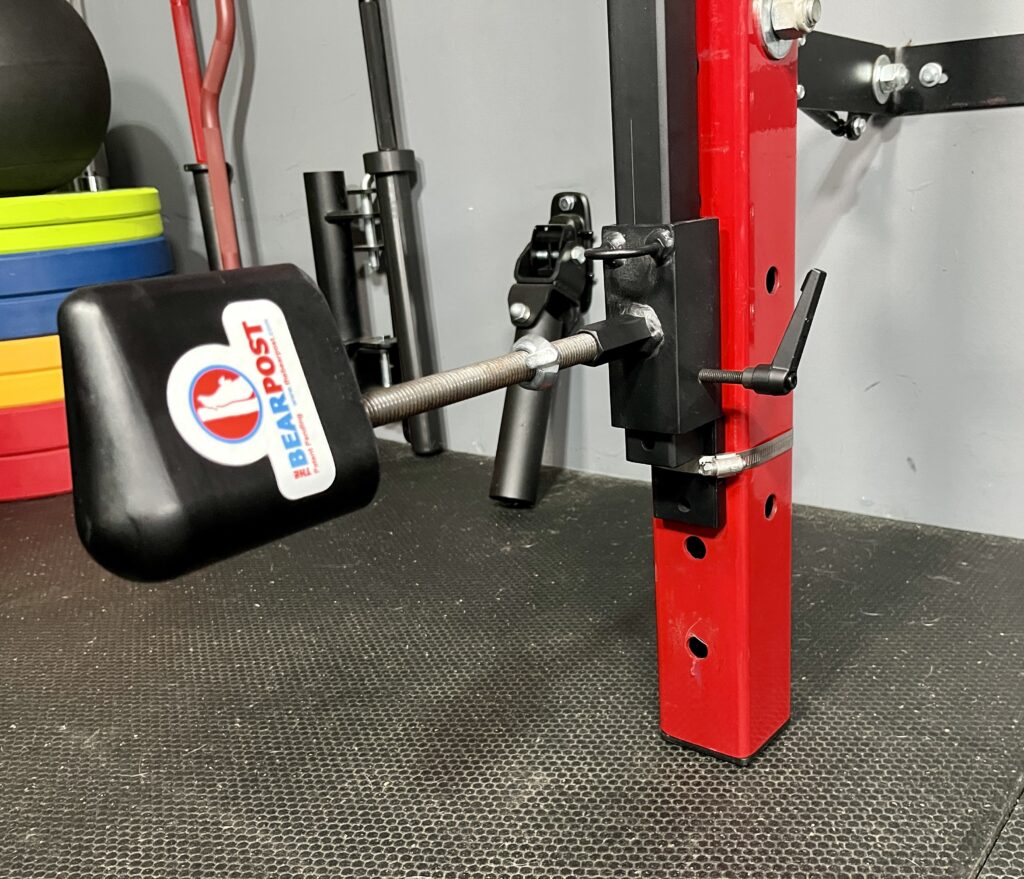
Right here I lowered the Bear Post all the way to the bottom of the Bear Tree.
This is where the Bear Tree comes in handy cause I don’t have to constantly unscrew the wing nuts to move it up and down quickly.
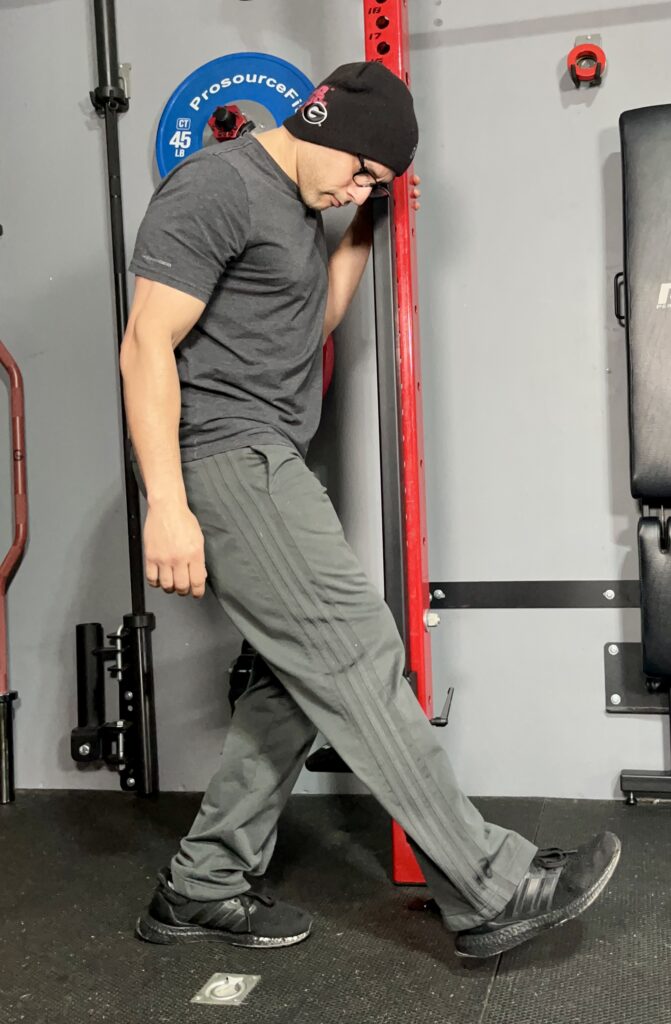
This allows me to work on my calves which are always tight.
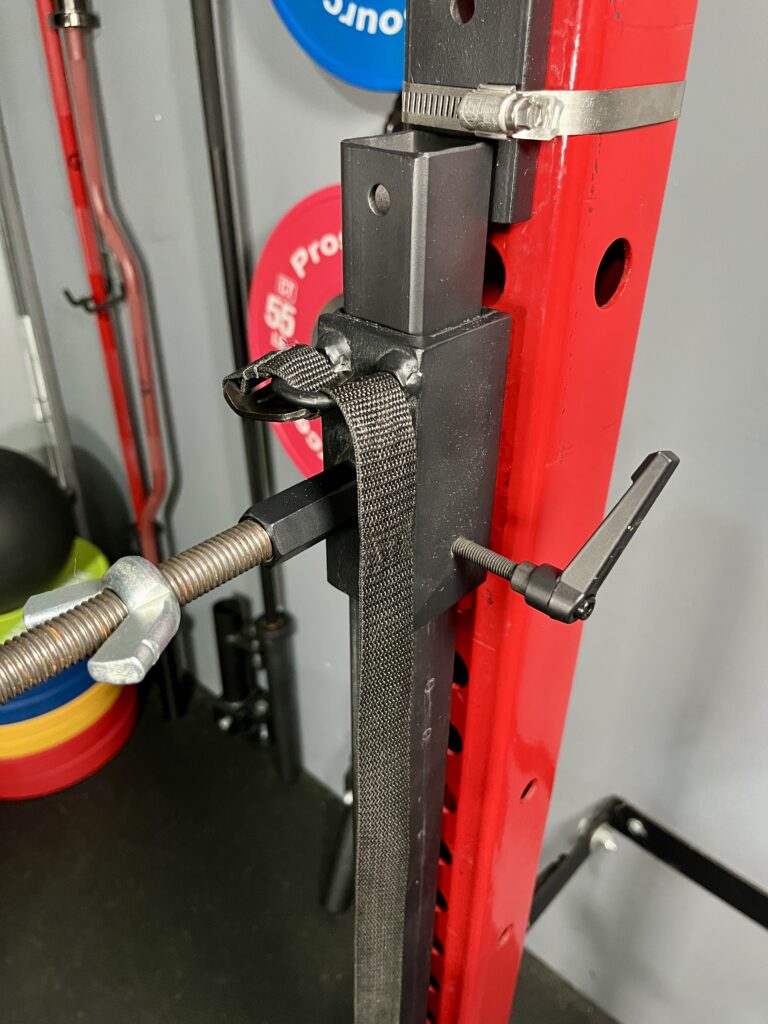
And lastly I’ll show you this strap that came with the Bear Tree.
I attach it to a loop at the top of the trolley and this gives me something to hold on to so I can pull myself when I’m working on my backside.
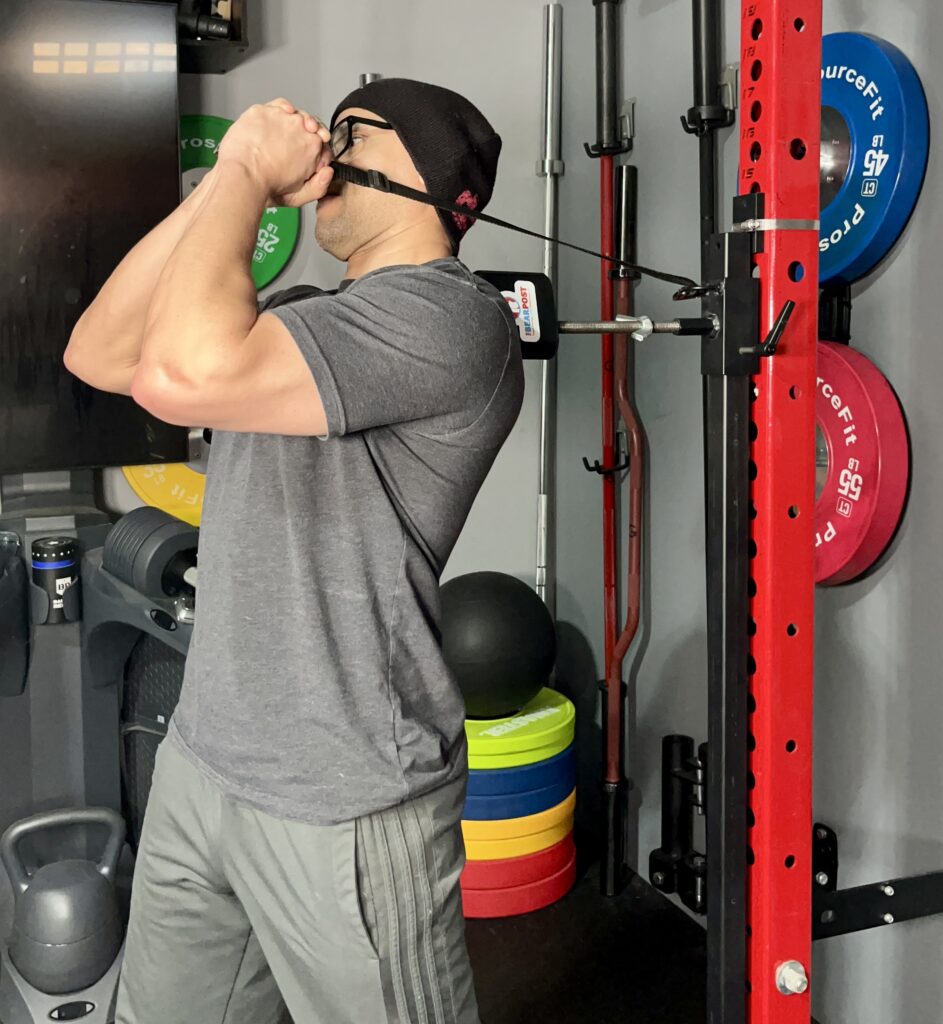
When I want to work on hard to reach areas like my upper traps or mid back, the strap helps me control the intensity.
So that covers everything from my neck to my calves but what about my feet…
That’s where the Bear Paw comes in.
RELATED: Bob and Brad A2 Pro Massage Gun
The Rack Mount
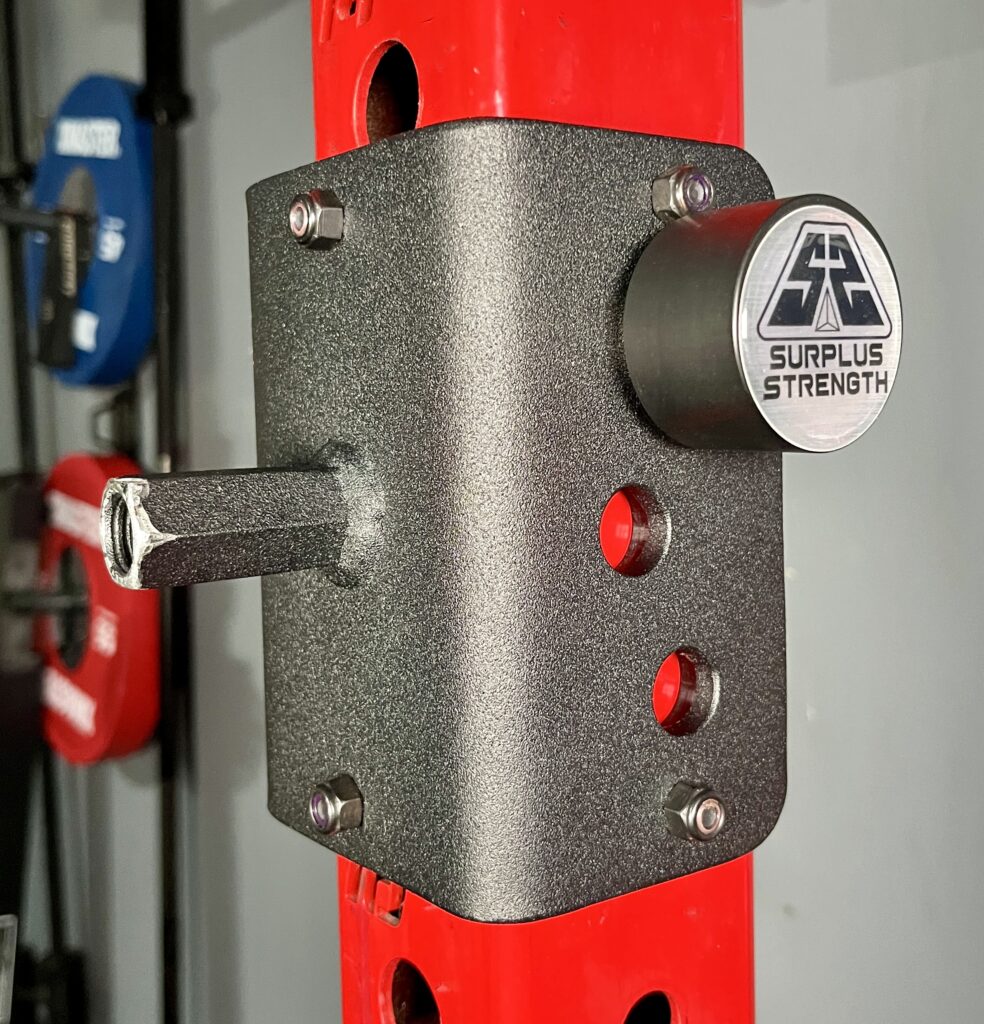
The Bear Post recently sent me a rack mount to test out and I gotta say, it is awesome and way faster to mount than using wing nuts.
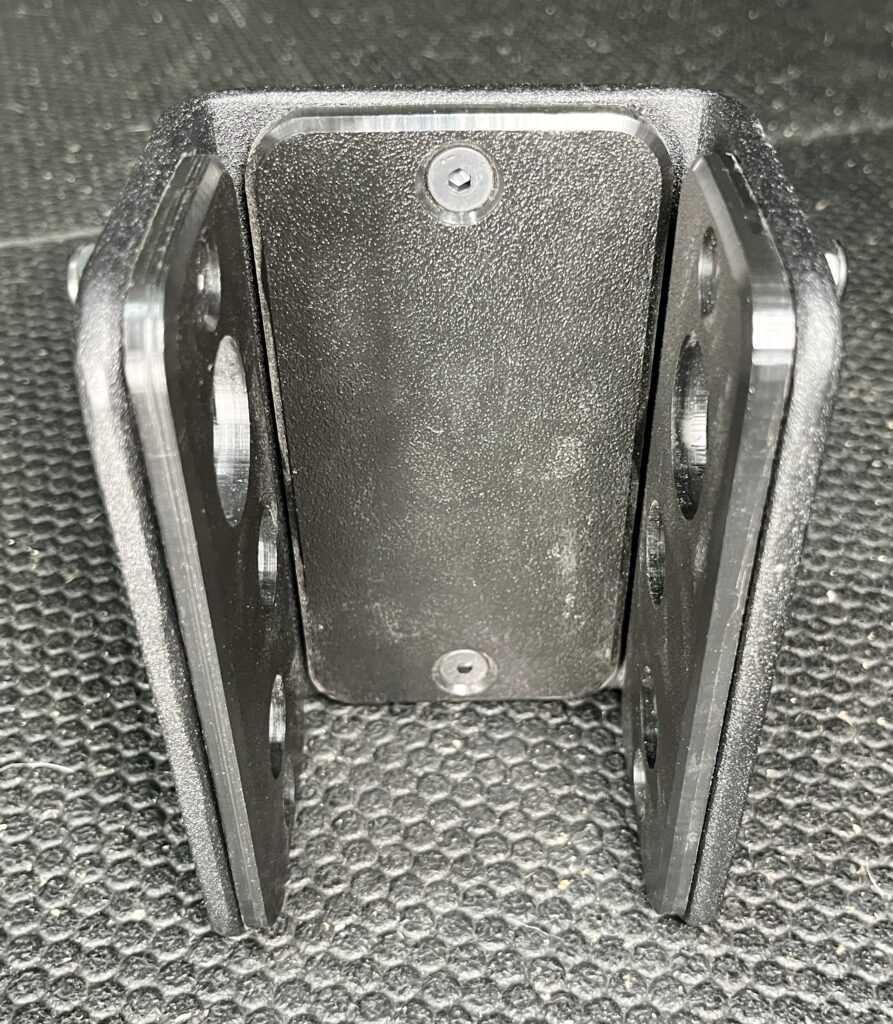
It’s lined with UHMW plastic on the inside so it protects my weight rack and has 5/8″ and 1″ holes.
I stick one of my magpins through it and it doesn’t move at all.
The Bear Paw
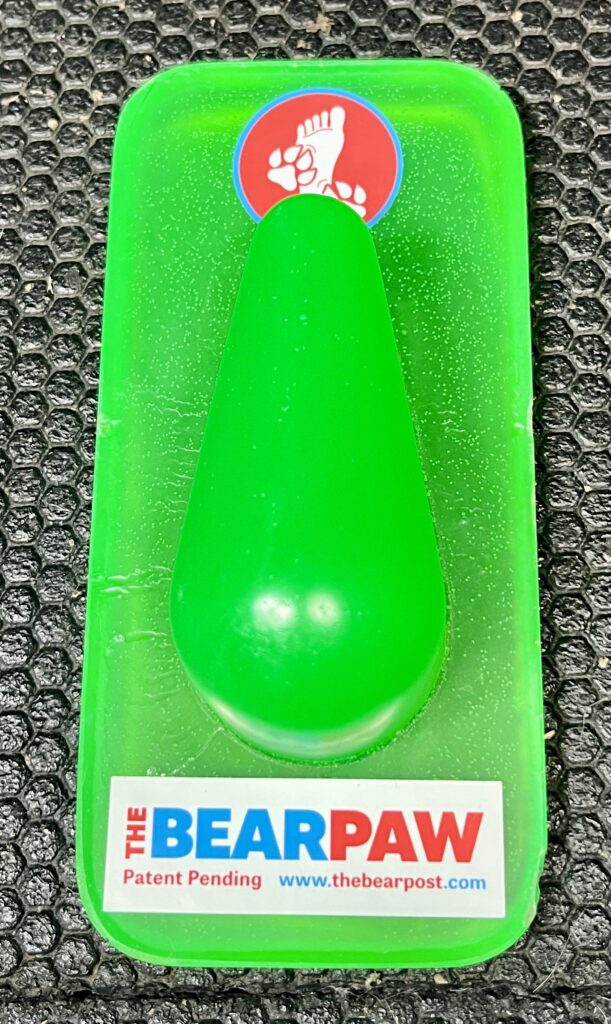
The Bear Paw is like the end of a Bear Post with a base.
I use this to workout stiffness and soreness from the bottom of my feet.
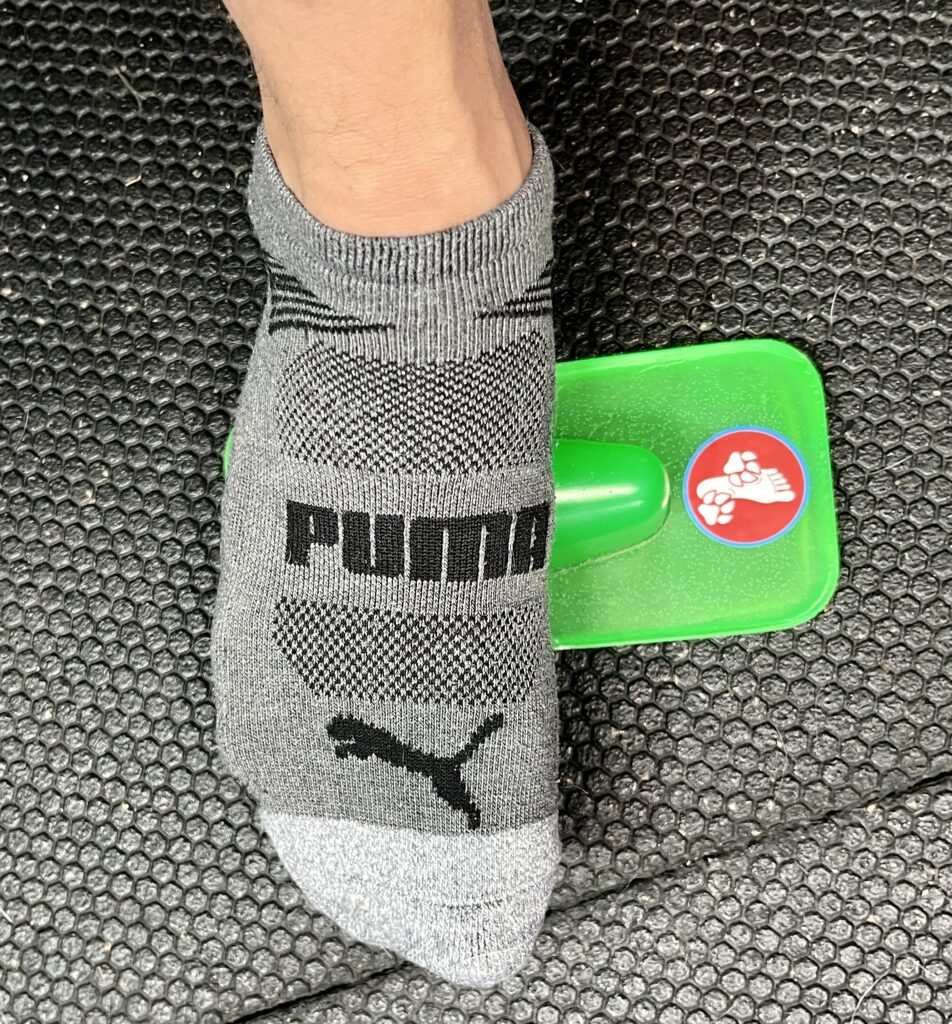
I simply glide my foot back and forth over the Bear Paw with socks on to workout any aches and pains.
When I really wanna dig in, I step on the base with my other foot to keep the Bear Paw from moving.
On The Meander
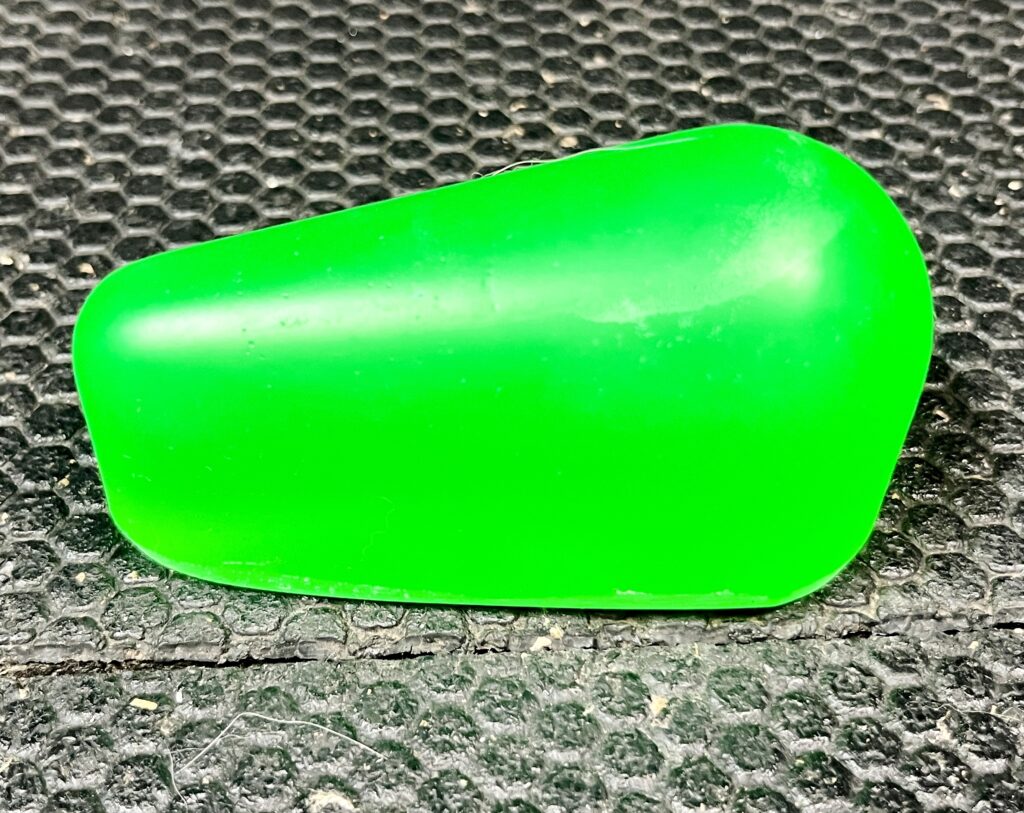
On the Meander is the on the go version of the Bear Post and I use this by hand to dig into areas of soreness and stiffness.
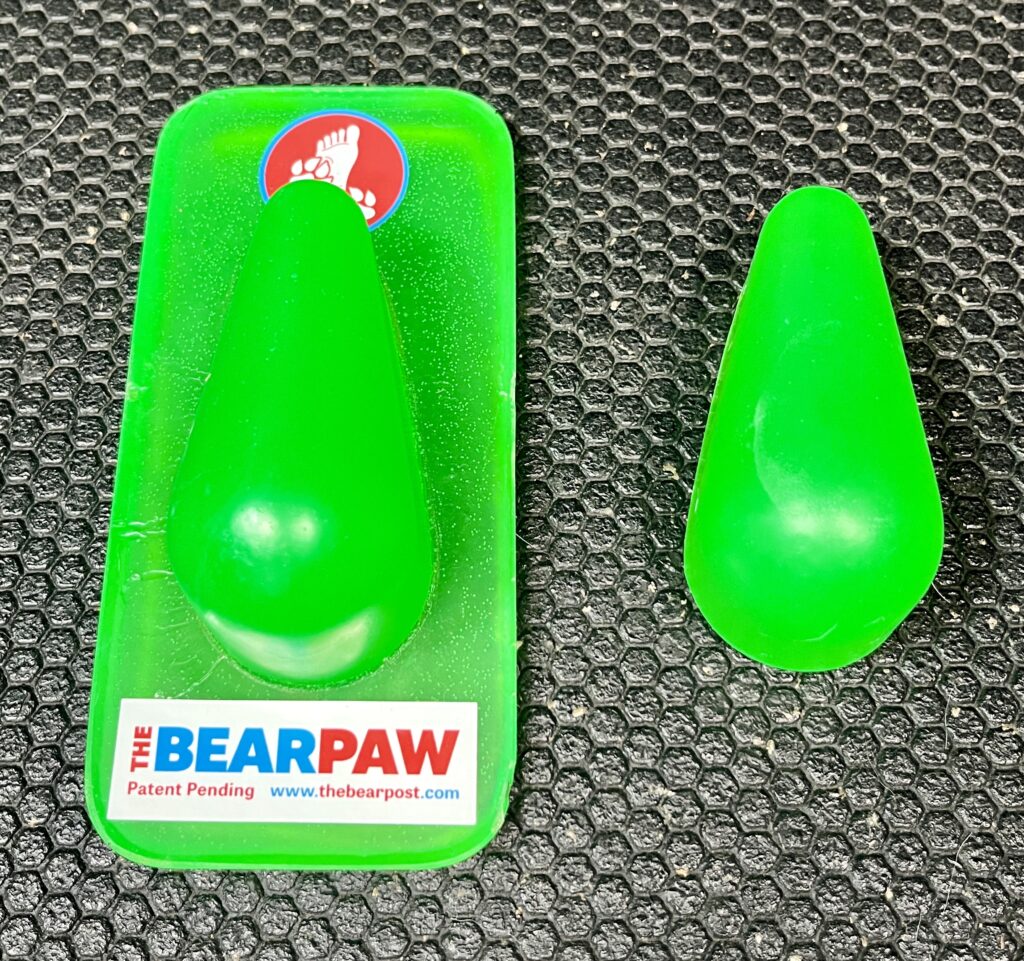
You can see that it’s exactly like the Bear Paw minus the base so it doesn’t take up as much space when traveling.
Does The Bear Post Work?
Yes, it does work and it helps me to reduce muscle soreness and stiffness.
Once I loosen up my muscles, I feel more mobile and it helps me recover faster for my next workout.
The beauty about myofascial release with the Bear Post, is that I control the amount of pressure I can tolerate.
And I can do it consistently without having to shell out cash every single time I treat myself.
Pros & Cons
Pros
- Build: Made out of solid hard plastic and metal parts so it can take on constant pushing
- One time investment: Unlike massage therapy sessions, I only pay for this once and use it for life
- Adaptable: Can be mounted several ways on different surfaces
- Stable: Once mounted, it doesn’t move so I can concentrate on massaging my muscles without any wobble
- Multi-sized: Small end for specific muscle work and large end for broader areas
Cons
- Rod: The rod can get rusty in a humid environment like a garage gym, so it’d be better if it was galvanized
Is The Bear Post Worth It?
Personally, I’m someone who doesn’t stretch out a lot so I’m always stiff and sometimes get knots in my muscles.
If you’re like me and workout a lot, the Bear Post can help you reduce stiffness and improve mobility so you can recover for your next workout.
It’s a one time investment that I use on my own time without having to spend recurring fees on a massage therapist.
DON’T MISS: Read my Moves Method reviews for mobility training you can do from home
The Bear Post Discount Code

The Bear Post retails for $149.99 but I got you covered…
I’ve negotiated a deal to get my readers an exclusive 10% discount so you don’t pay full price.
Click here and use coupon code SHREDDED at checkout for a discount.
The Bear Post Review
I like that the Bear Post gives me a “hands off” approach to self myofascial release.
Once I set it on my rack, I can work all areas of my body by moving it to different heights.
Then lean into it and move around to release tension and stiffness from my muscles so I’m able to move better and recover faster.
Click Here To Check Out The Bear Post

Shredded Dad is a home gym equipment reviewer and fitness equipment expert specializing in hands-on testing of strength and conditioning equipment.
His work has been featured by leading fitness brands and quoted by major media outlets including Yahoo Health, GQ, AskMen, LifeWire, Wales Online, and others.
ShreddedDad.com


