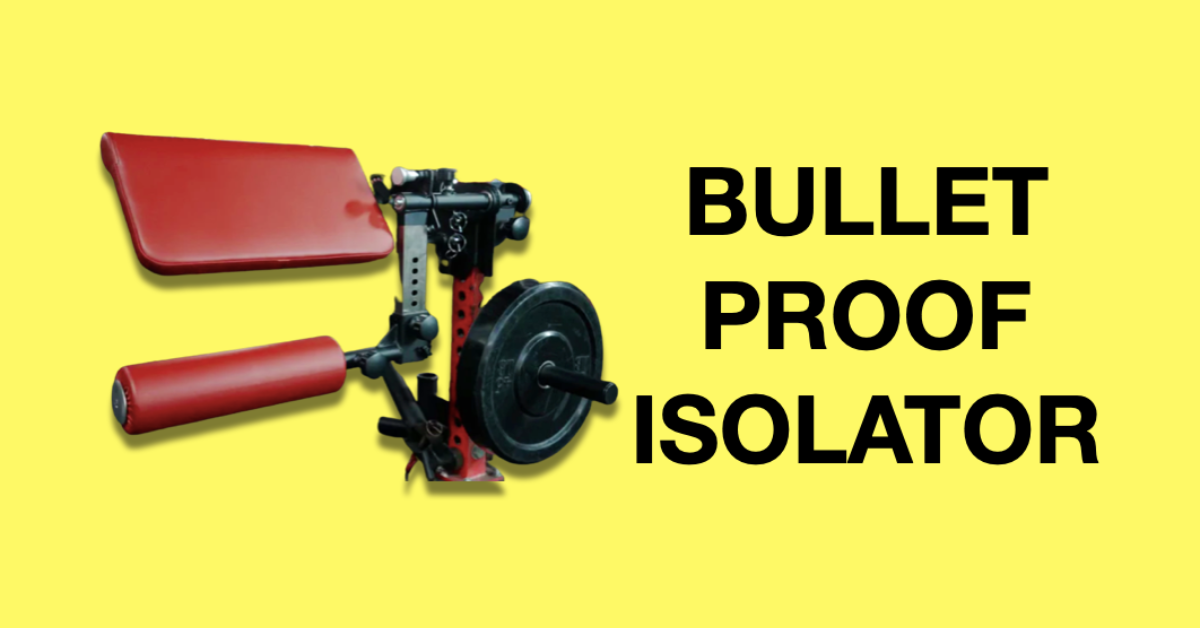
The Bulletproof Isolator may be the new kid on the block but damn is this thing bad ass.
If this isn’t the king of power rack attachments I don’t know what is.
I’ve done many isolation exercises with this rack attachment and stumble upon new ones often.
It replaces a ton of machines and with lots of versatility, the Bulletproof Fitness Isolator is definitely a game changer in the home gym space.
Let’s check it out!
Unboxing
Table of Contents
- 1 Unboxing
- 2 Specs
- 3 Setting Up The Bulletproof Isolator On A Power Rack
- 4 Bulletproof Isolator Exercises
- 5 Isolator vs Other Rack Attachments
- 6 Bulletproof Tri Post Rack
- 7 Bulletproof Solo Stand Deluxe
- 8 Pros & Cons
- 9 Where To Buy The Bulletproof Isolator
- 10 Bulletproof Fitness Isolator Review
- 11 Bulletproof Fitness Isolator
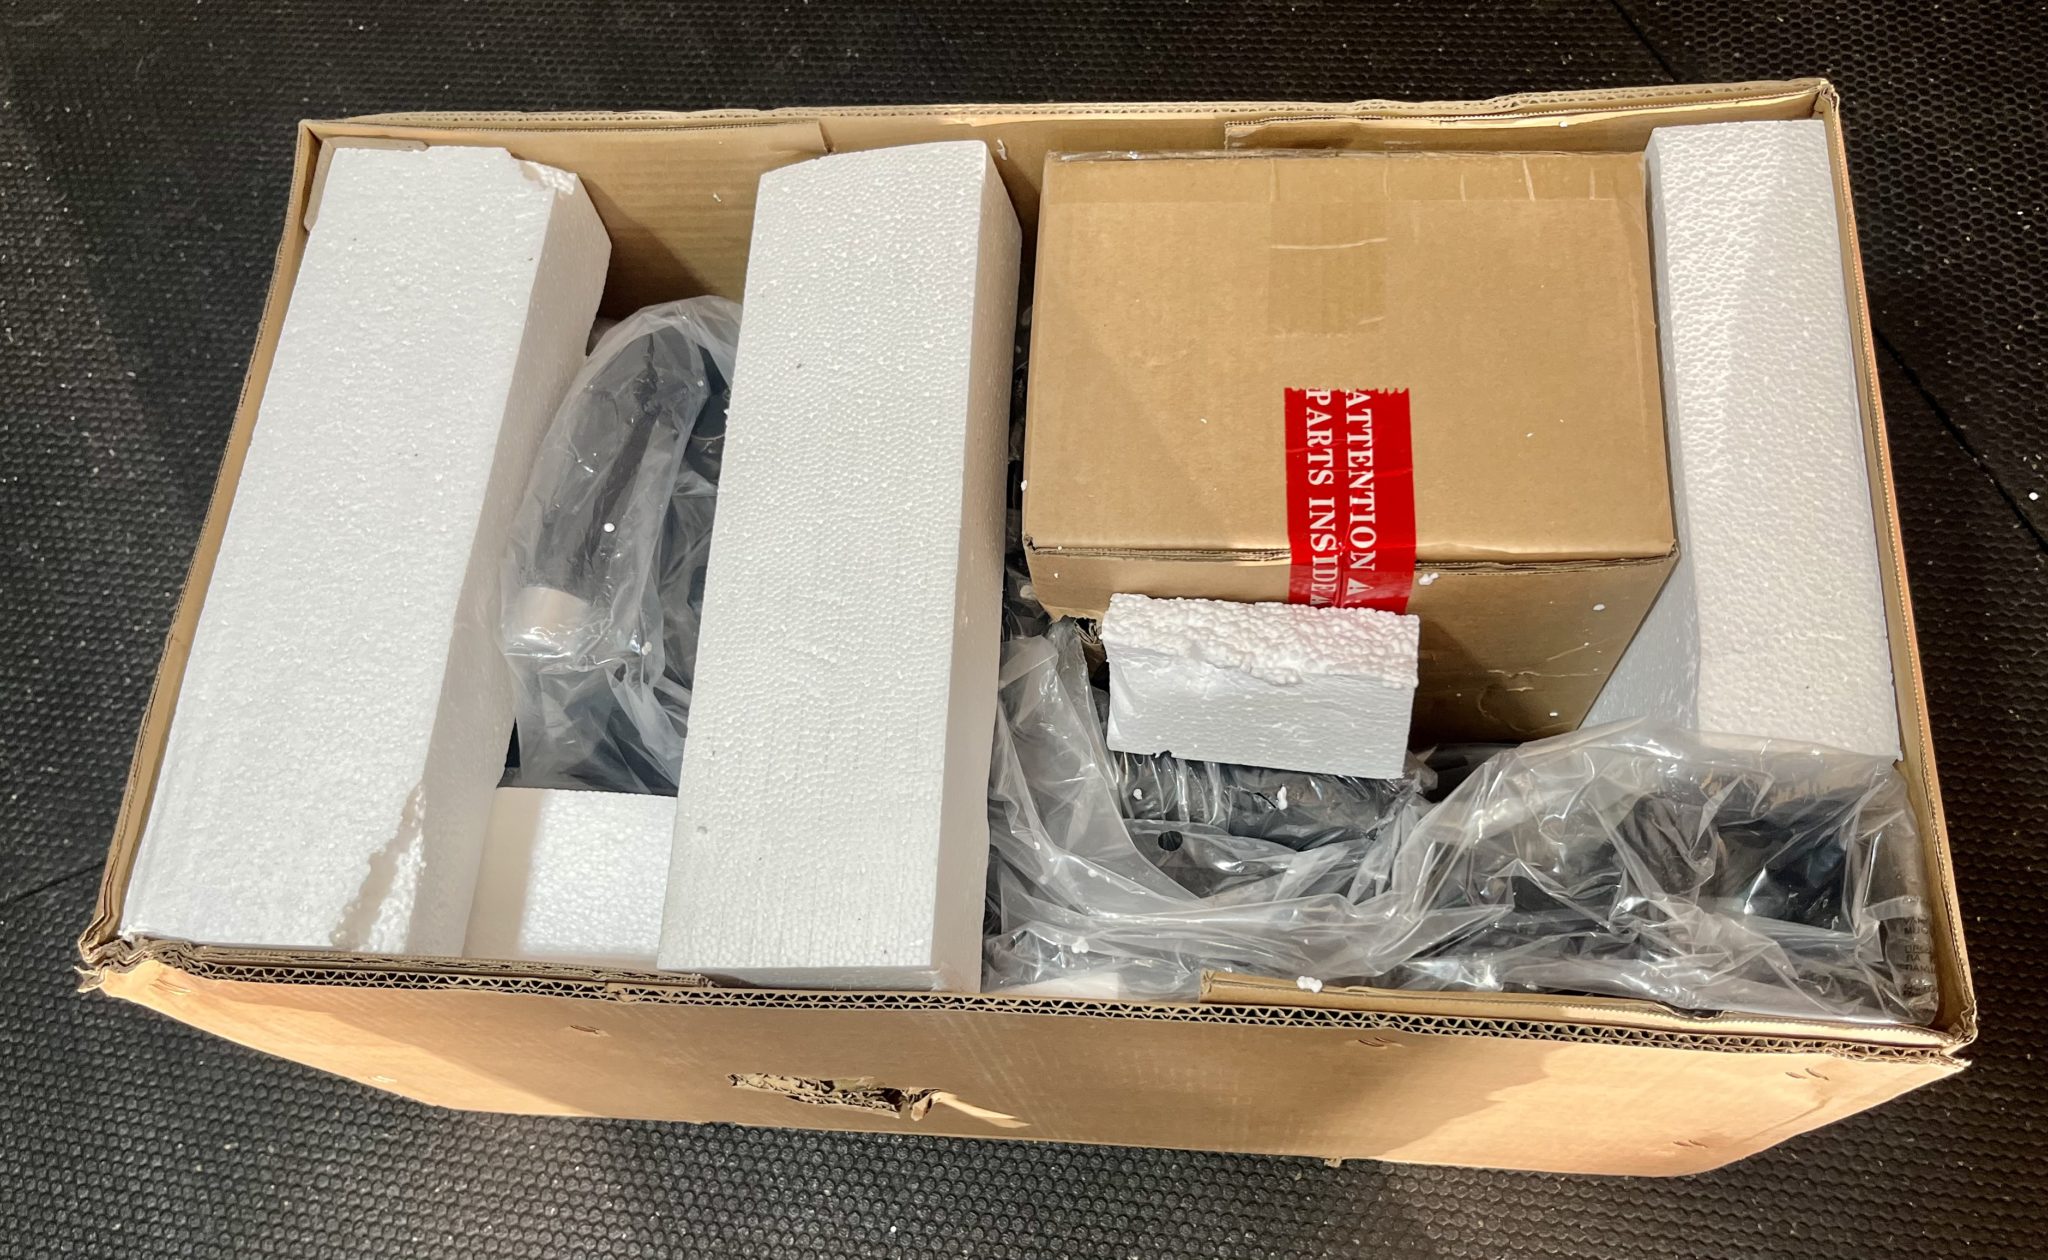
The Isolator came in two separate boxes.
I’ll show what comes in each box then break down the contents in detail.
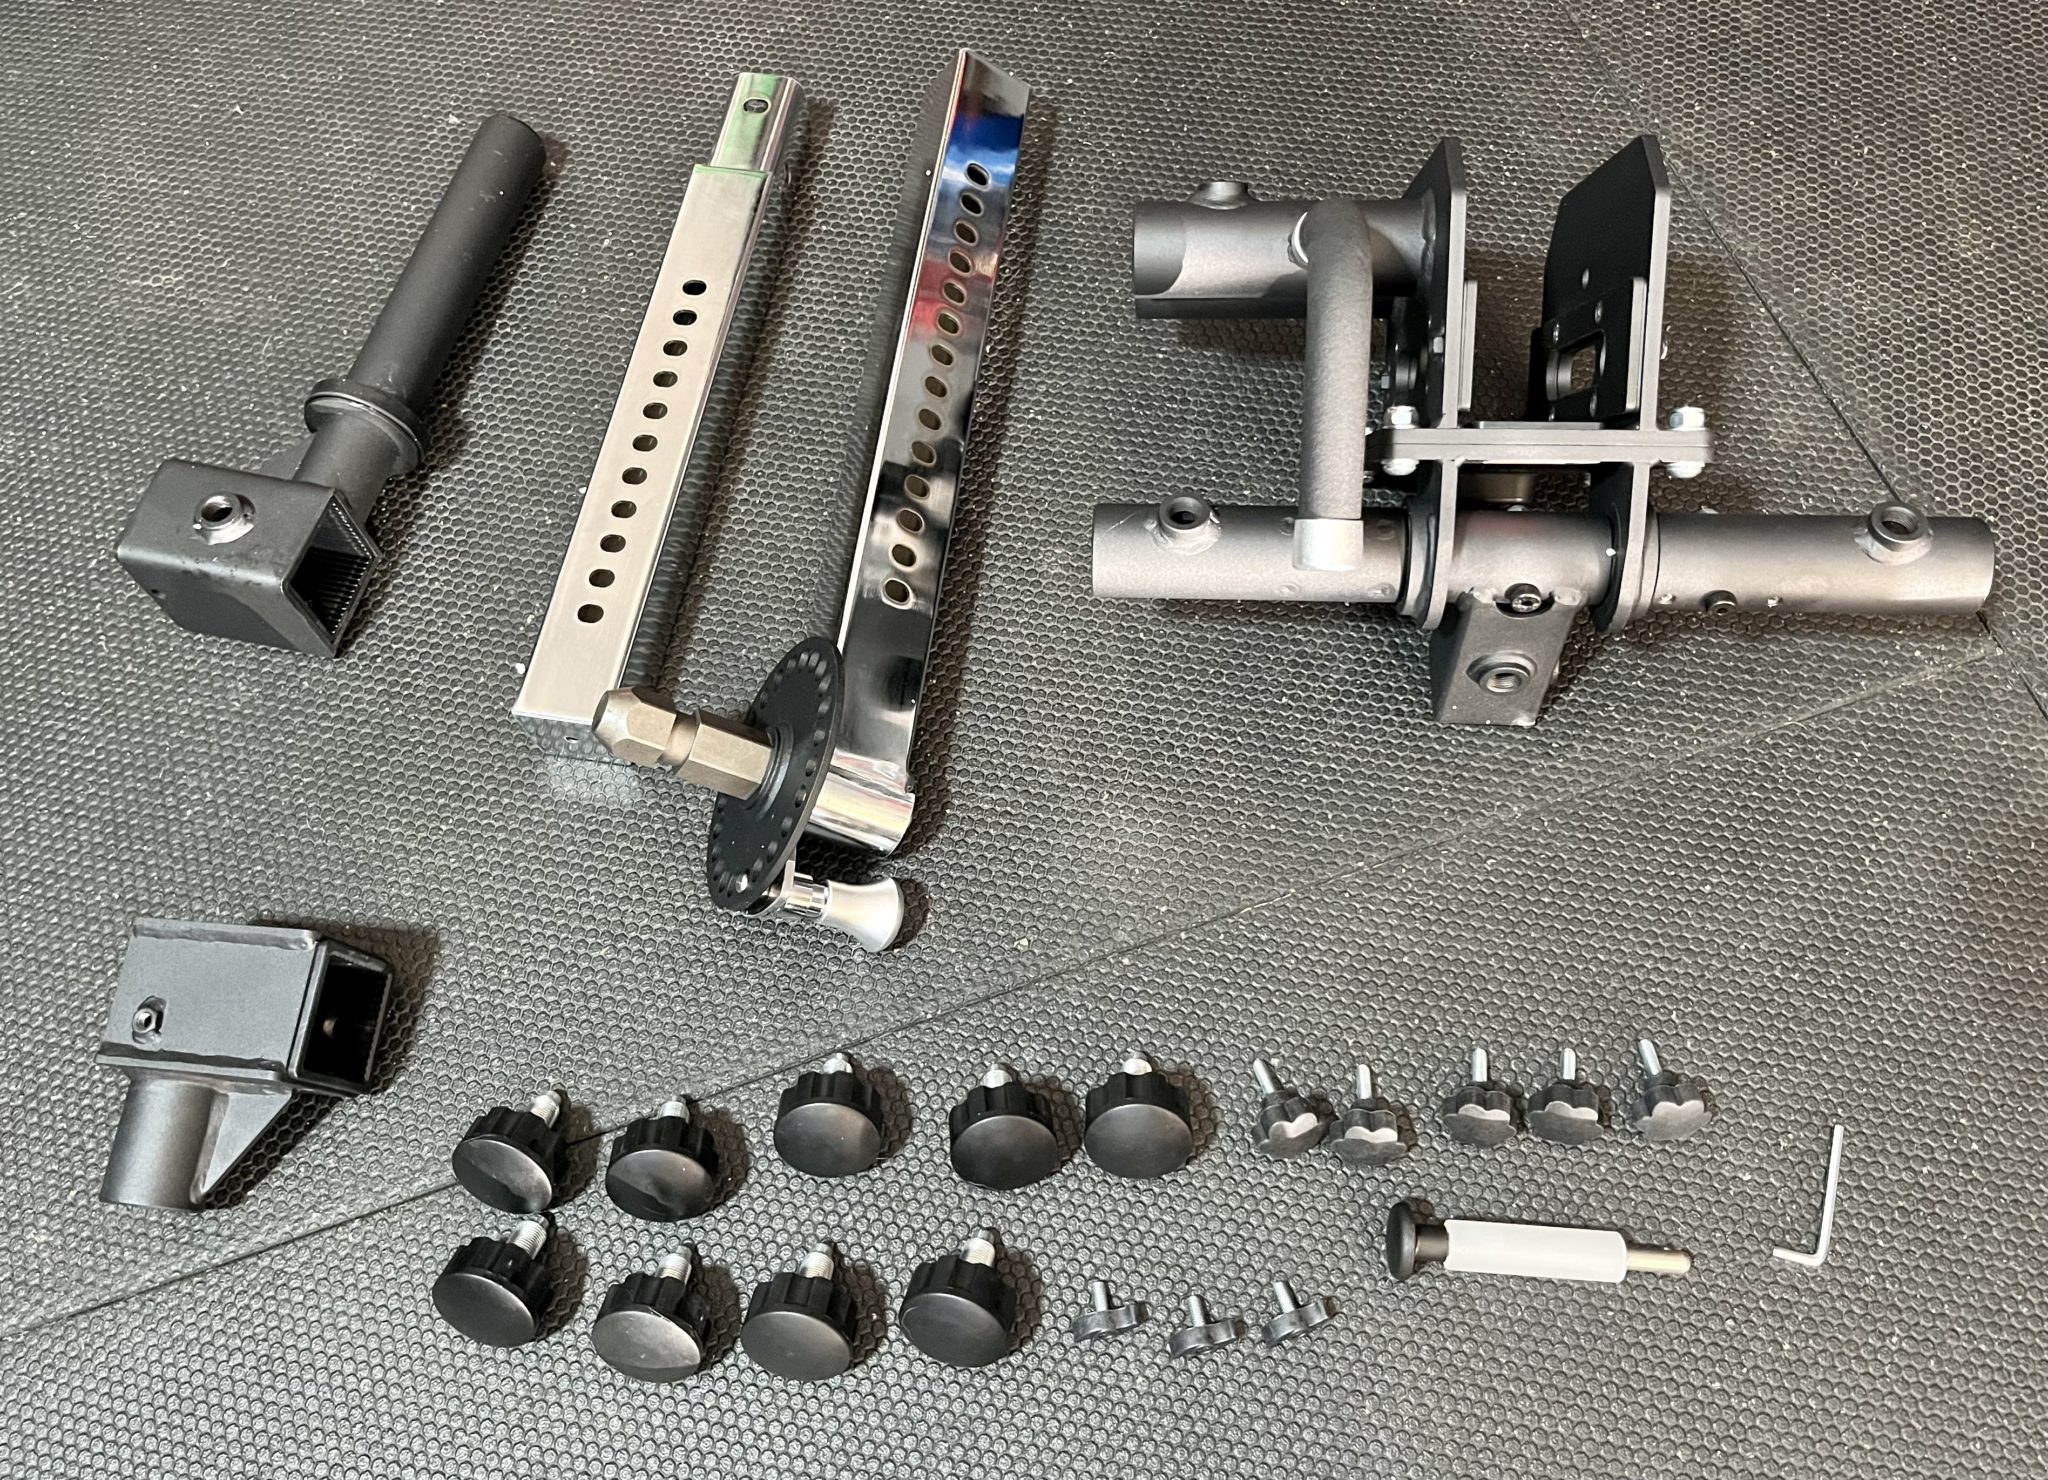
Here’s what I pulled out of the first box.
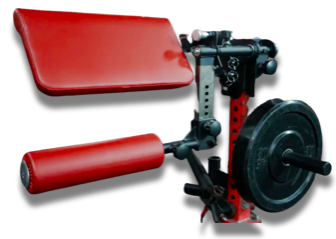
There’s a weight horn, weight arm, carriage, lever arm, a bunch of knobs, and pin.
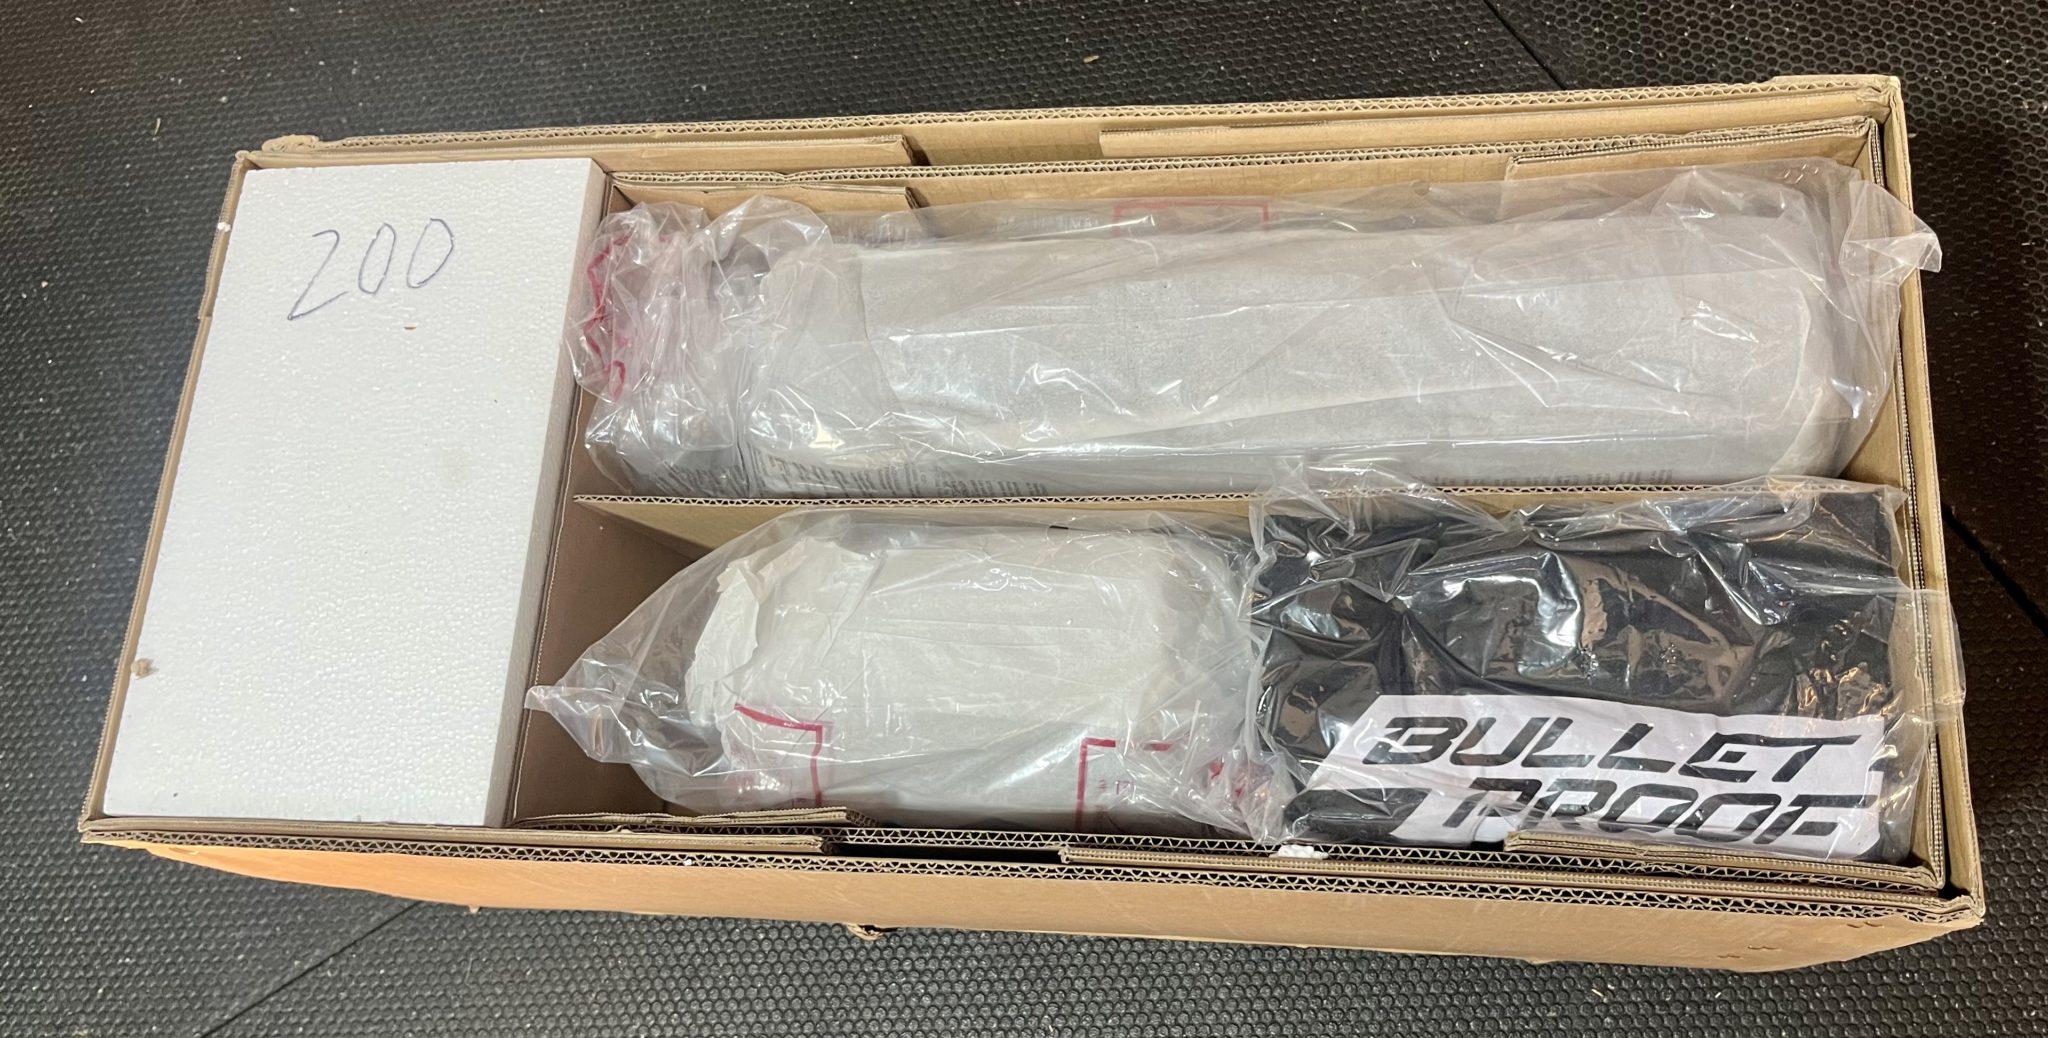
The second box had mostly all the soft pieces.
And Bulletproof even threw in a shirt.
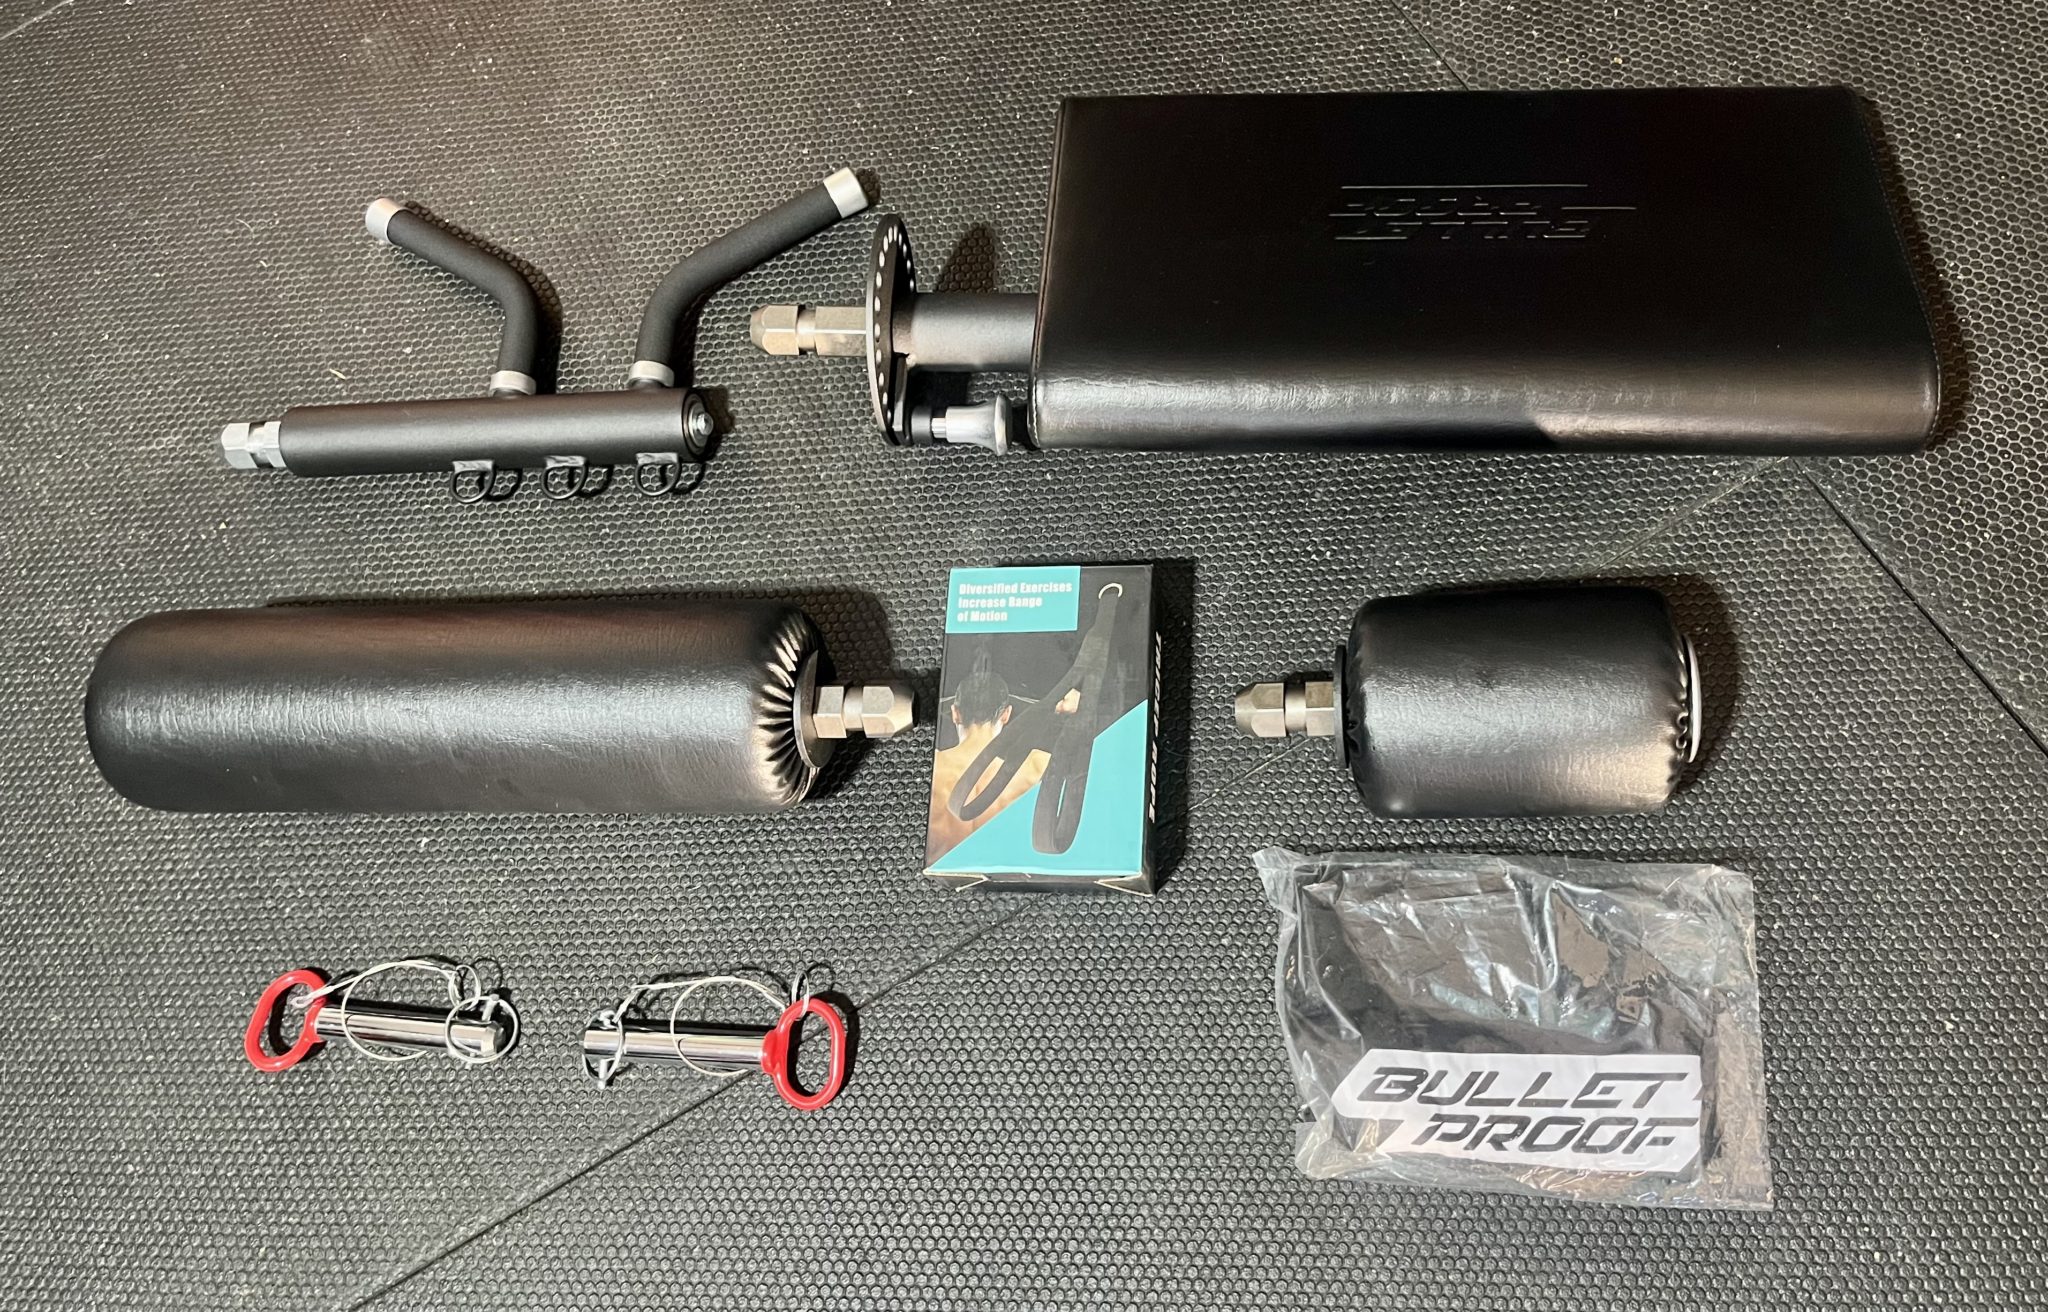
Inside the second box there’s a short and long leg roller, seat / preacher pad, arm curl attachment, two hitch pins, and the shirt.
The multi-strap triceps rope attachment (box in the middle of the pic) was something I got in addition to the Isolator package.
Now that I showed you what’s in each box, below I’ll share the specs, then break down each item in detail as I set up the Isolator on my rack.
Specs
| Max user weight capacity | 265 lbs |
| Weight plate capacity | 275 lbs |
| Weight arm | 20 1/2″ L x 2 1/2″ W x 2 1/8″ D |
| Weight horn | 10 1/4″ L |
| Leverage arm | 25″ L x 2 1/4″ W x 2 1/2″ D |
| Curl arm | 13 1/8″ L, 2 1/2″ thick |
| Seat/pad | 31 1/2″ L x 12 3/4″ W |
| Long leg pad | 19 3/8″ L (23 1/3″ with hex end), 5 1/2″ thick |
| Short leg pad | 7″ L (11″ L with hex end), 6 1/8″ thick |
| Carriage | 8 3/8″ H x 12 1/4″ W, Hex Port to Hex Port 18 1/2″ |
| Compatibility | Fits 3 x 3, 2 x 3, and 2 x 2 rig posts |
| Pin sizes | Choose from 5/8″, 3/4″, 1/2″, 11/16″, or 1″ |
Setting Up The Bulletproof Isolator On A Power Rack
Carriage
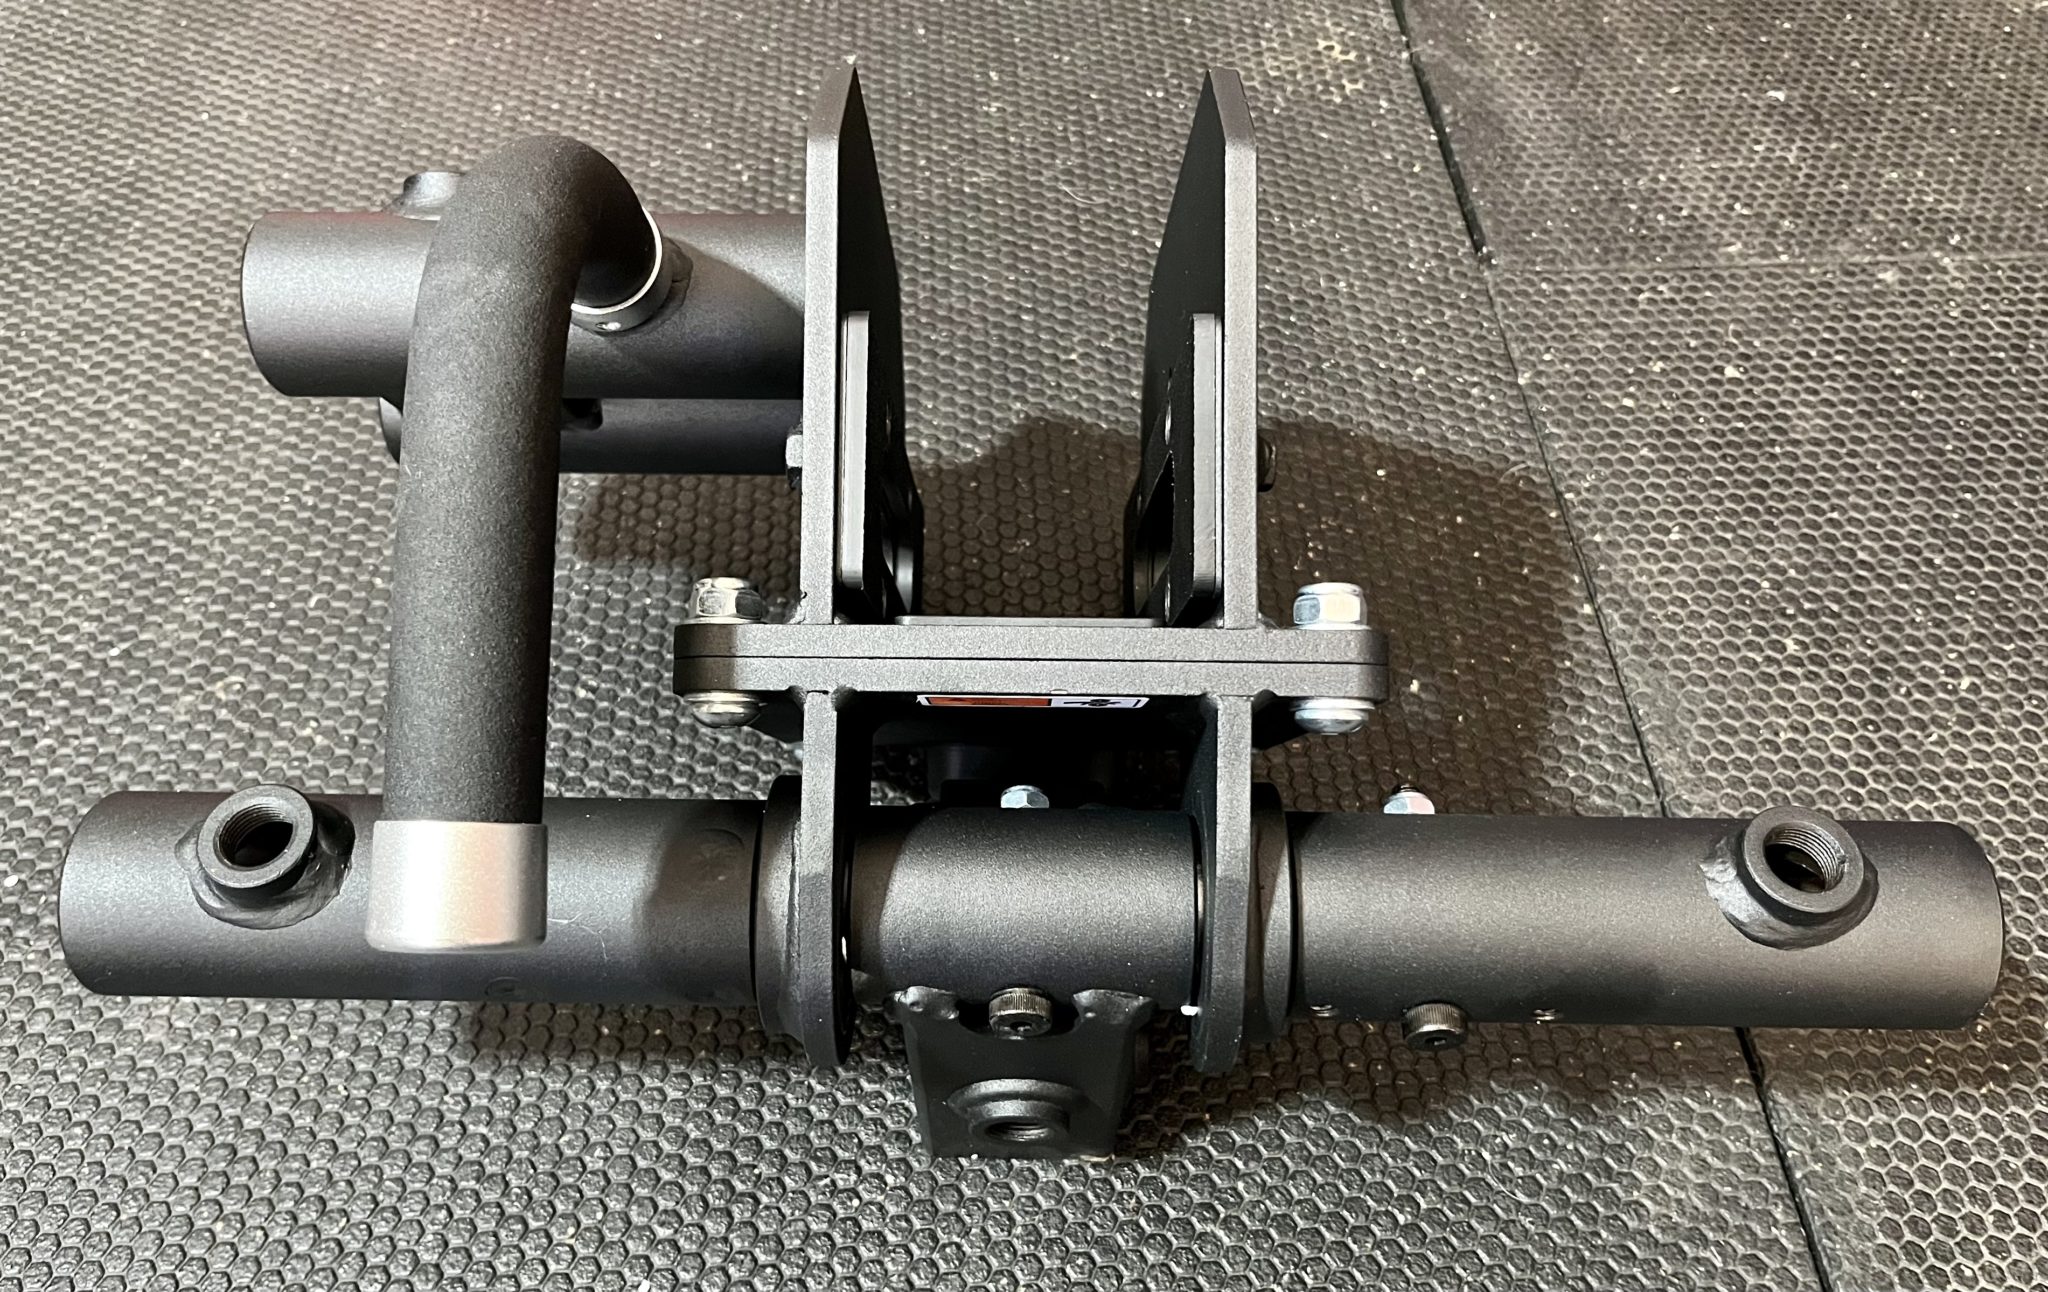
The carriage is the piece that connects all the Isolator’s moving parts to my PRx weight rack.
It has a handle on the left side and I can see why it’s needed because this piece is heavy (weighs about 46 lbs).
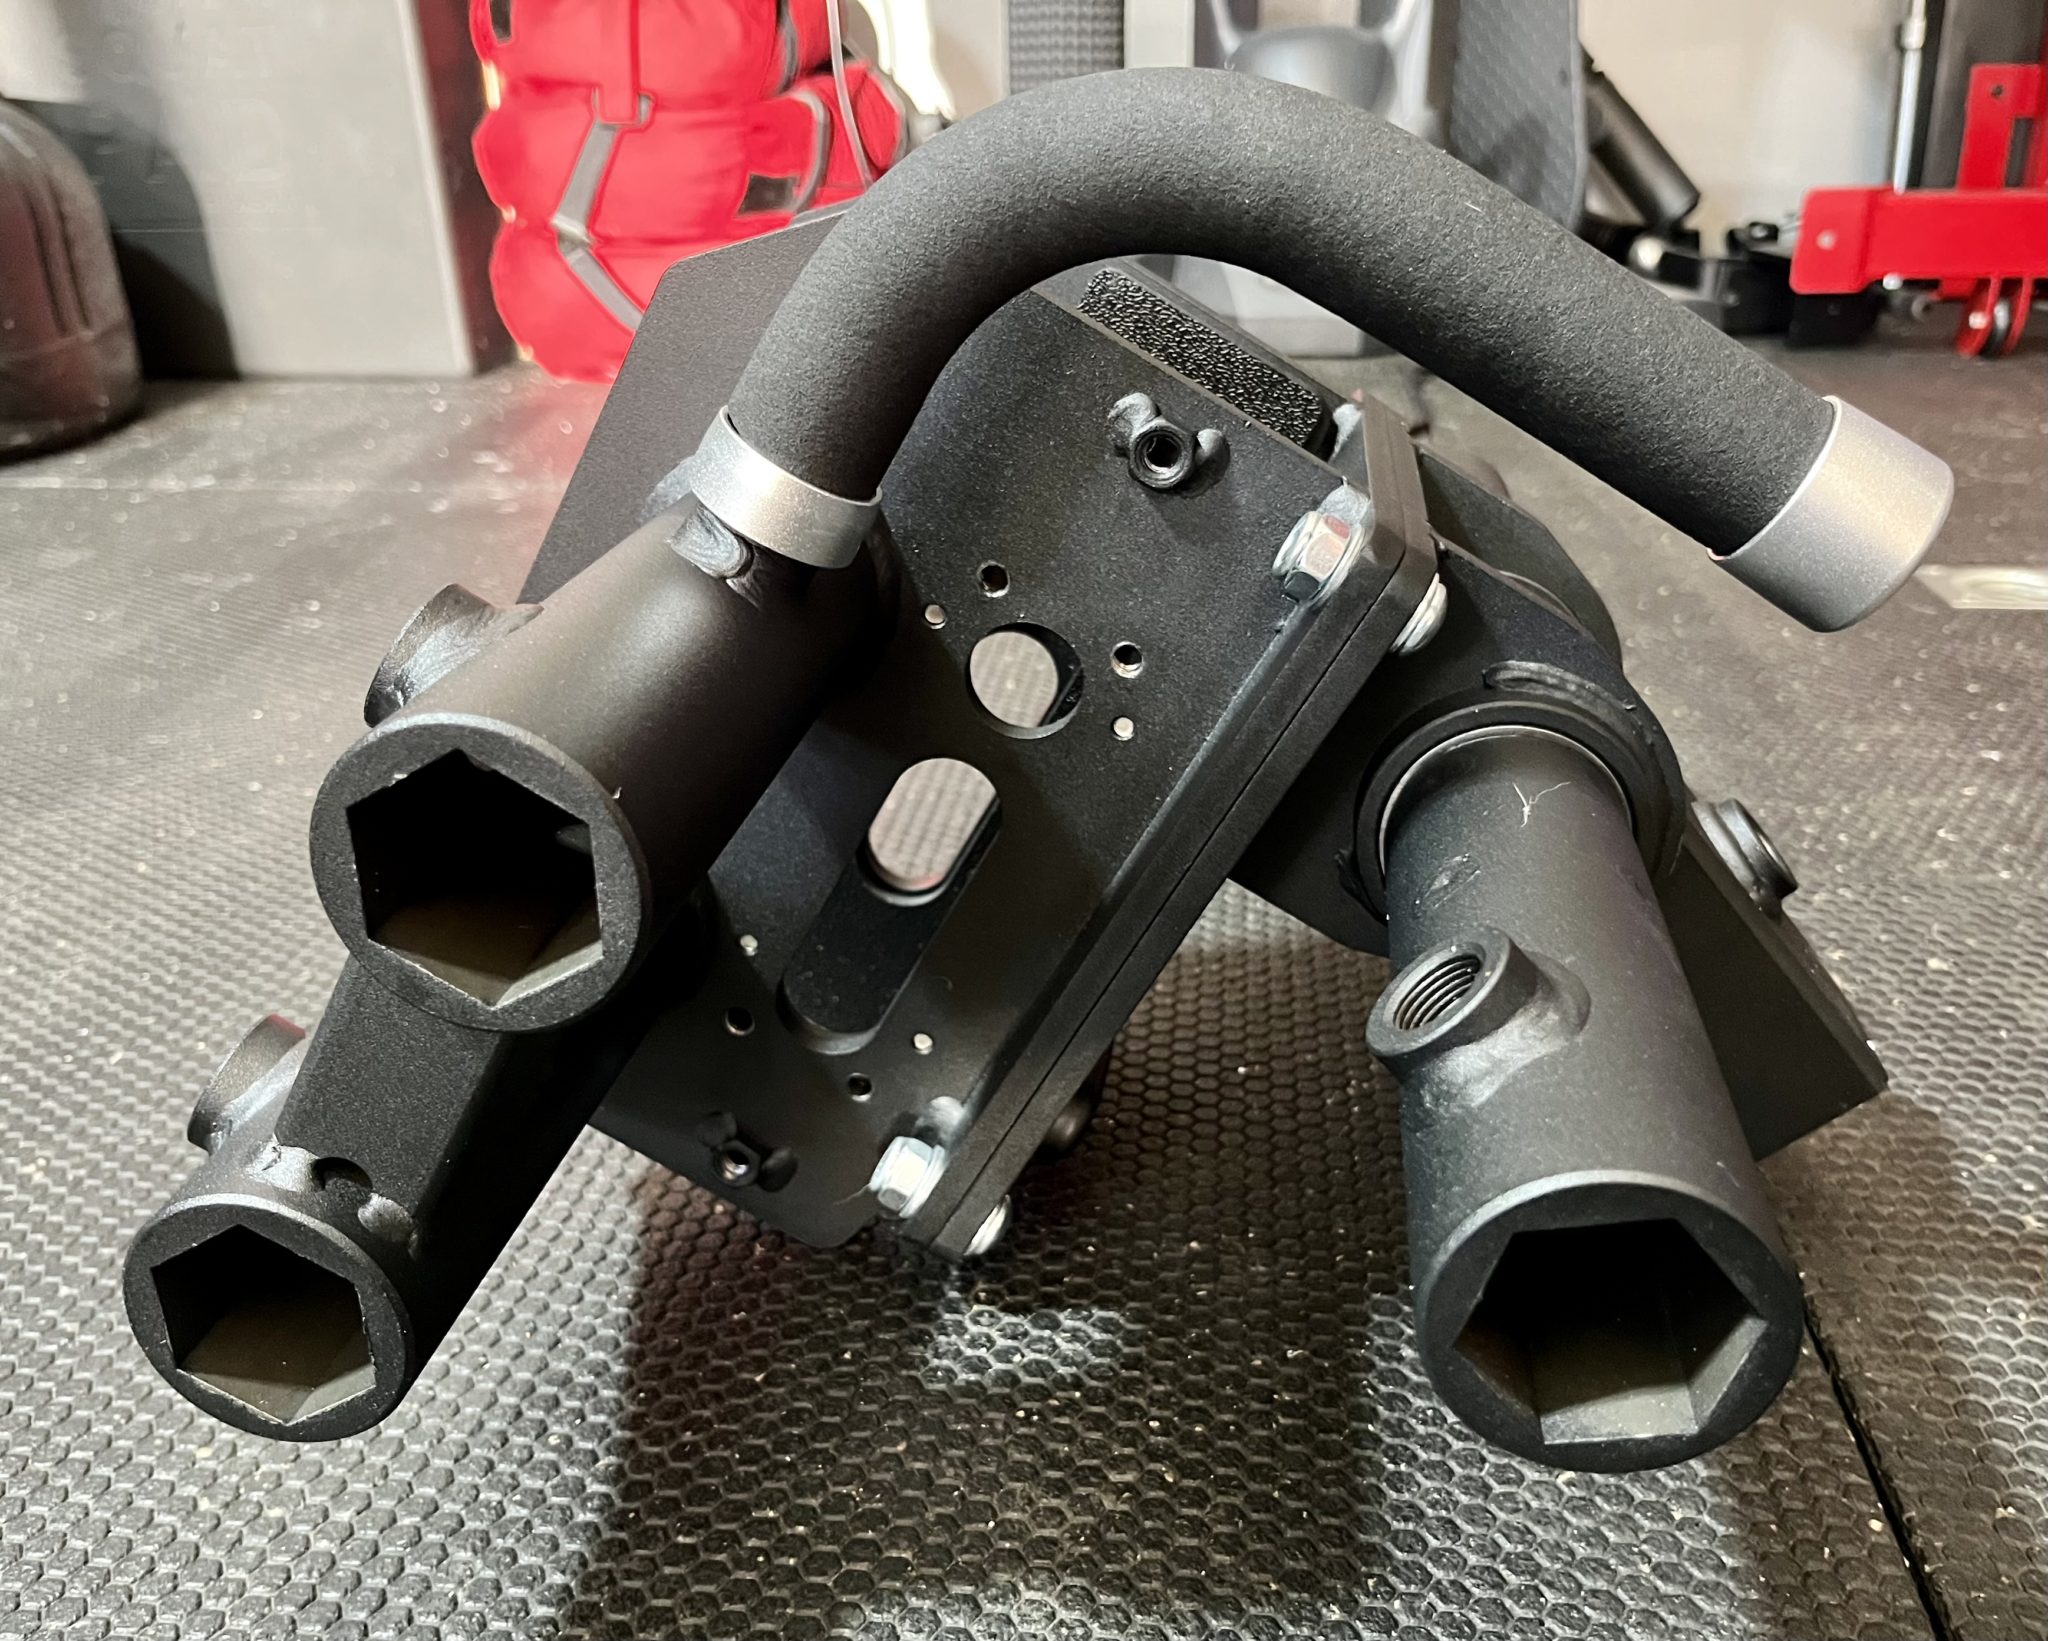
The left side of the carriage has 3 hex ports (hexagonal openings) and this is where attachments connect to it.
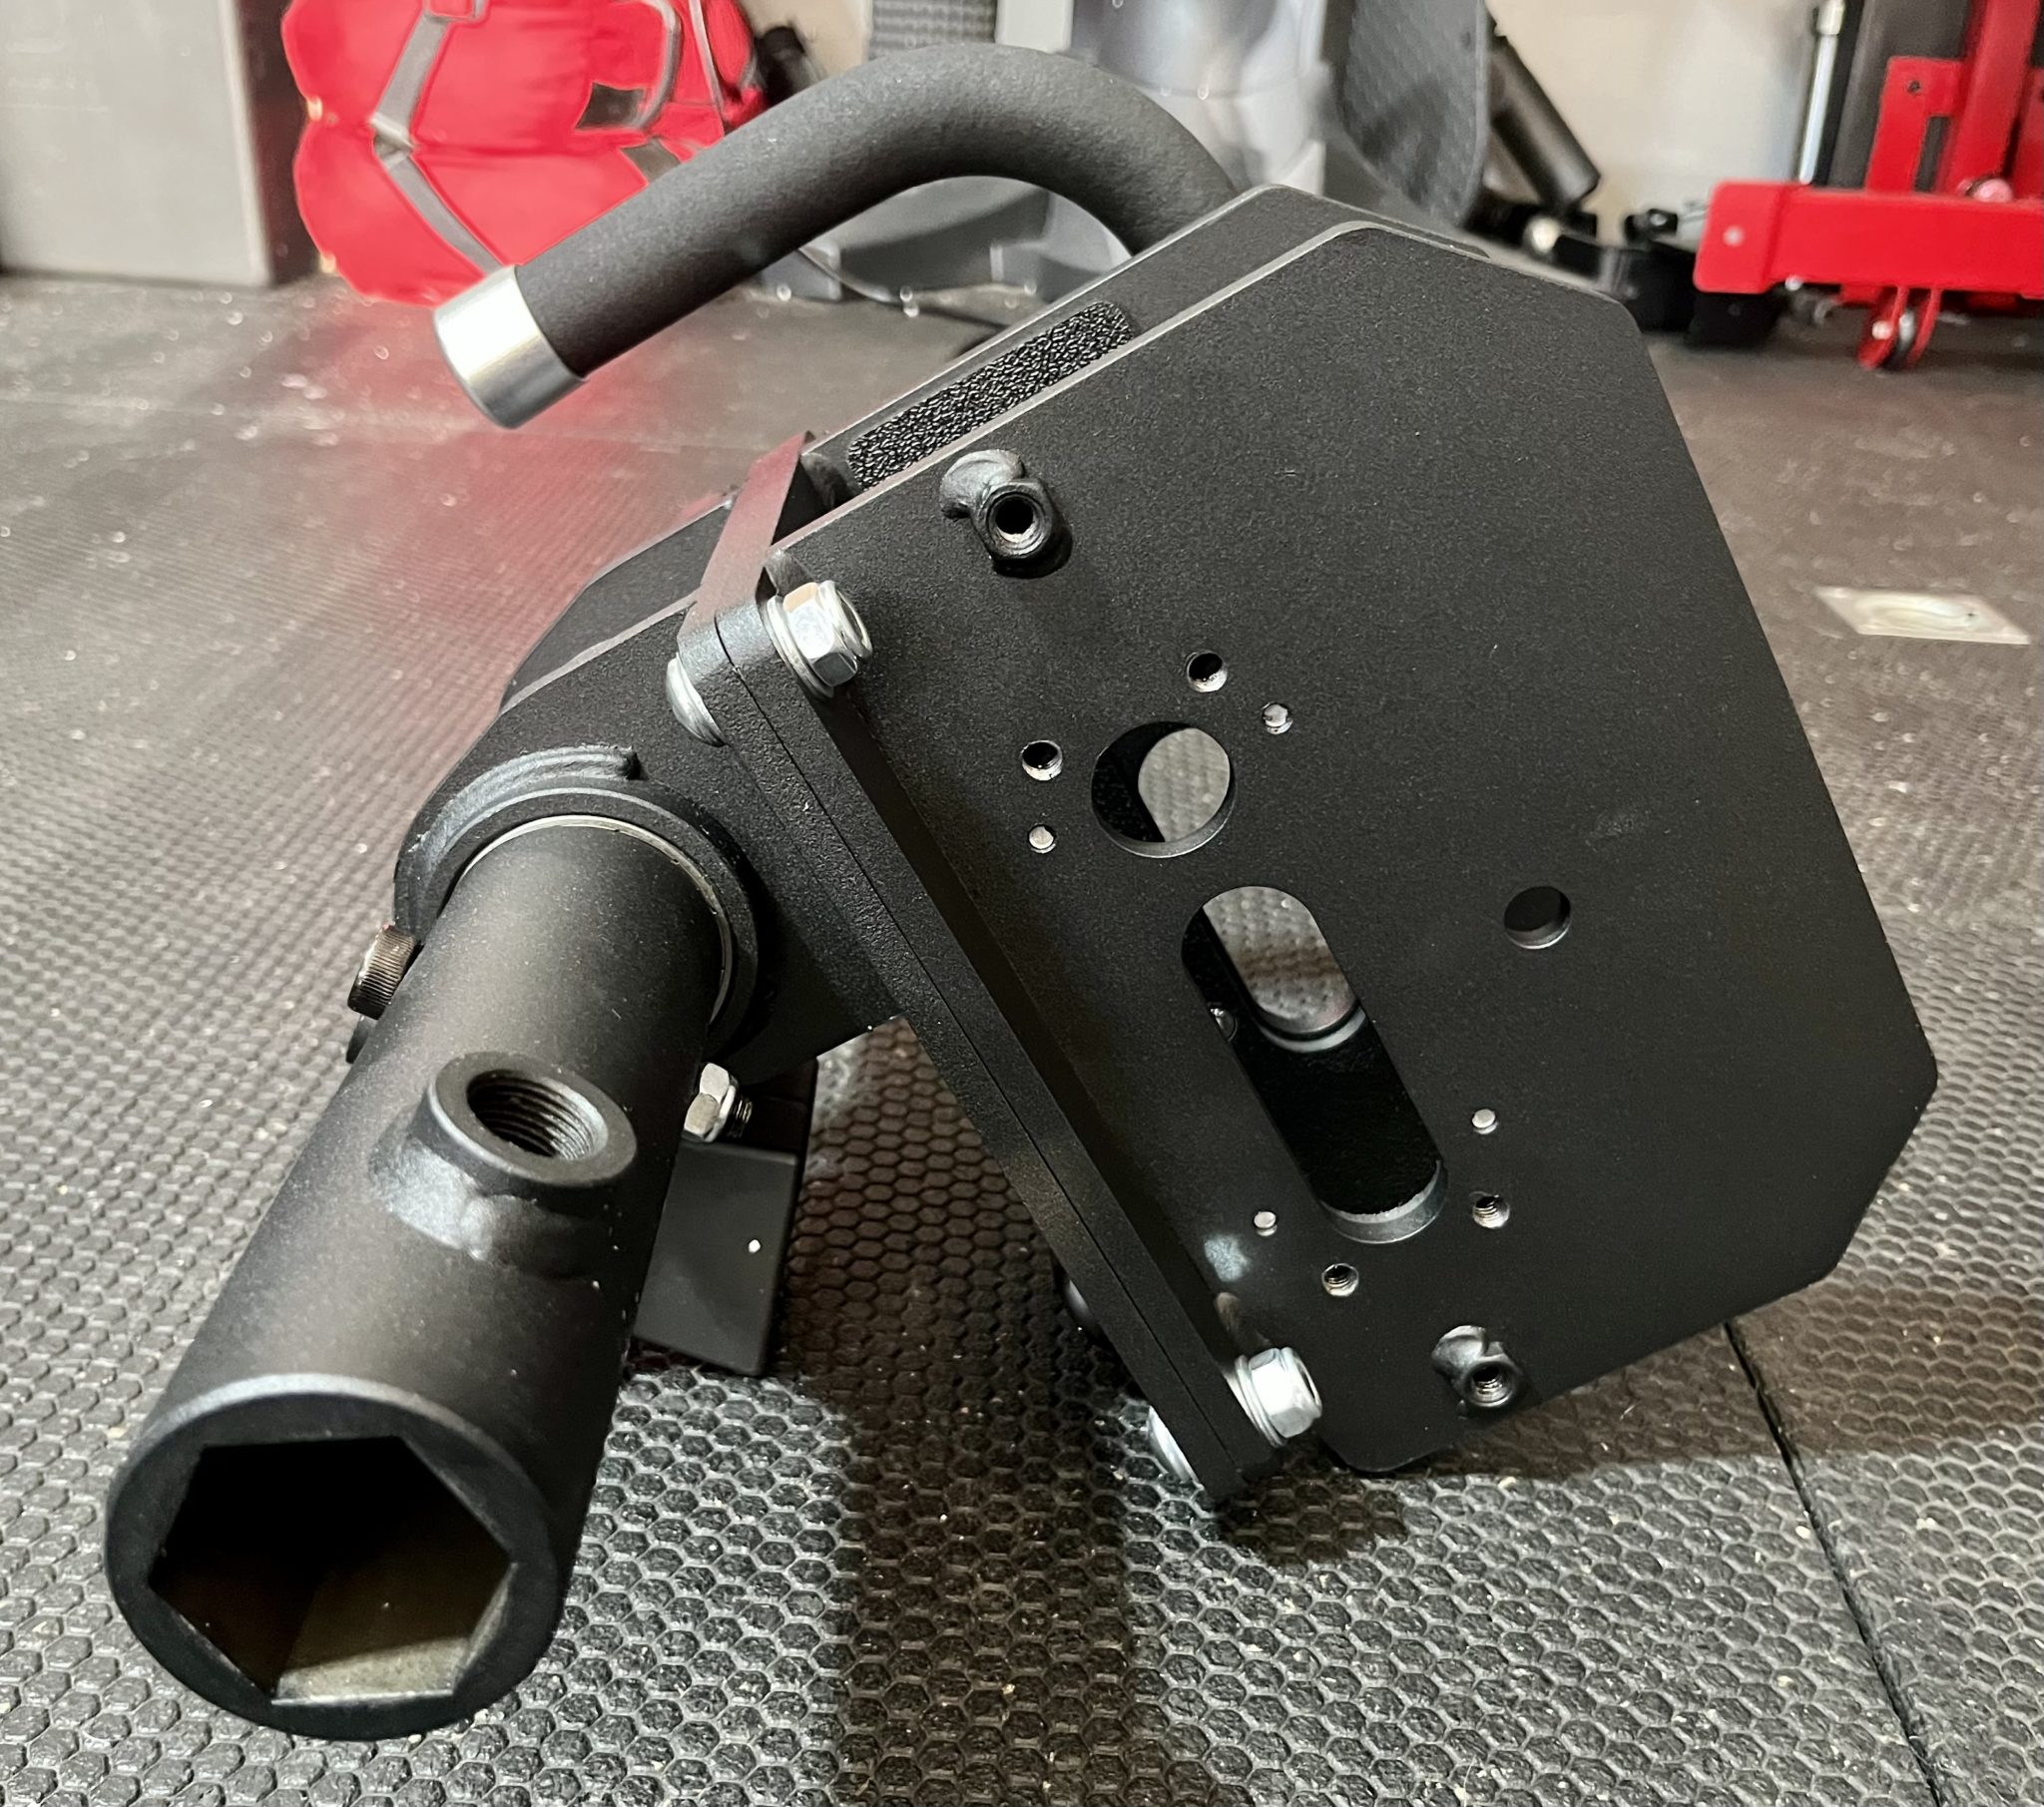
The right side has one hex port.
I’ve only used the left side of the carriage so far.
If I’m not mistaken the right side opening is for future attachments Bulletproof Fitness Equipment plans to drop.
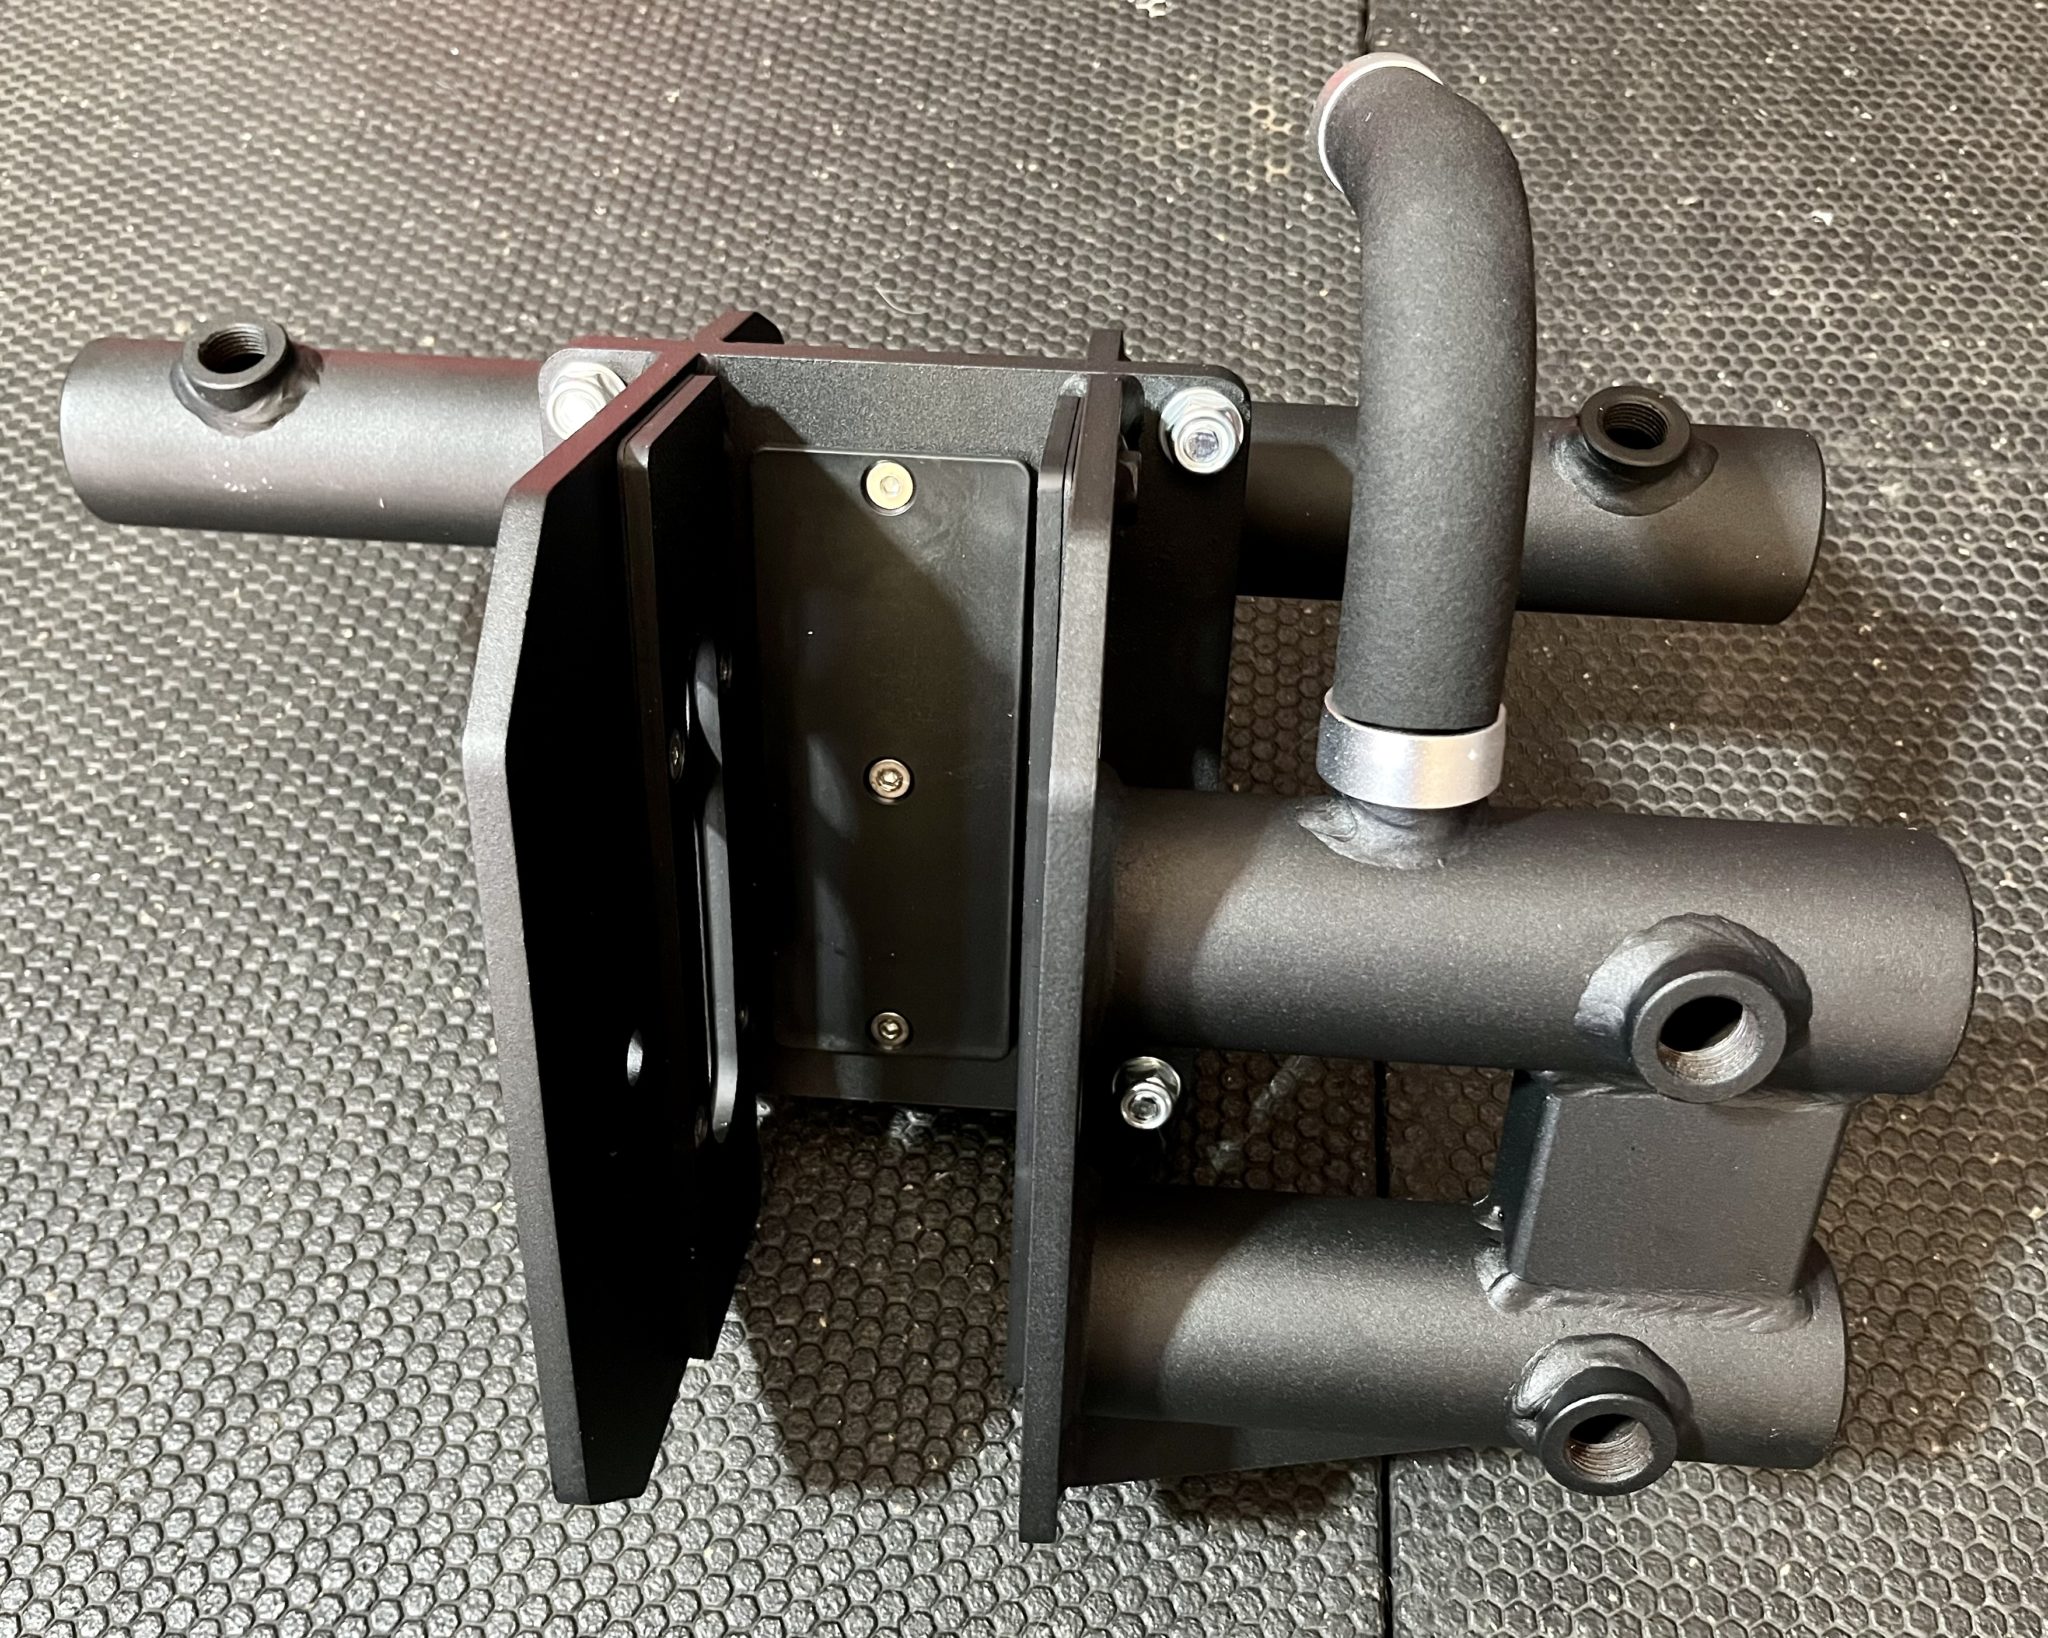
And here I’m showing you the back of the carriage.
All those holes you see are for knobs that tighten attachments to the carriage.
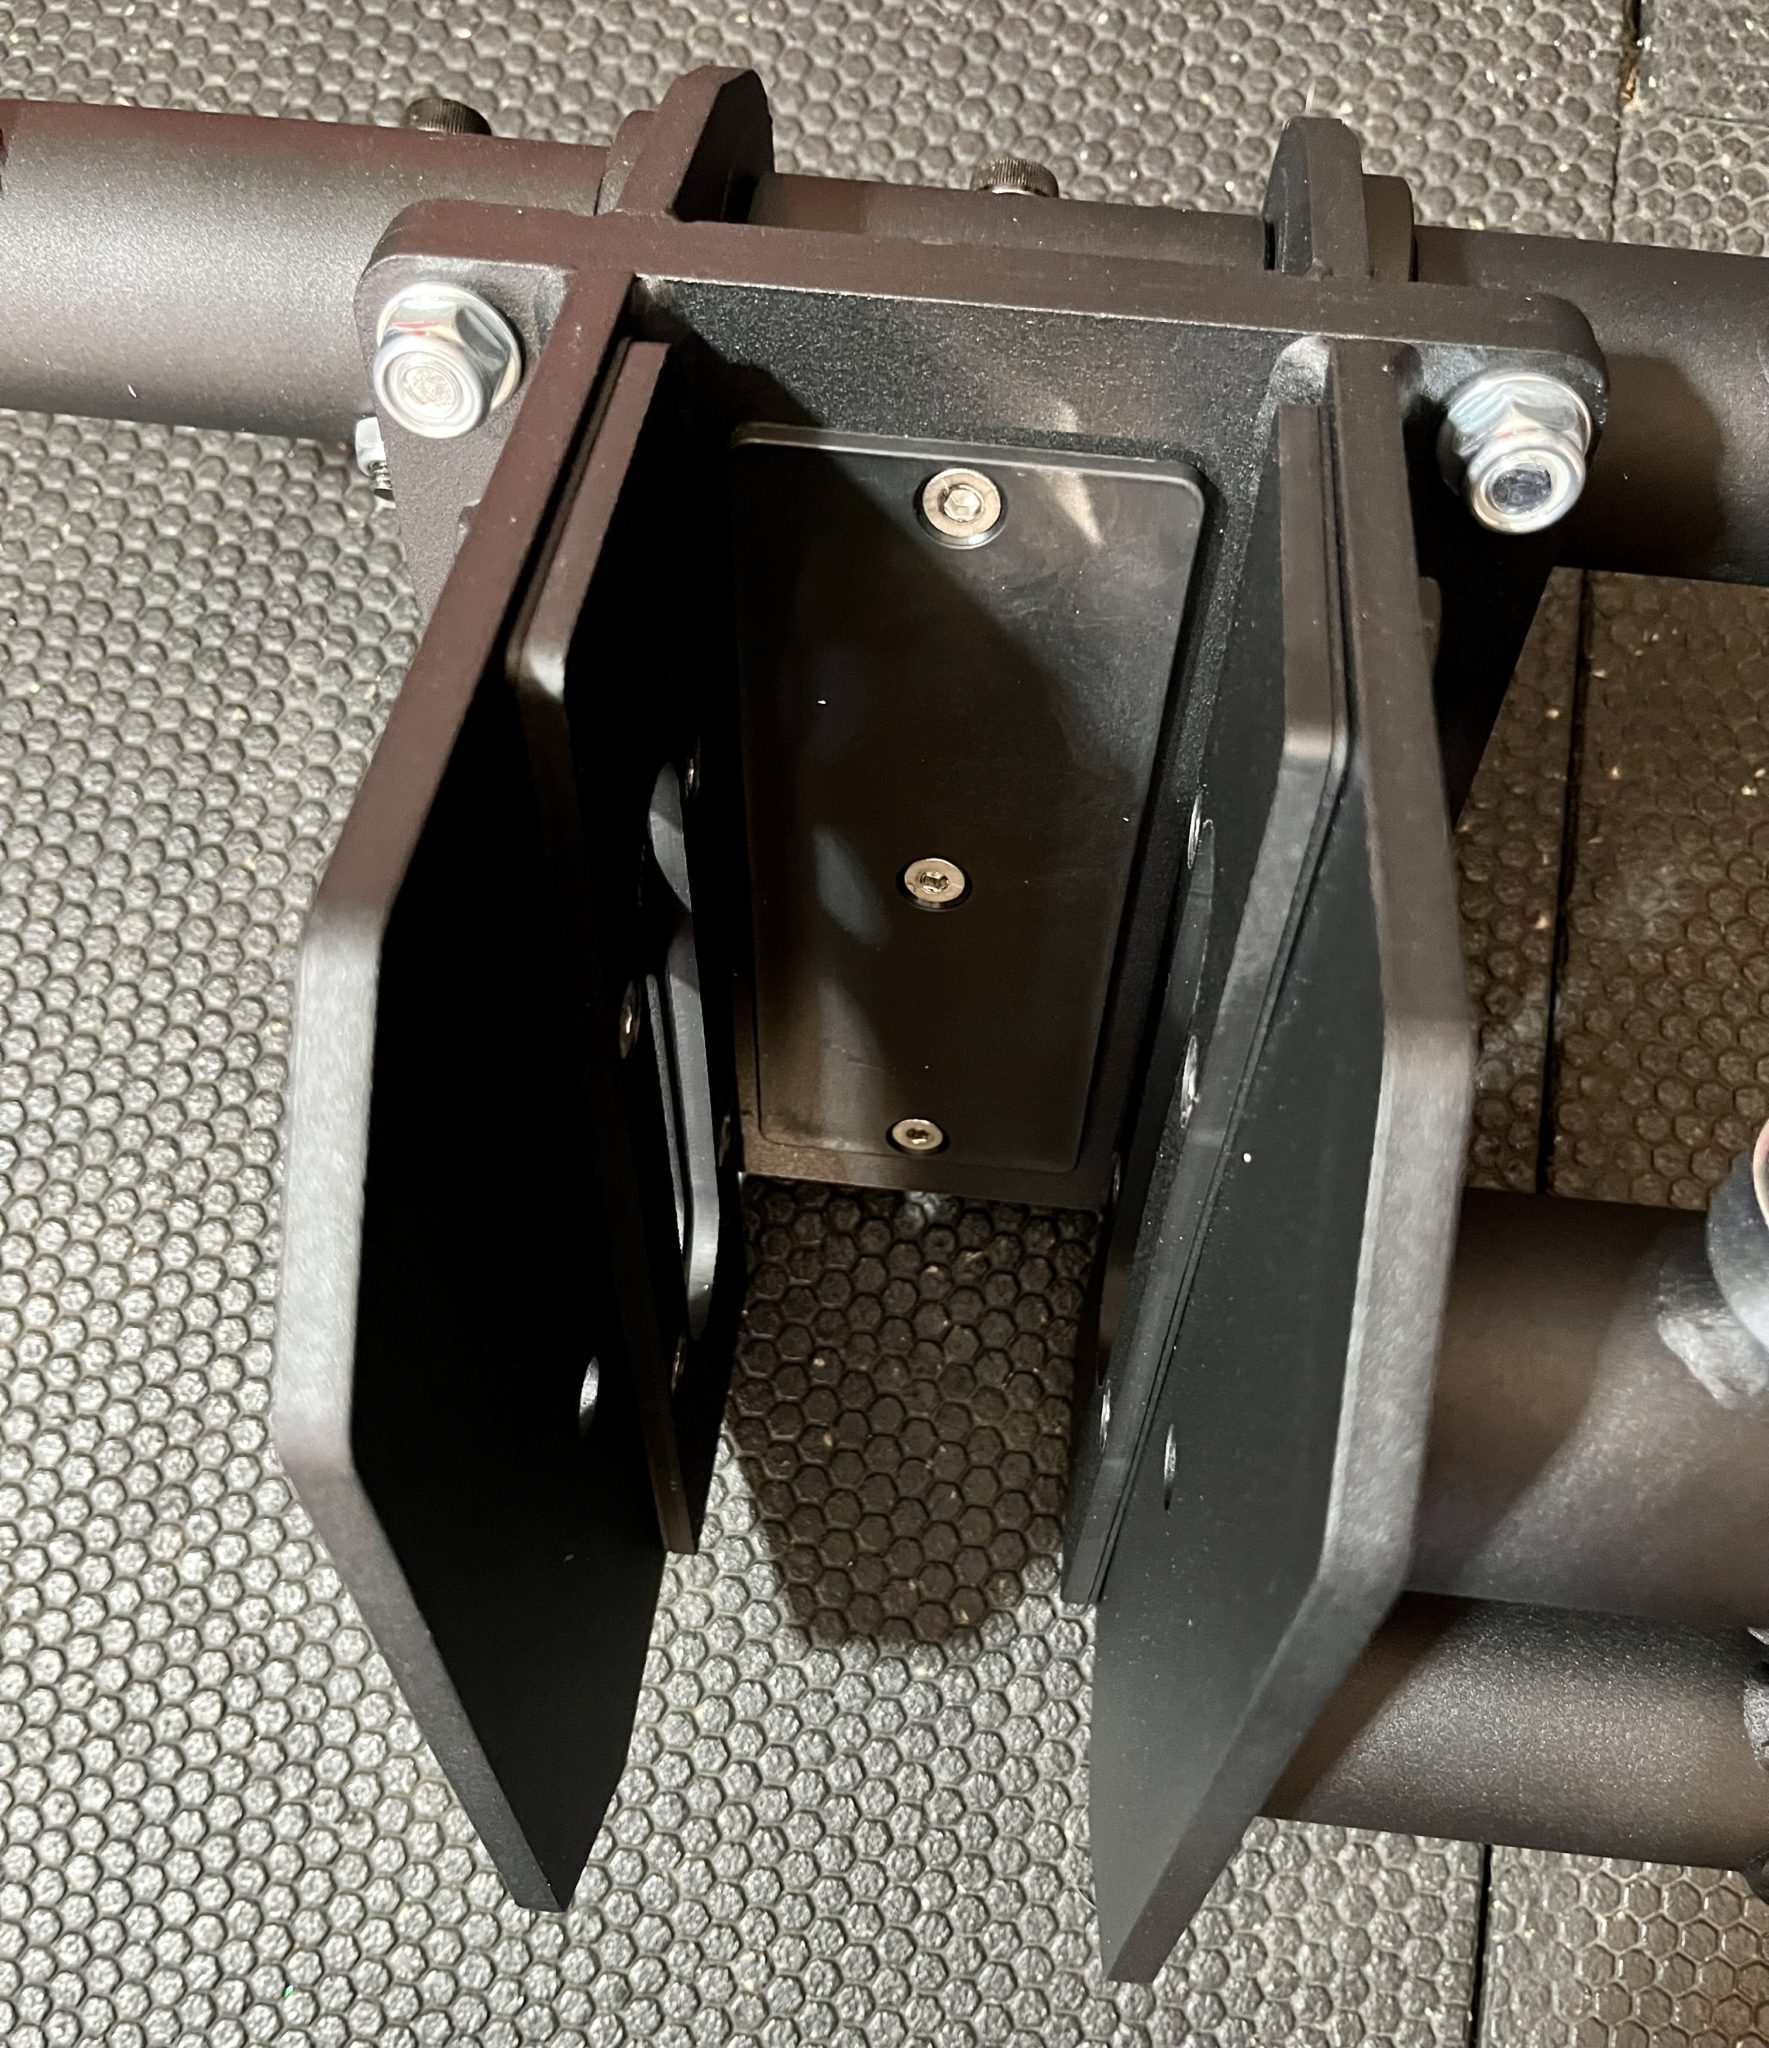
Here I’m giving you a closer at the inside of the carriage and as you can see it’s lined with UHMW plastic to protect the rack.
What’s unique about the UHMW on the sides is that it can be pushed inward by knobs to tighten up the fit against my rig.
Genius idea to reduce any wiggle while the carriage supports weight and pushing/pulling forces.
Time to put this up on my rig post.
Mounting The Carriage
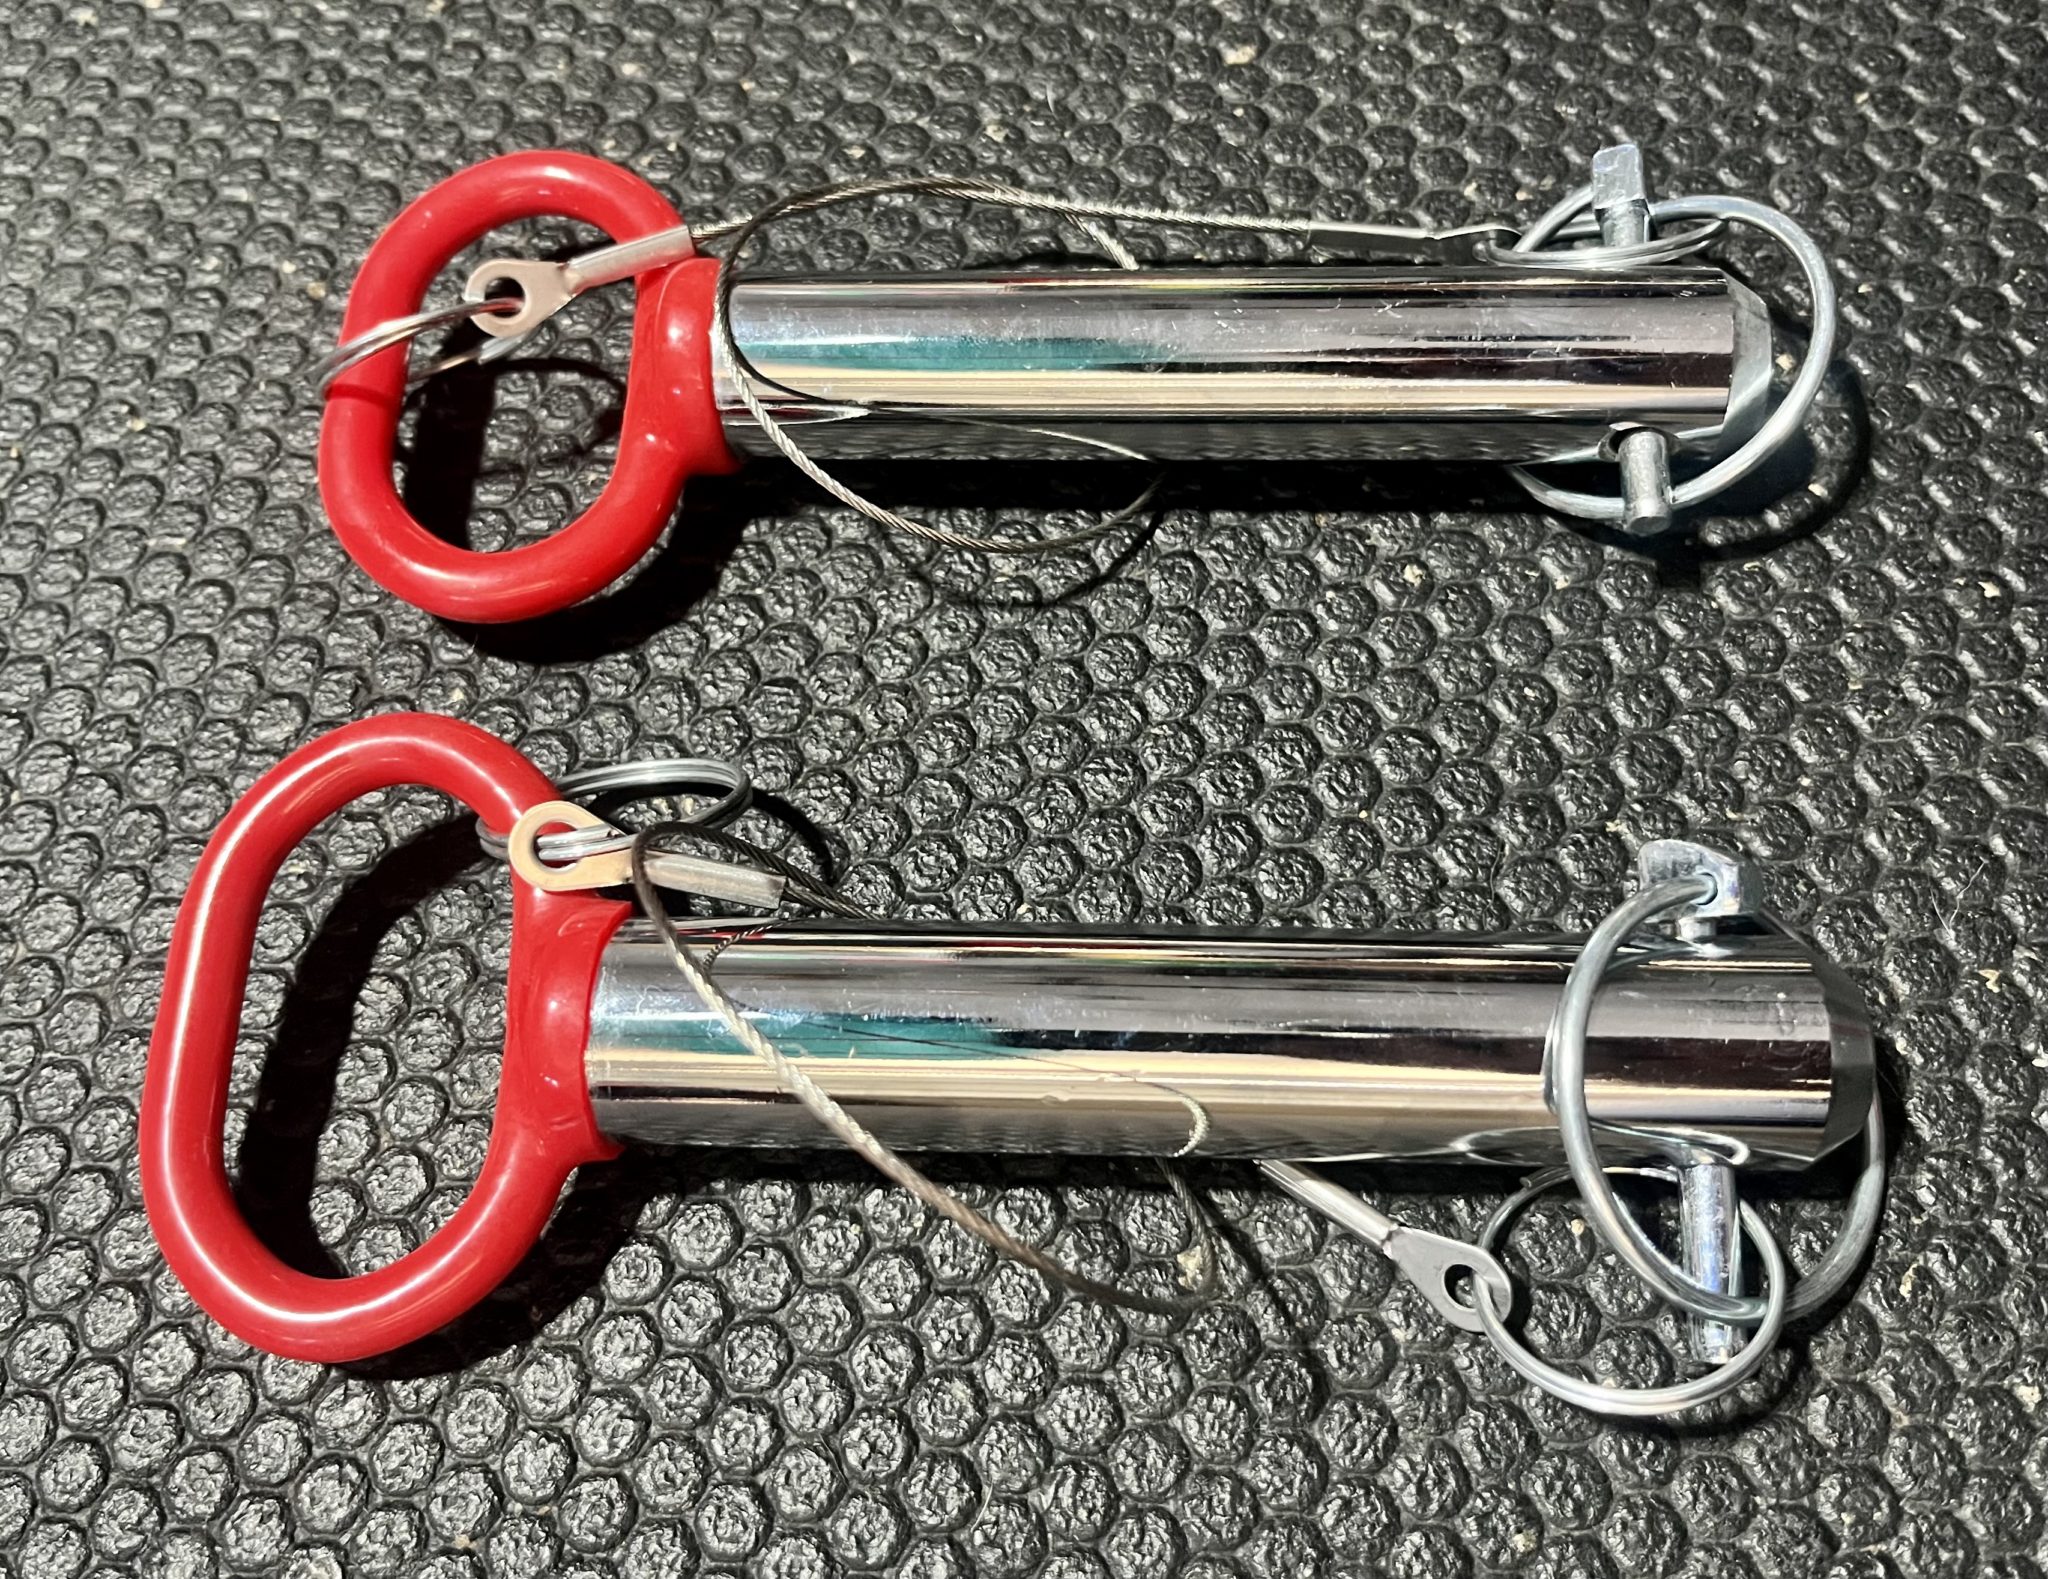
Before attaching the Isolator carriage to my rack I need to have the 1″ hitch pins close by.
These pins are what keep the carriage on the rig.
When you purchase the Isolator from the Bulletproof Fitness Equipment website, you have the option to choose pin sizes depending on the holes on your rig.
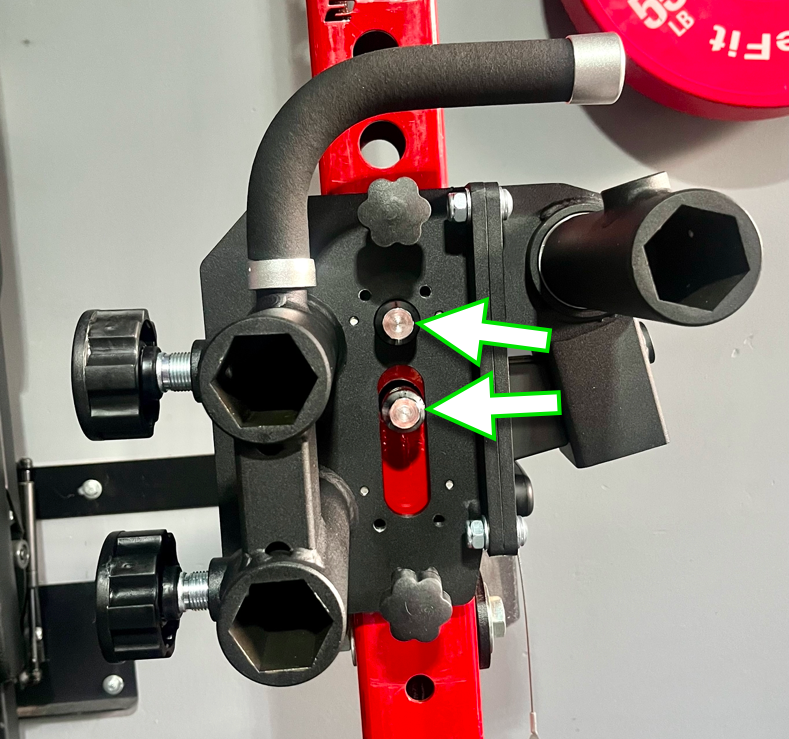
Once I got the carriage around the upright, I inserted the two hitch pins.
Now I need to make sure it’s snug around the upright so there’s no wiggle when I’m exercising.
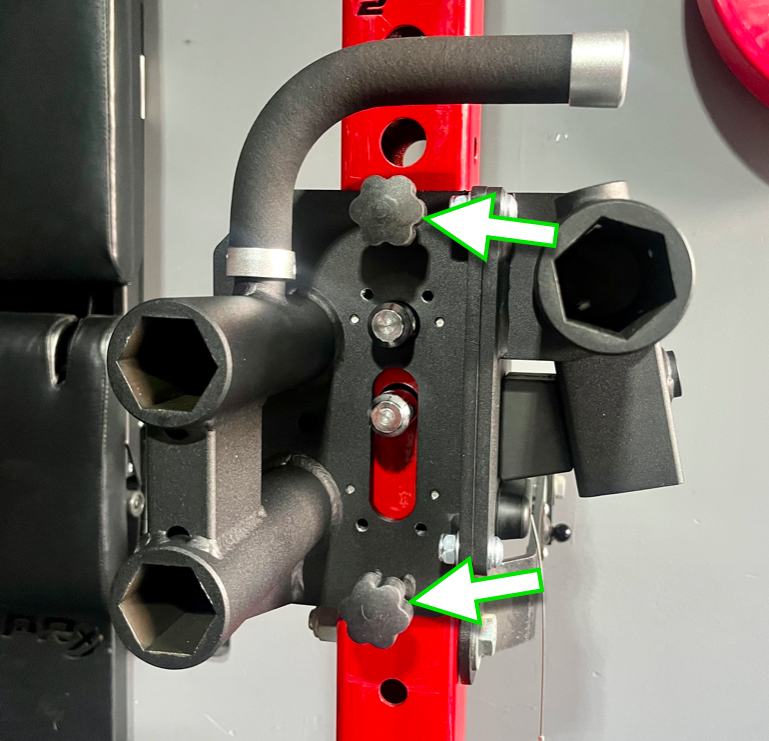
And I do that by turning two knobs at the top and bottom of the carriage.
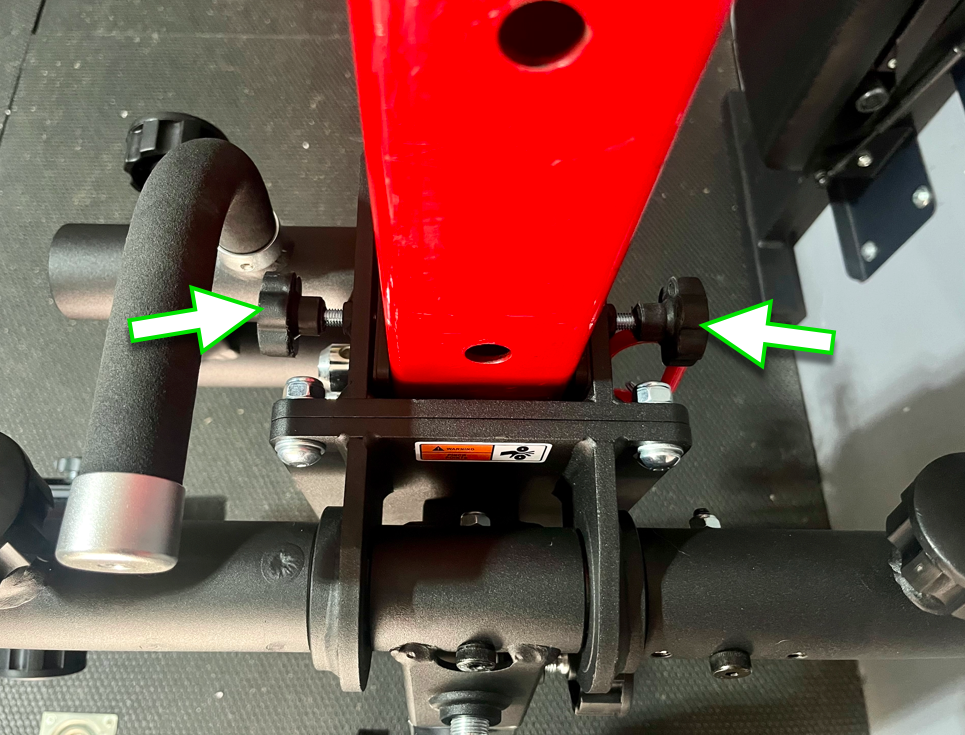
There’s another set of knobs on the opposite side so I tighten both sides.
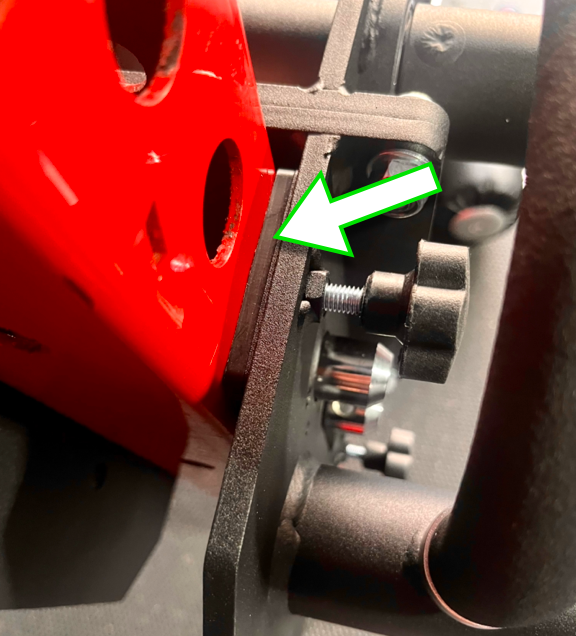
In the pic above I’m showing you how the knob pushes the UHMW plastic against the upright for a snug fit.
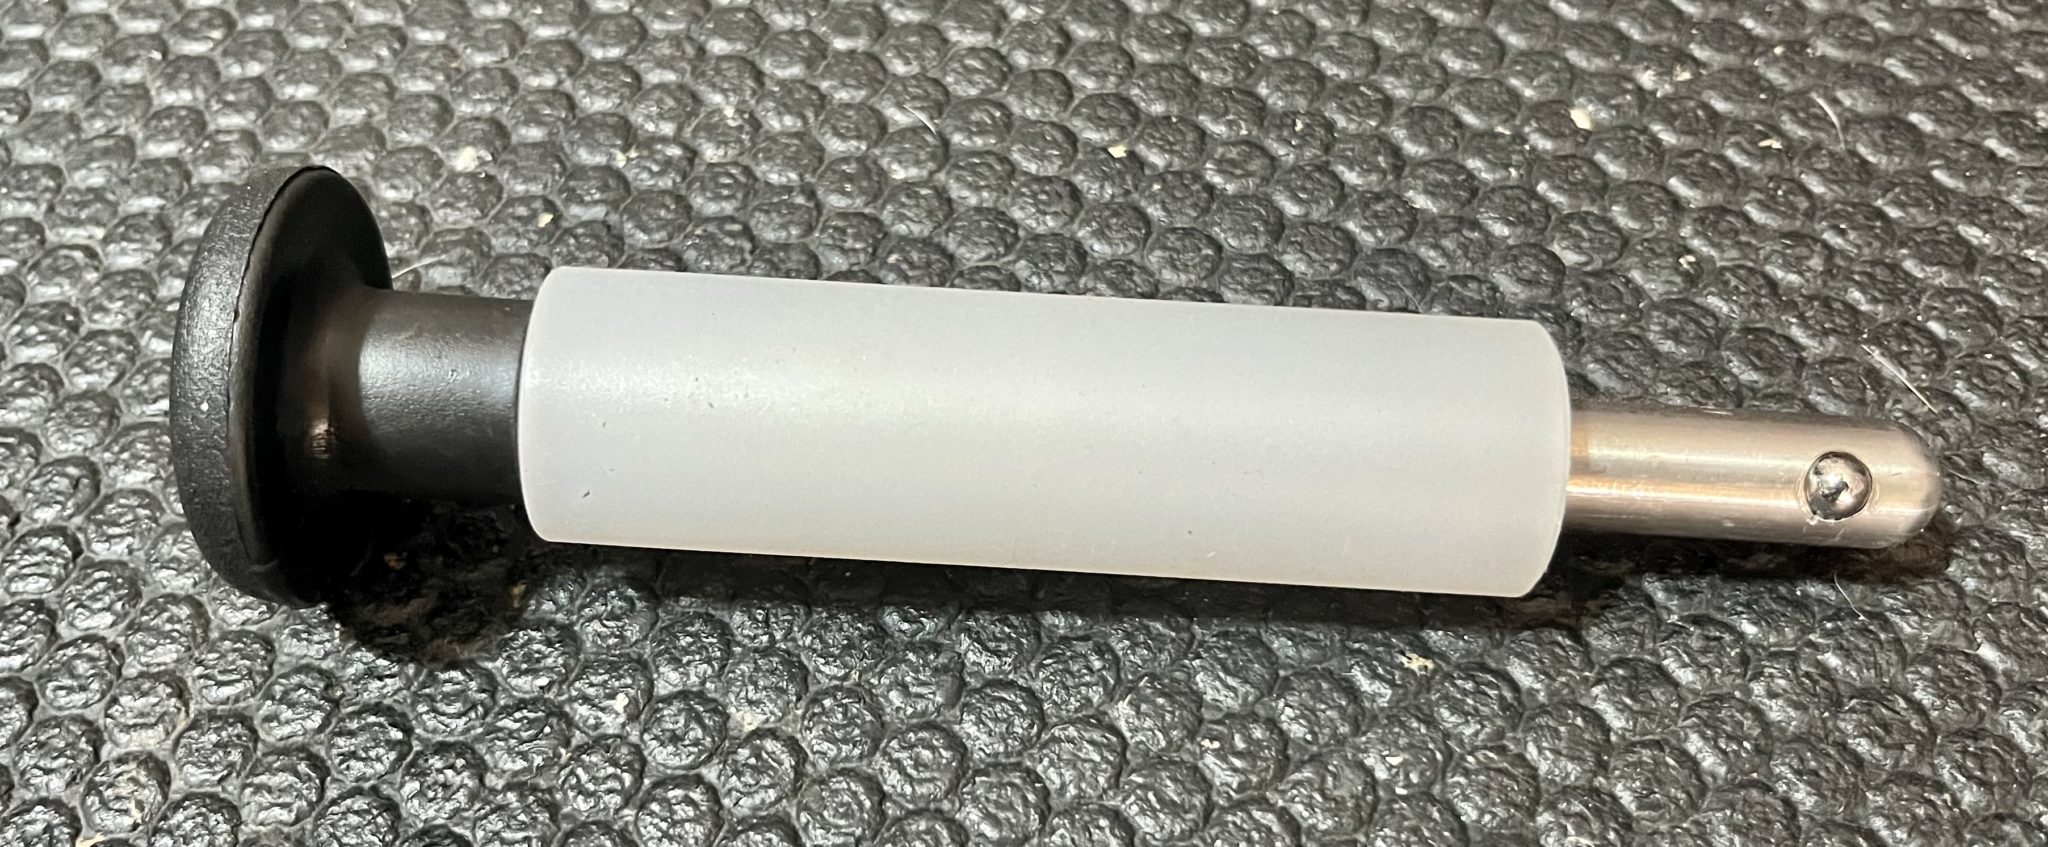
So now the only thing left to do is add a rolling pin to the back of the carriage.
This doesn’t provide any stability for the carriage, it’s more to make it easier to move up and down the upright when changing heights.
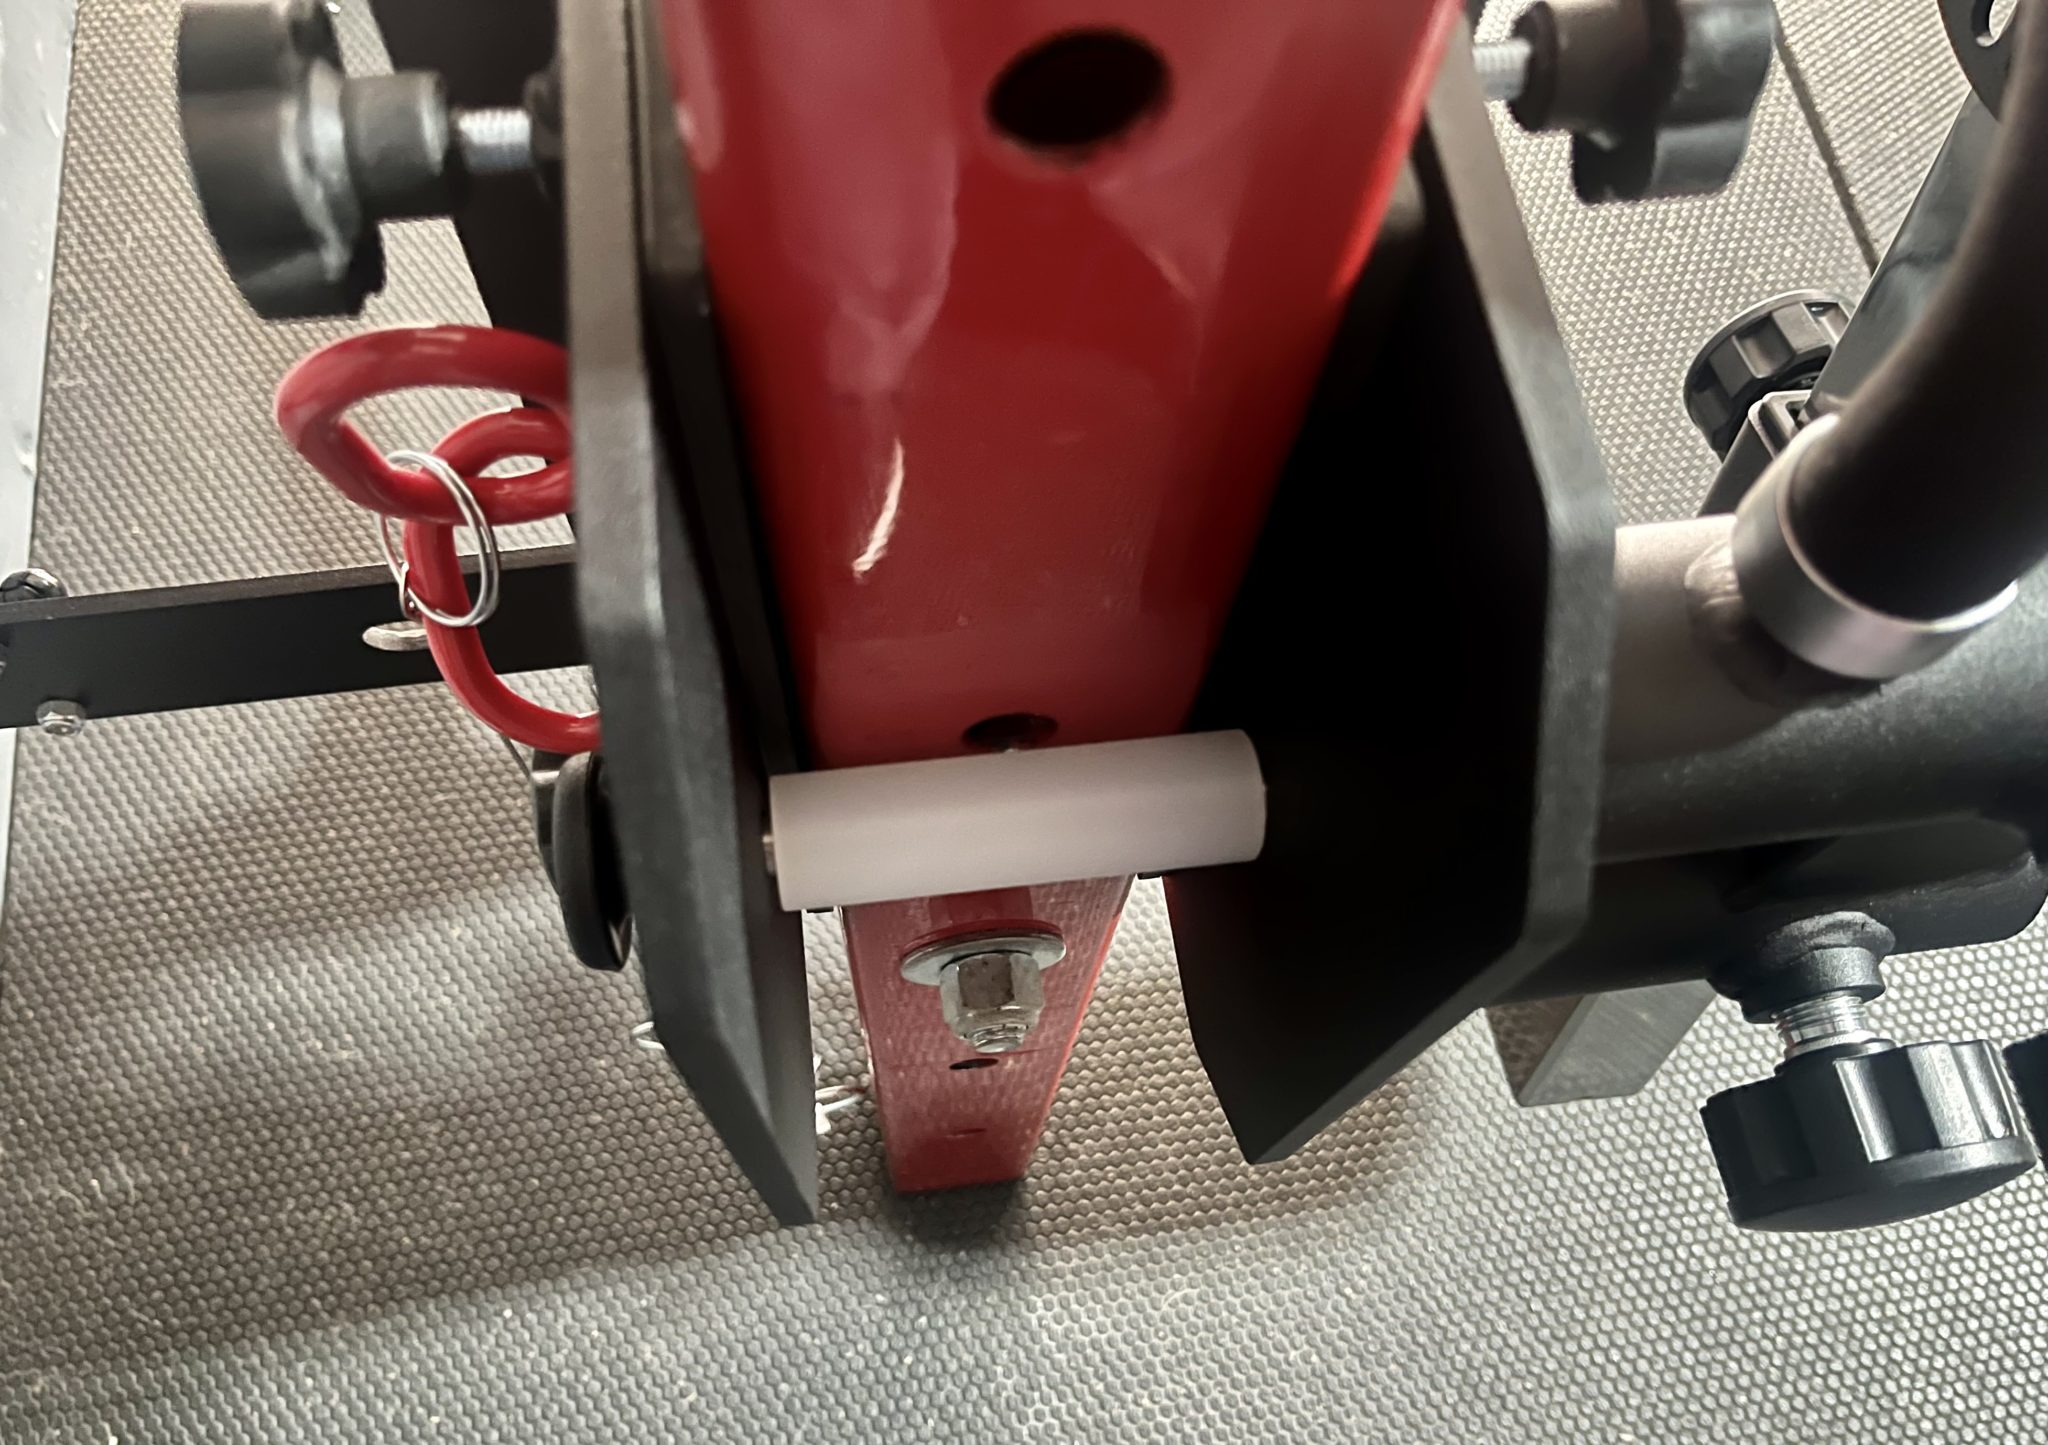
And here it is once I got it on the carriage.
Whenever I want to change heights, I remove both hitch pins, roll the carriage, and insert the hitch pins again.
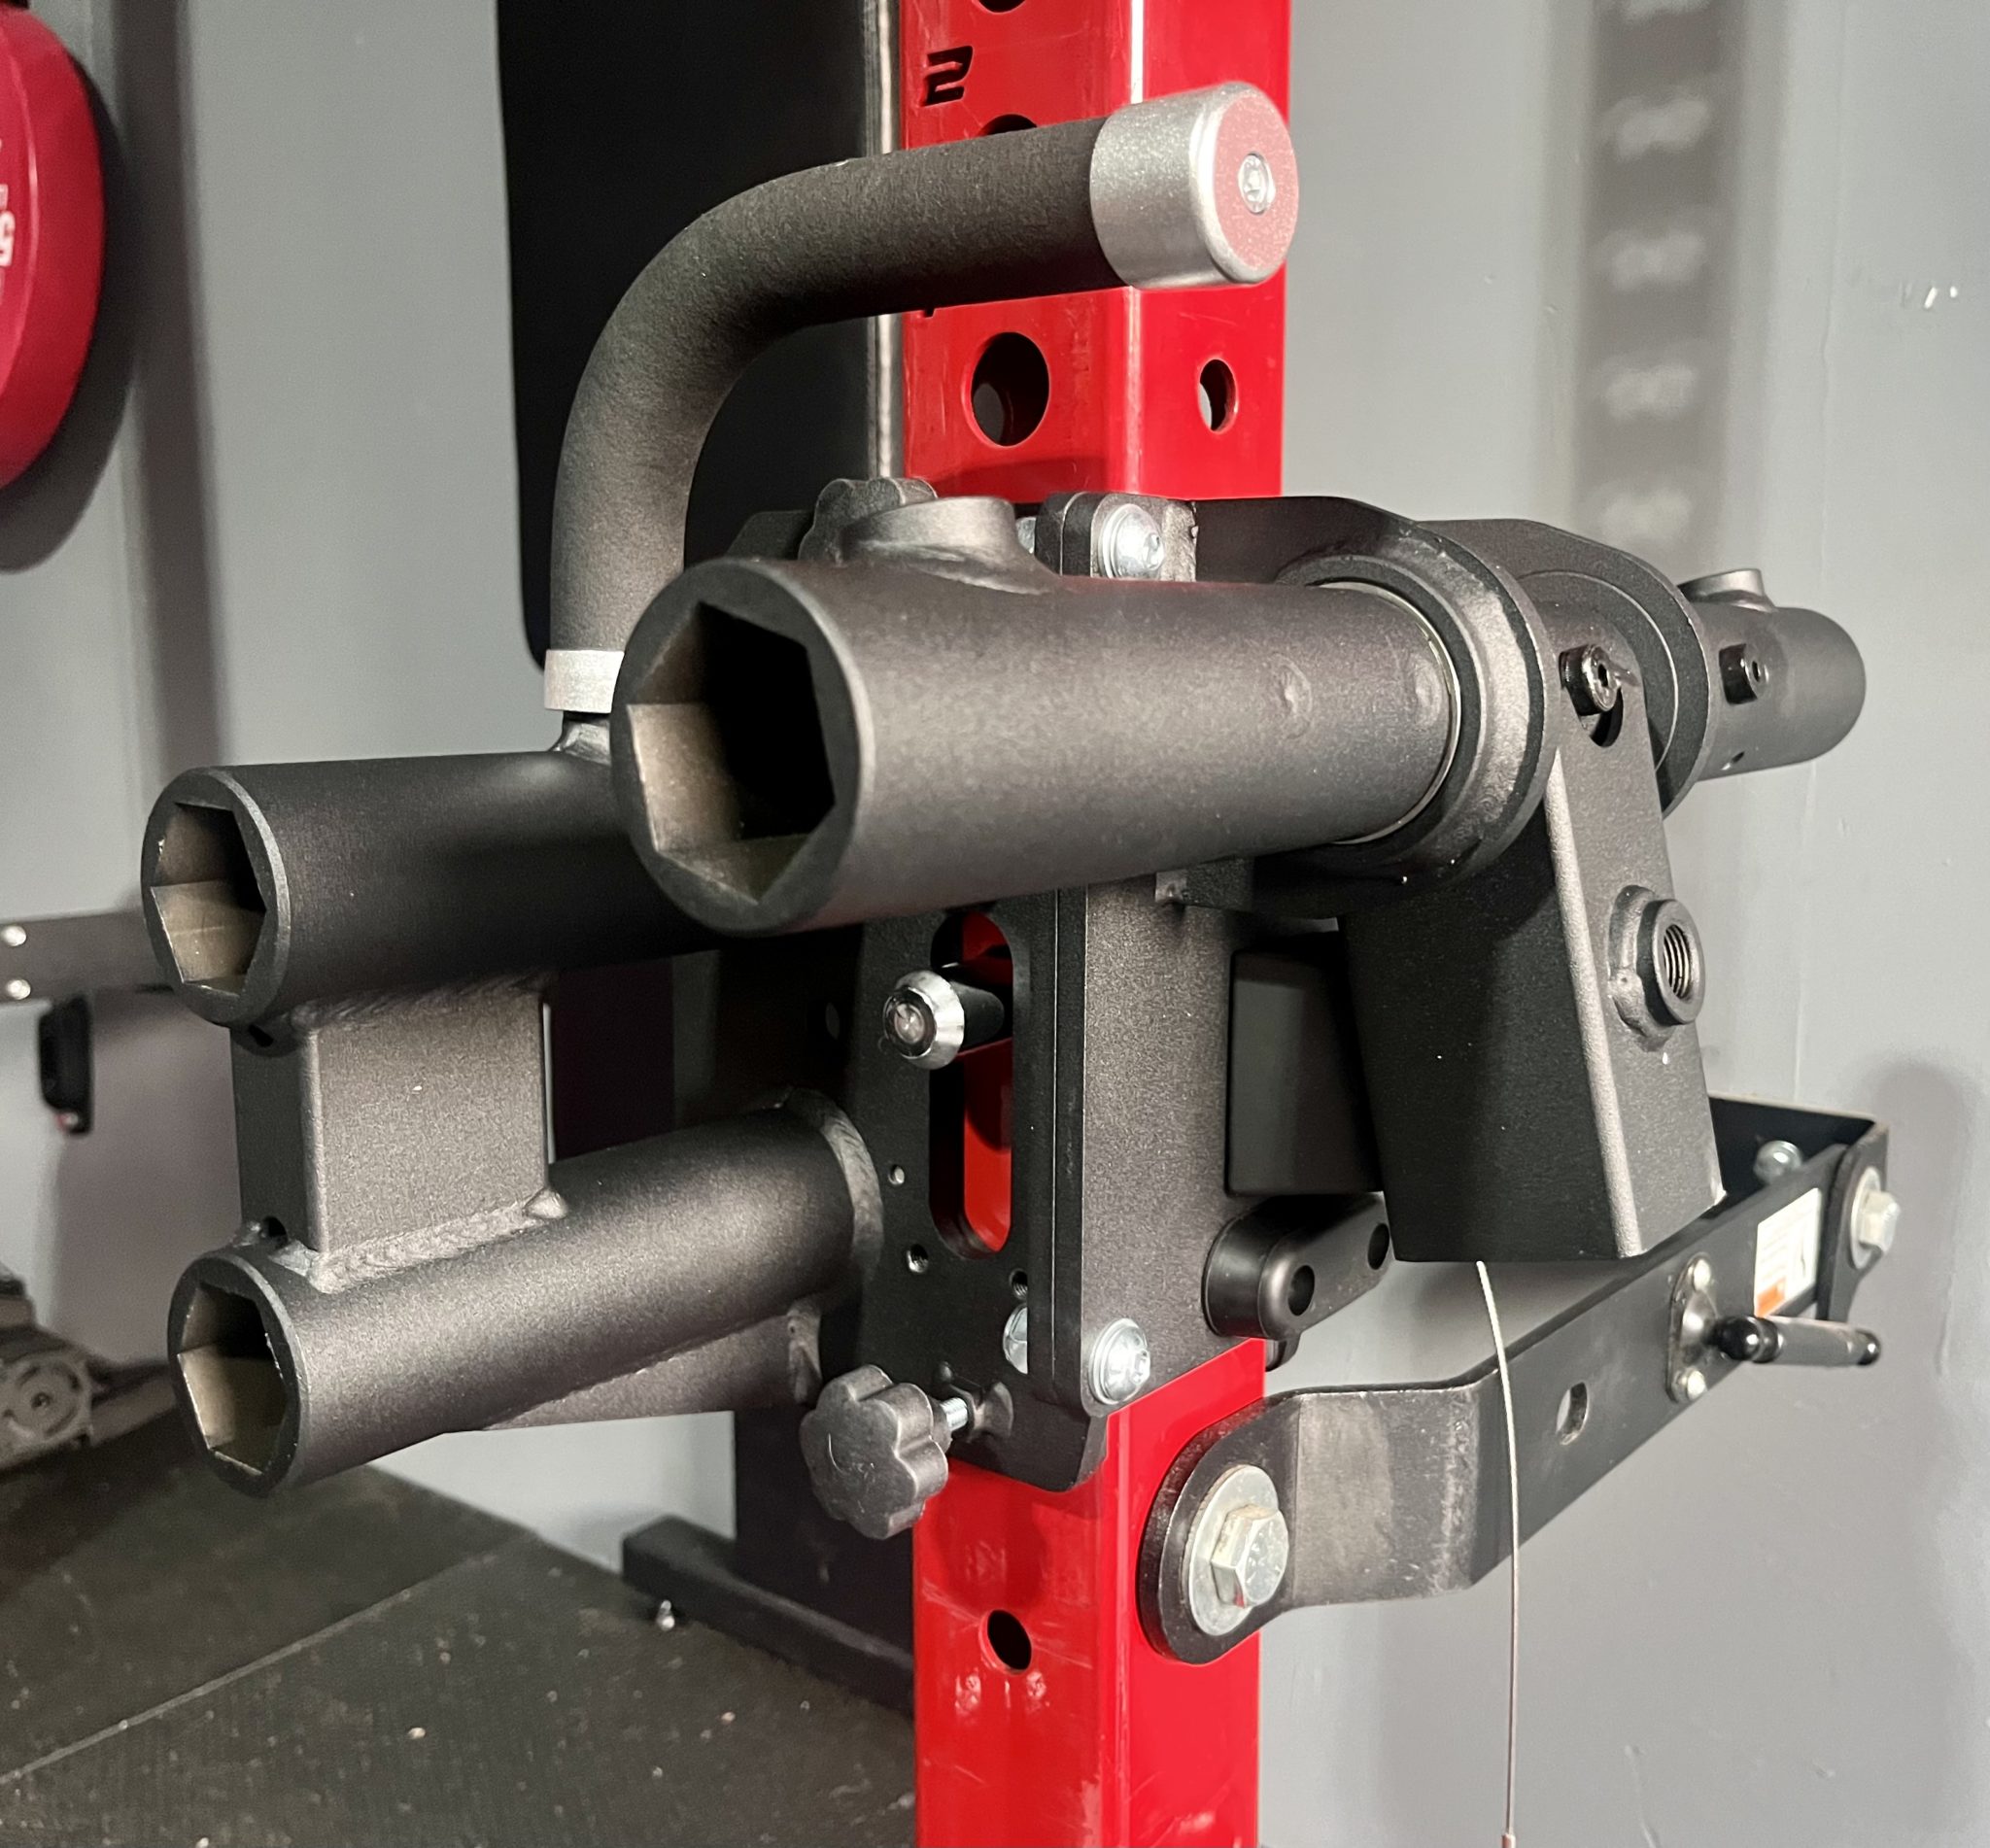
The Isolator carriage is now on so I’m gonna start adding attachments to it.
I’ll start with the weight arm.
Weight Arm & Weight Horn
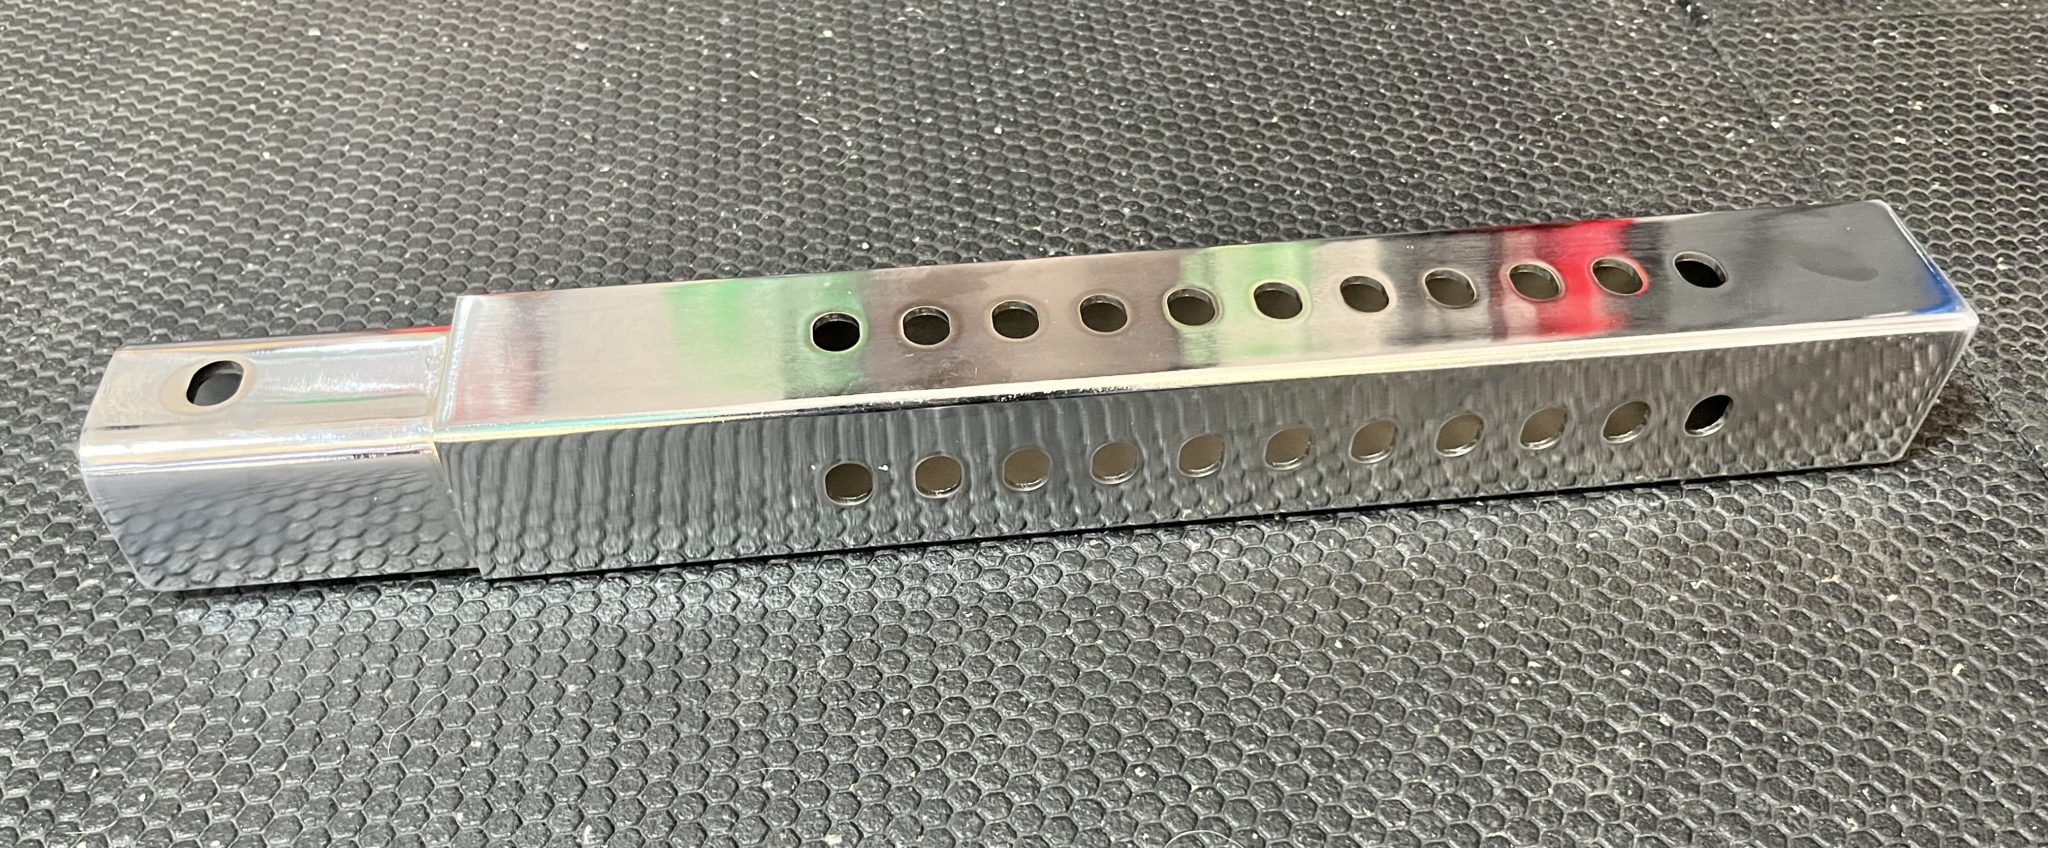
The Isolator weight arm is the all chrome arm with 11 holes on two sides.
Like the name suggest, the weight arm is what holds weight plates.
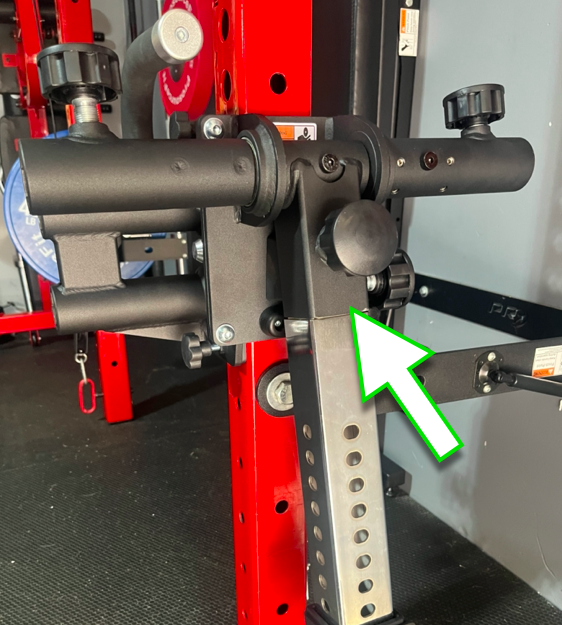
The weight arm connects to the front center of the carriage on one end and the other end holds the weight horn.
I then tighten it with a knob on the front and another one on the right side.
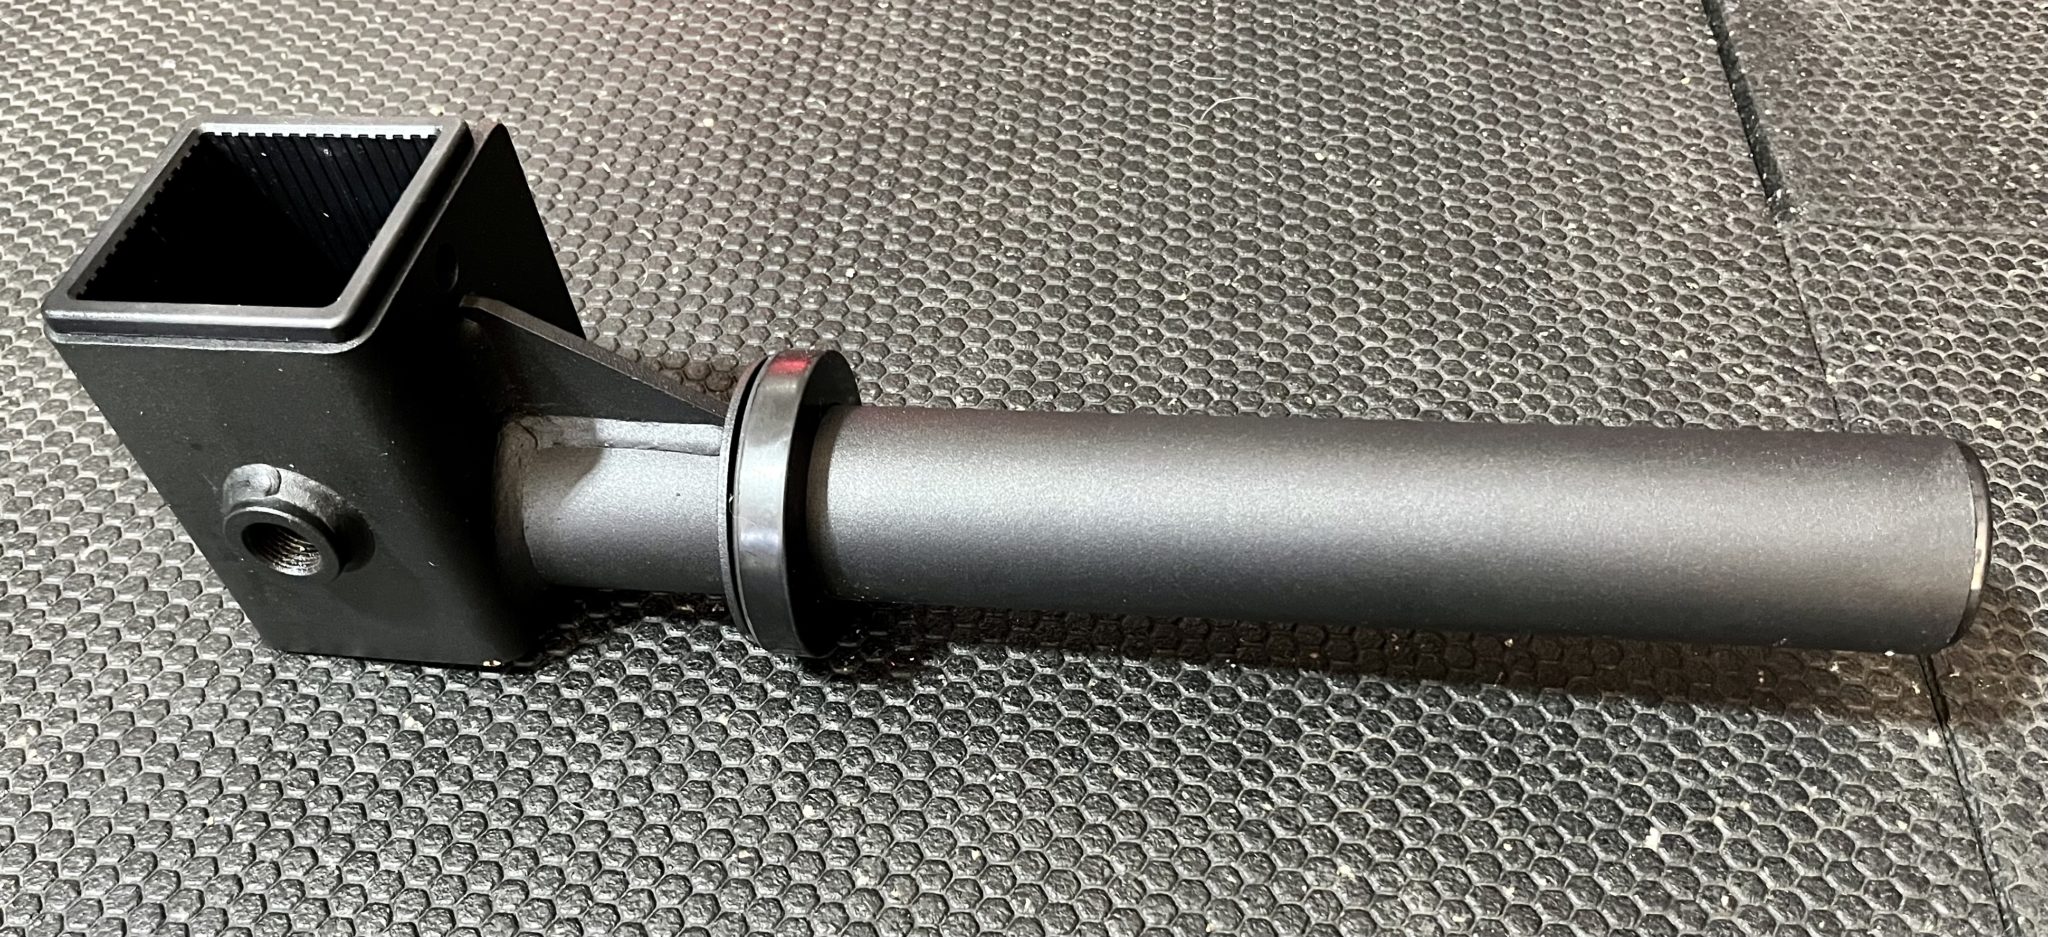
This is the weight horn and it slides right into the bottom of the weight arm.
It has a usable length of 10 1/4″ and is compatible with Olympic sized (2″ center hole) plates.
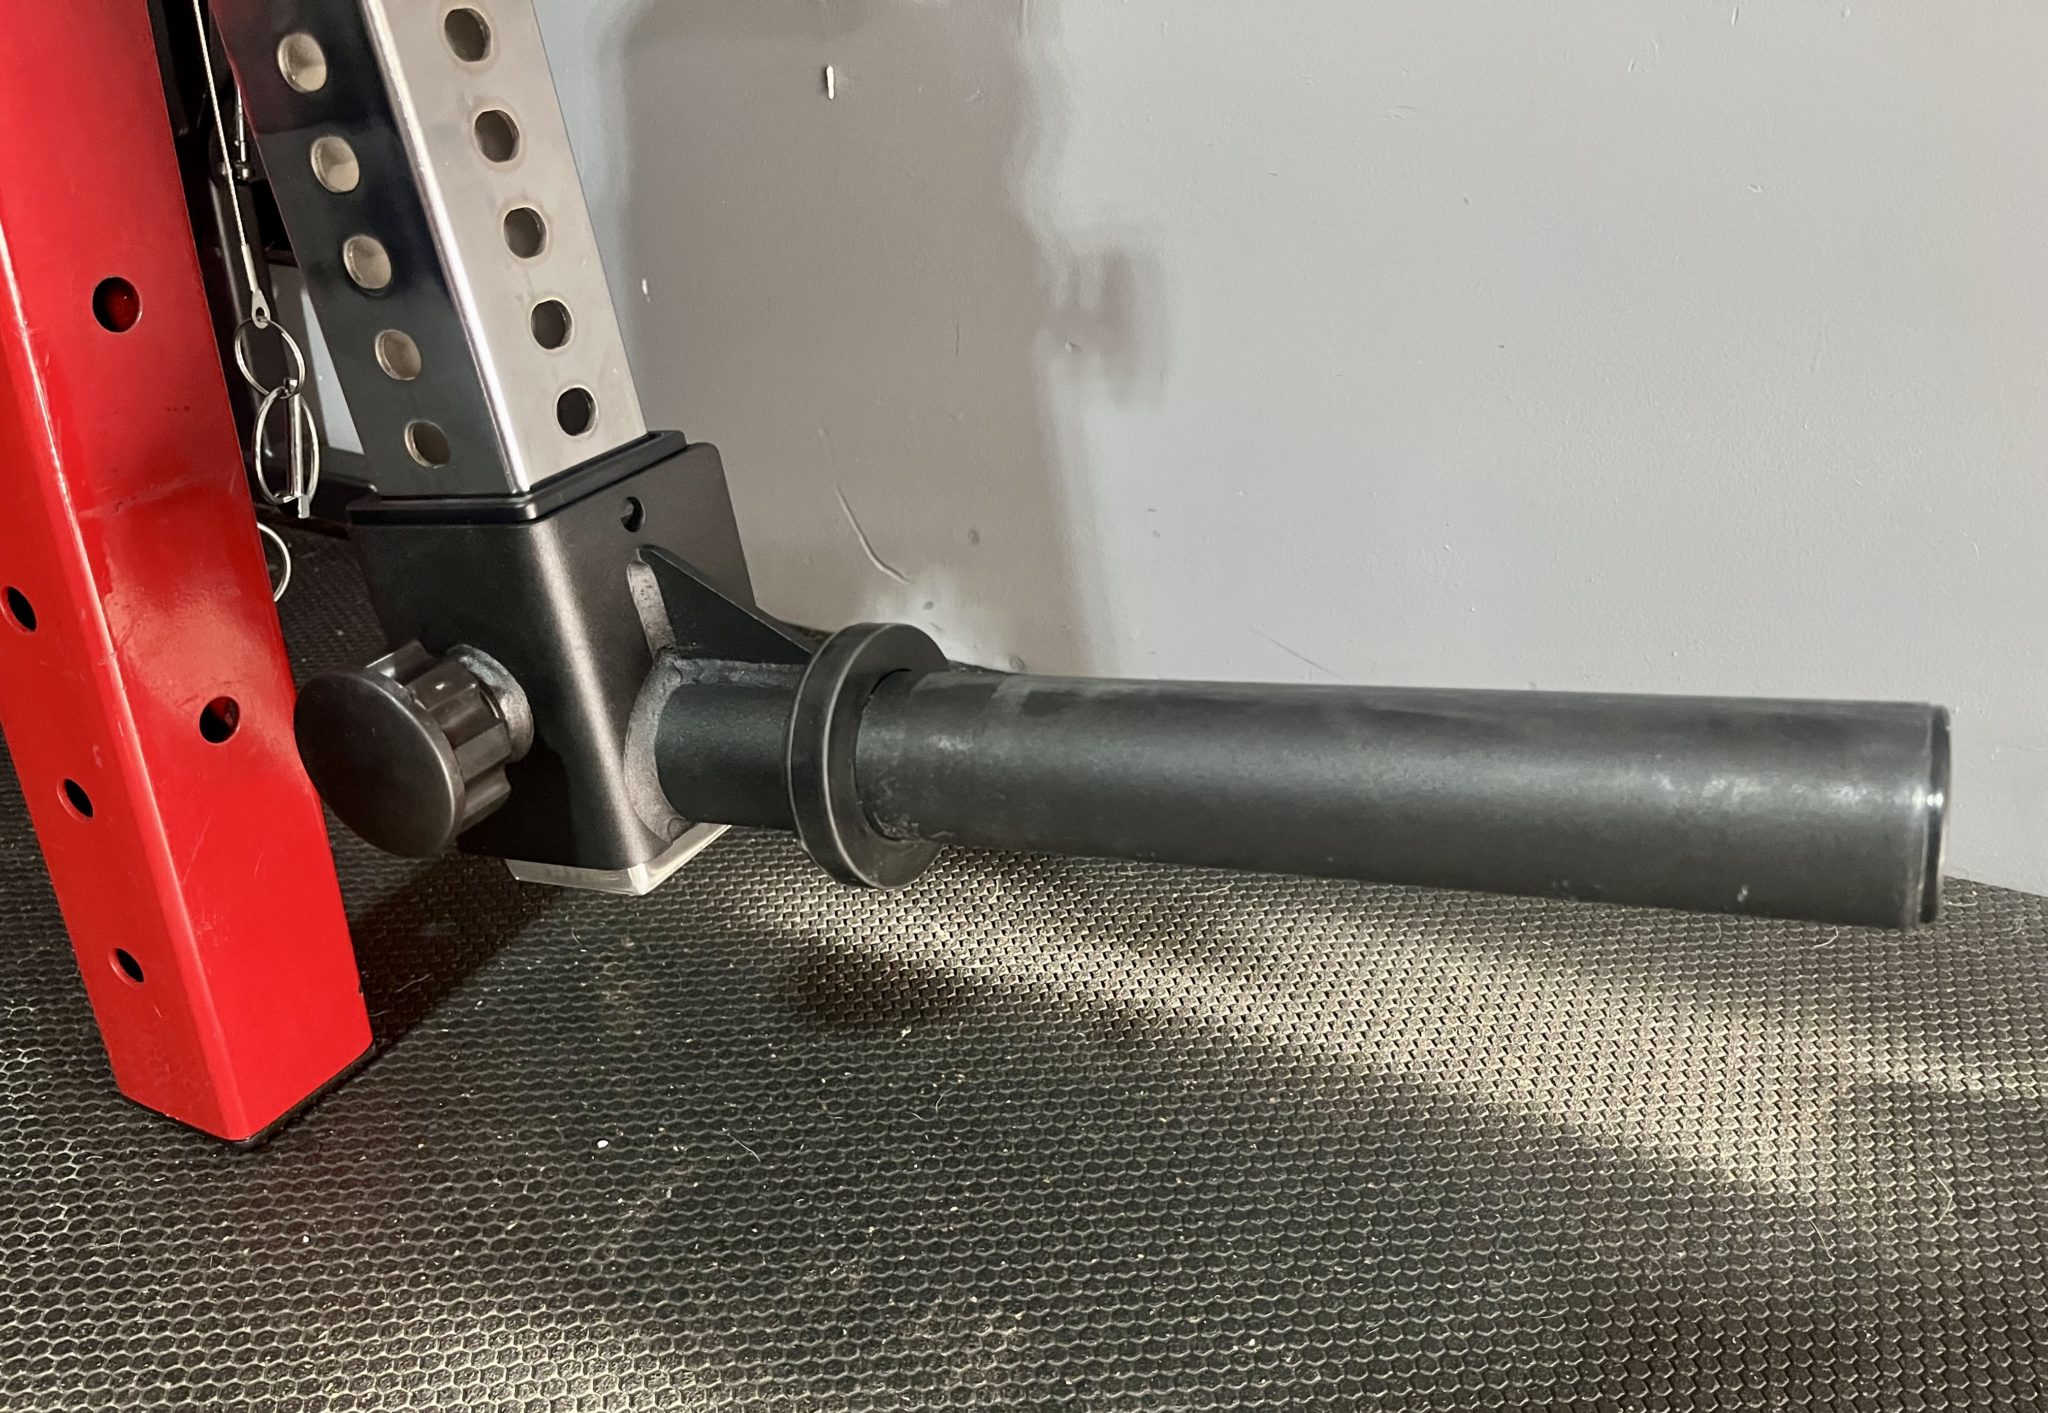
I like to have the weight horn facing forward because it works better with my set up.
But it can also be attached sideways like I show below.
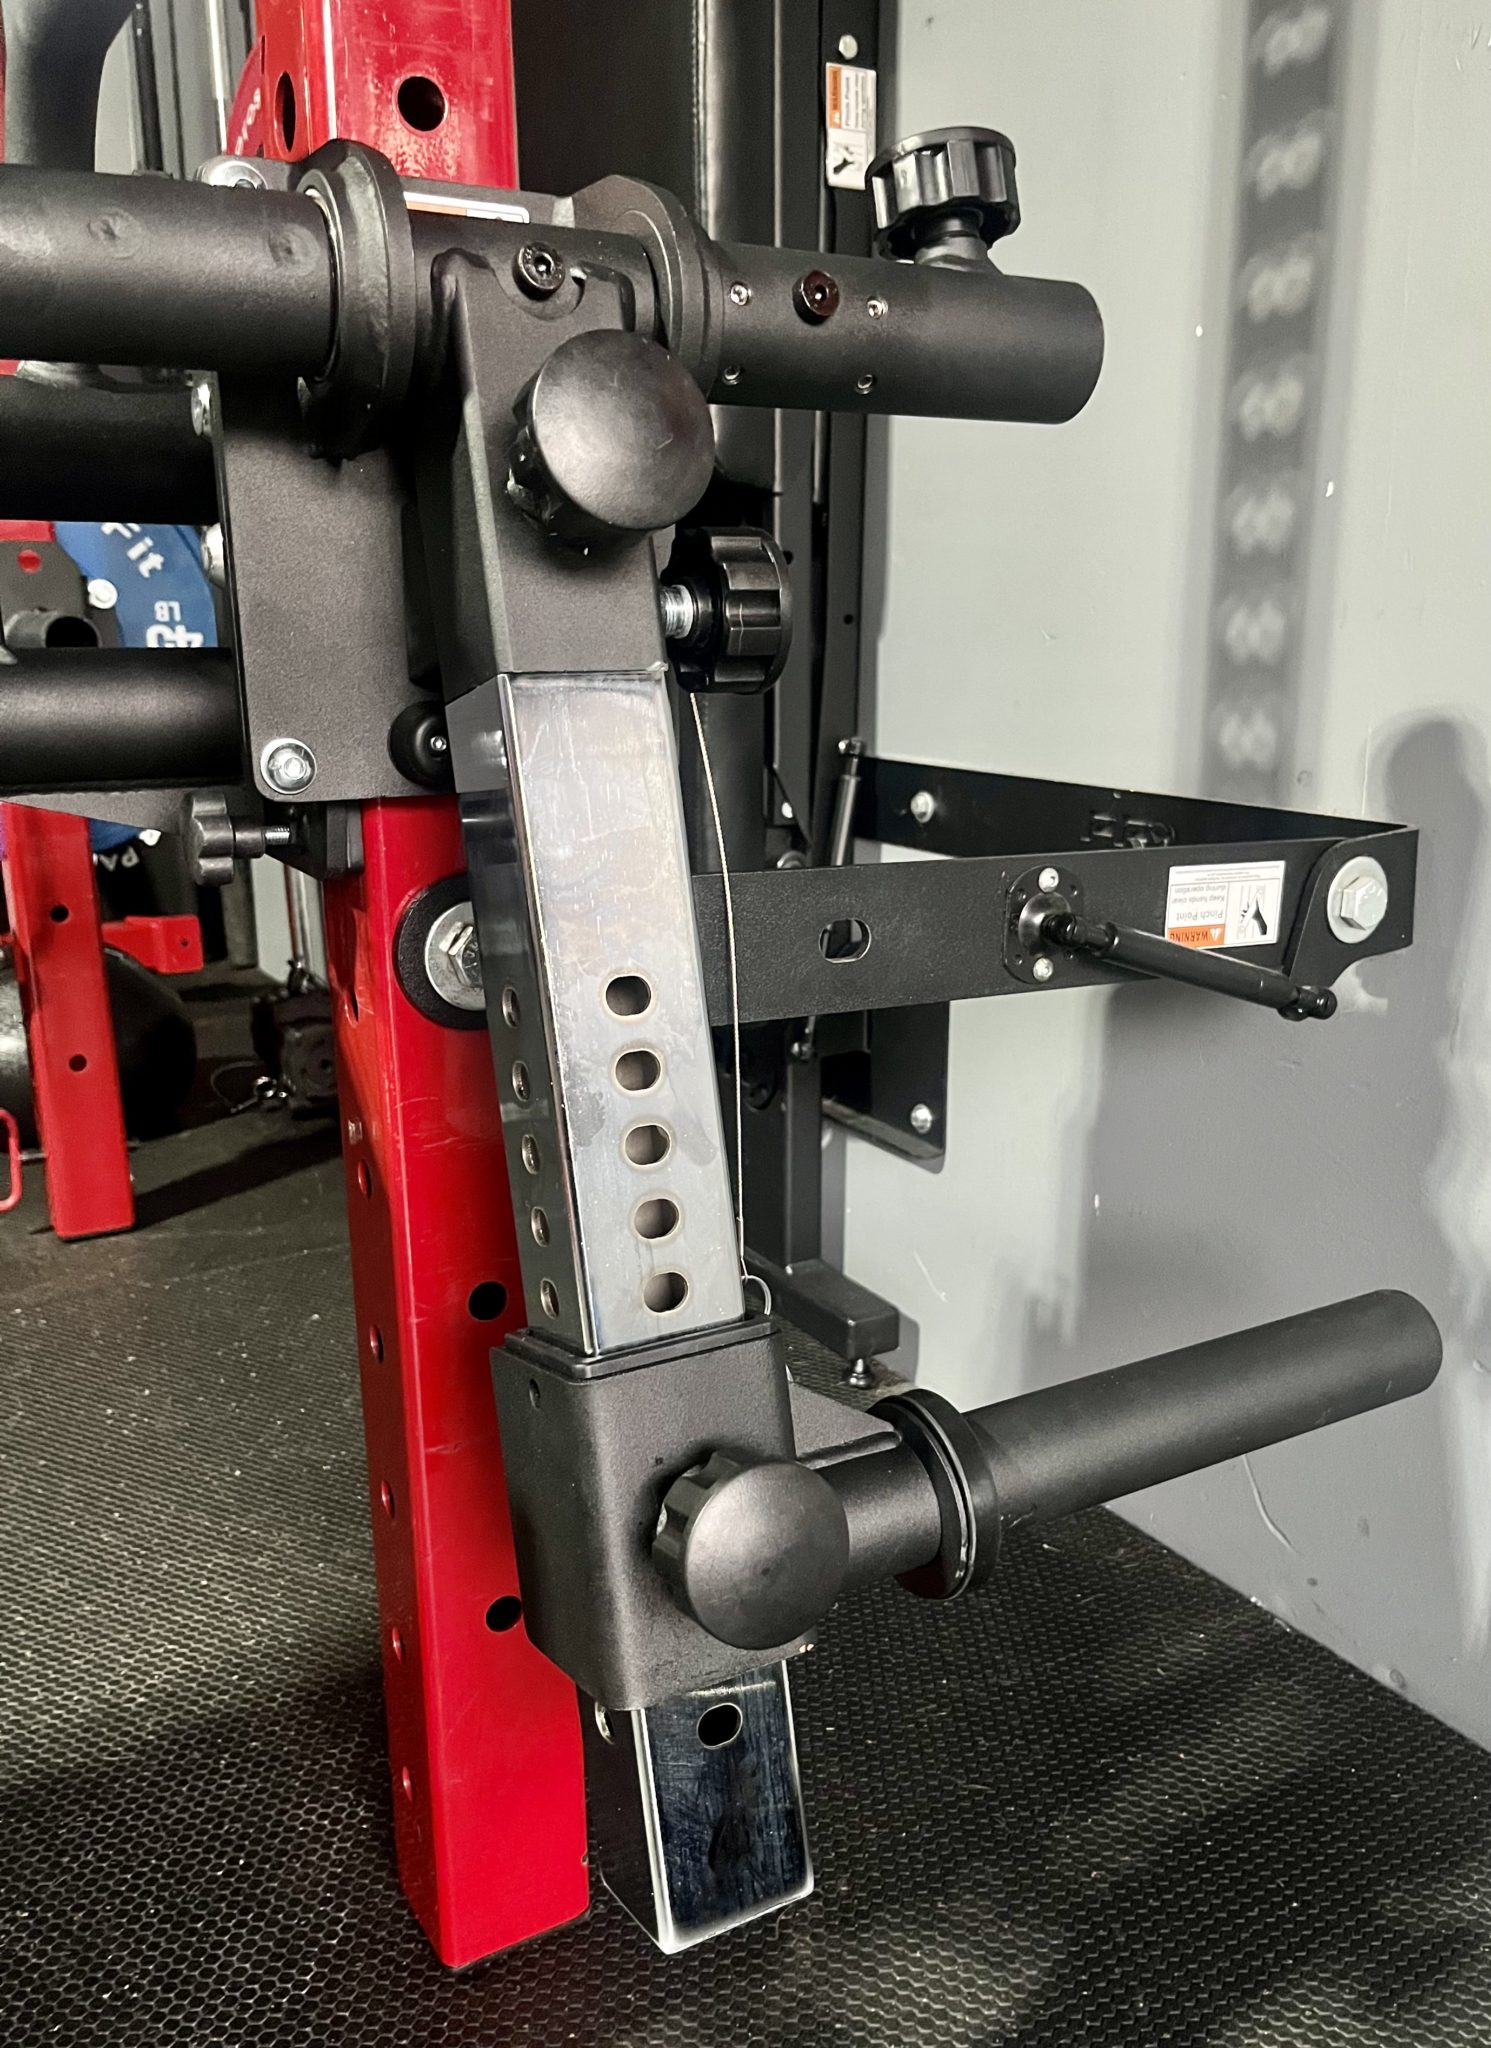
Here I set it up sideways but with my PRx weight rack being wall mounted, the weight horn sits too close to the wall making it hard to load bumper plates.
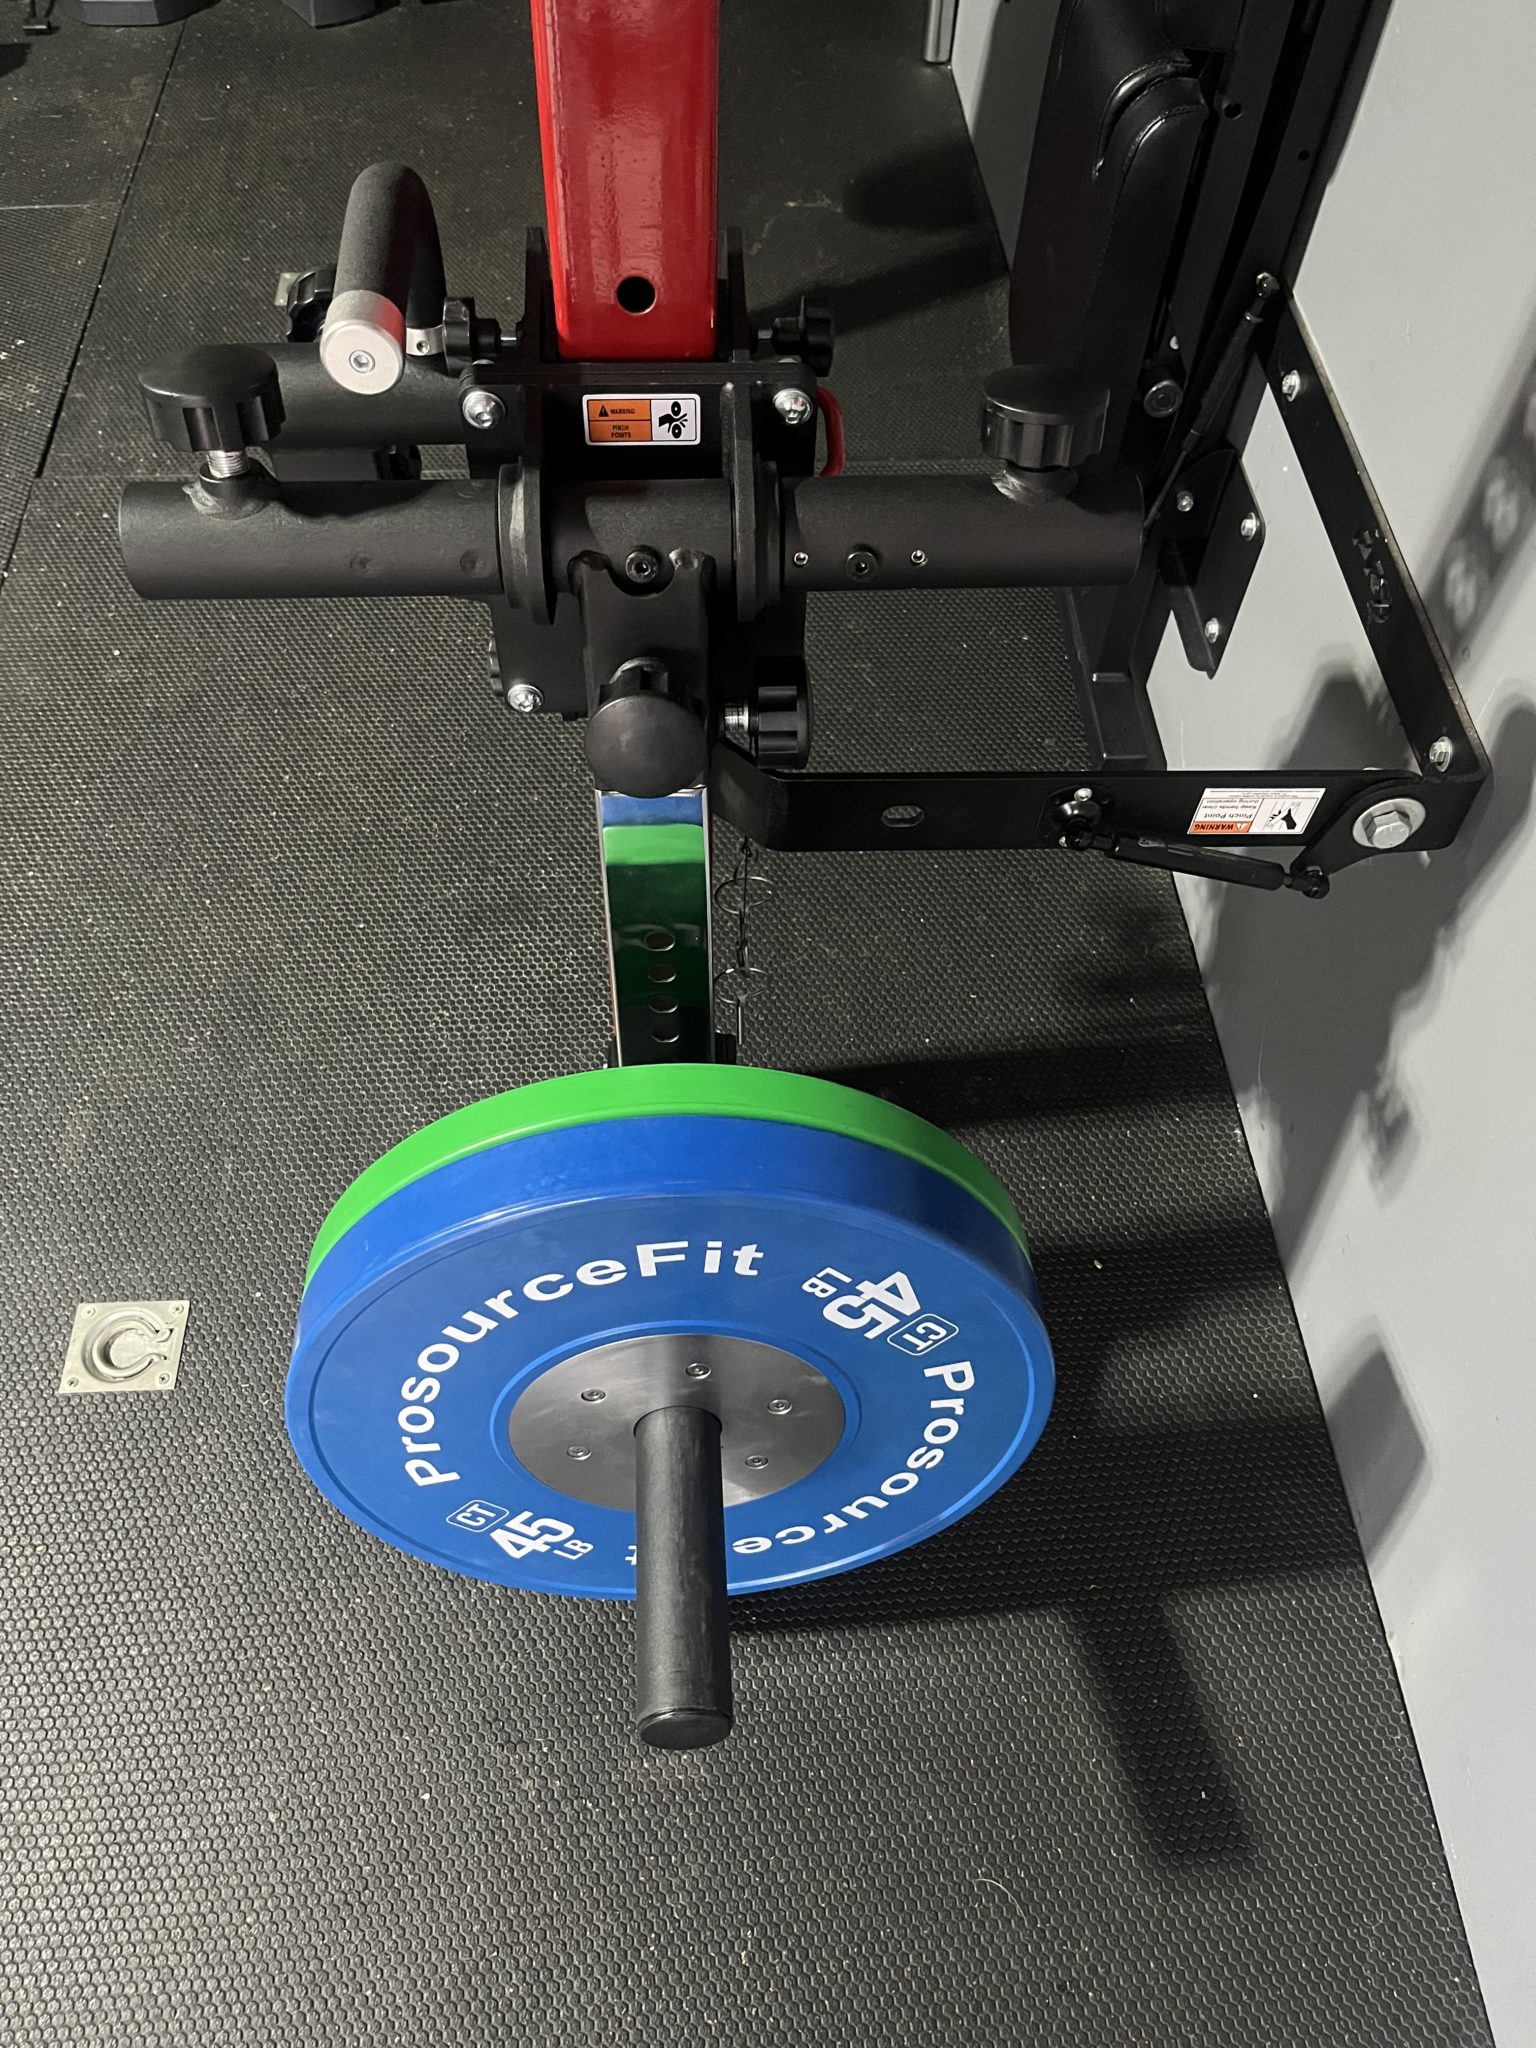
This forward facing set up makes loading and unloading plates way easier.
Now that the weight arm is all set up, I’m gonna attach the lever arm.
Lever Arm
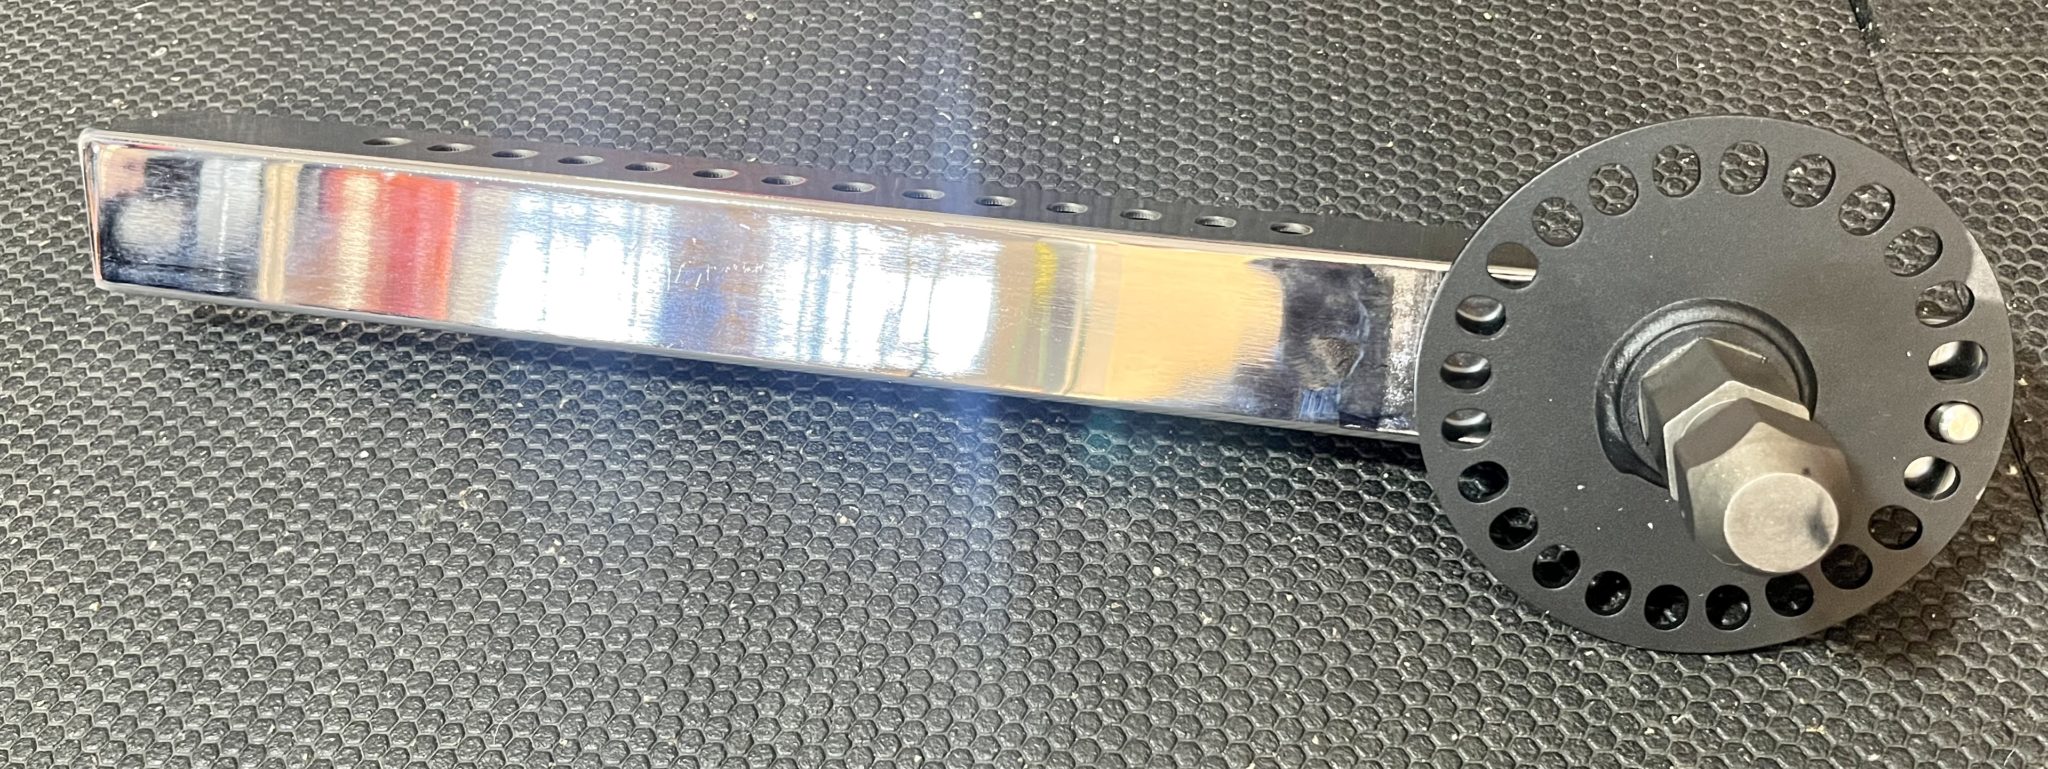
The lever arm is the other chrome bar but this one has a wheel and hexagonal male piece on one end.
This piece inserts into the left side of the carriage and helps to move the weight.
Bulletproof now sells an optional long lever arm that makes exercises flow smoother especially if you have longer limbs.
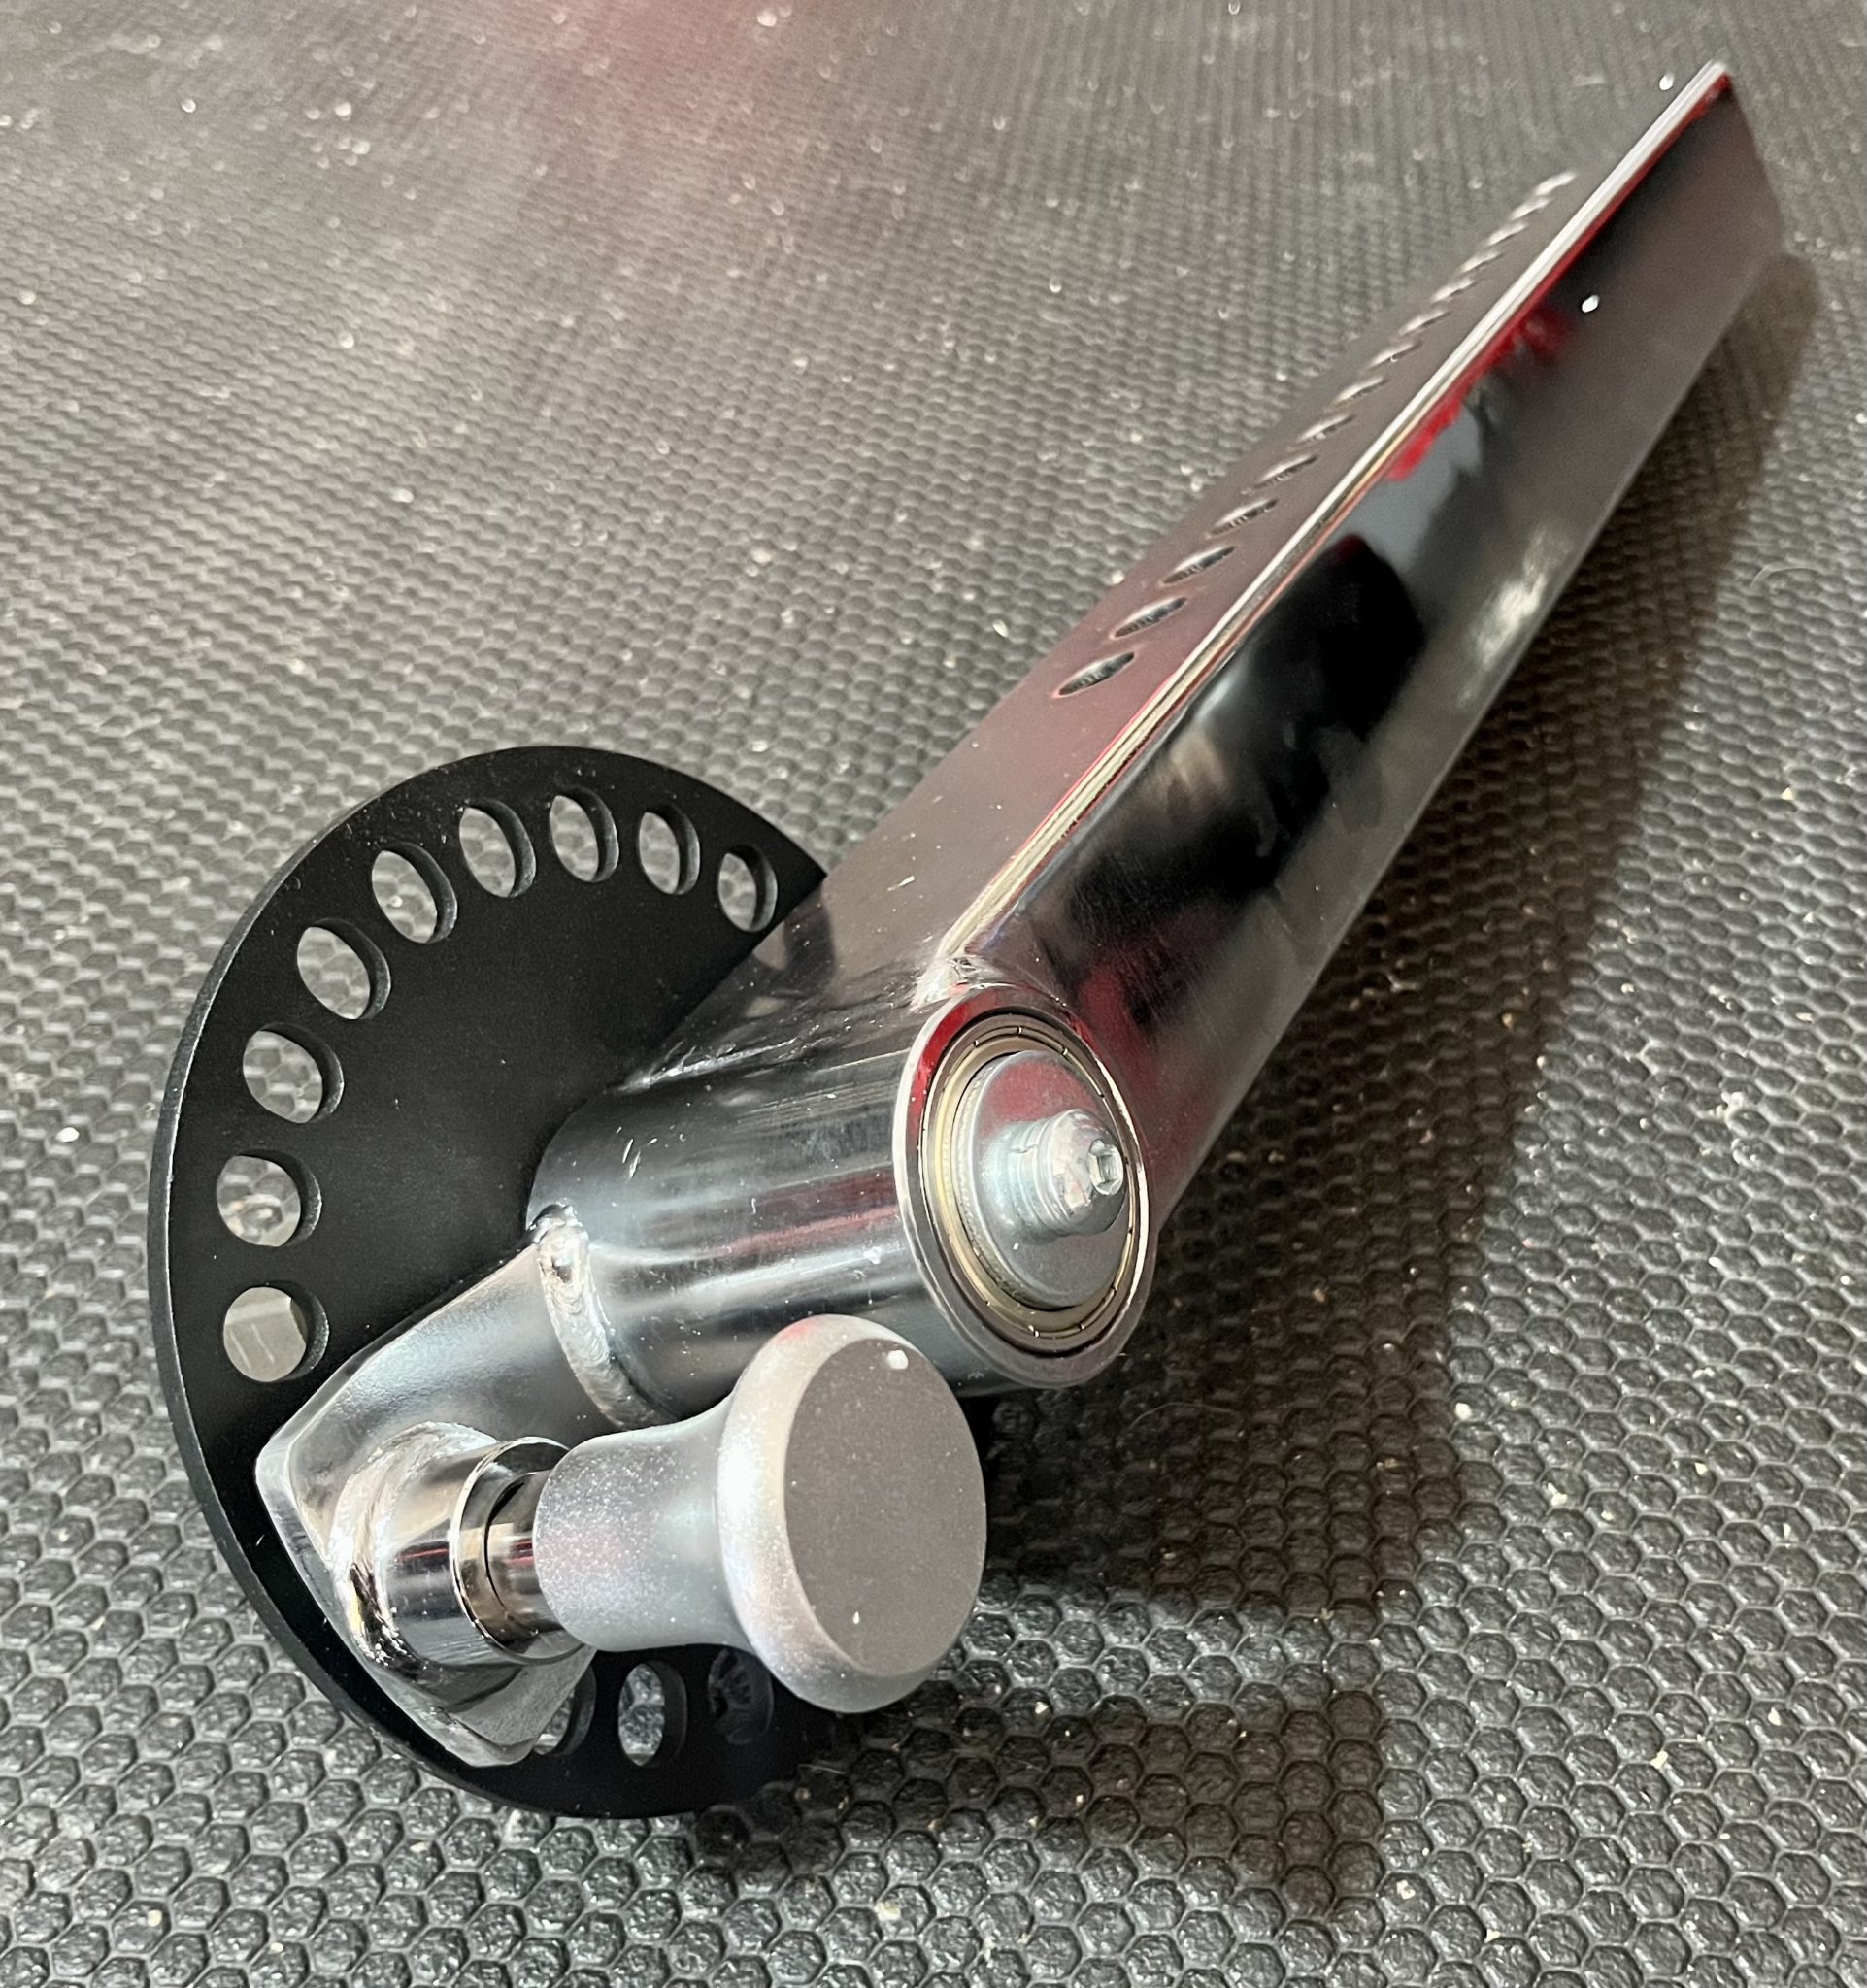
On the other side of the wheel there’s a pop pin that locks the lever arm at different angles (360 degrees of rotation).
Now I’m going to add the lever arm to the Isolator carriage.
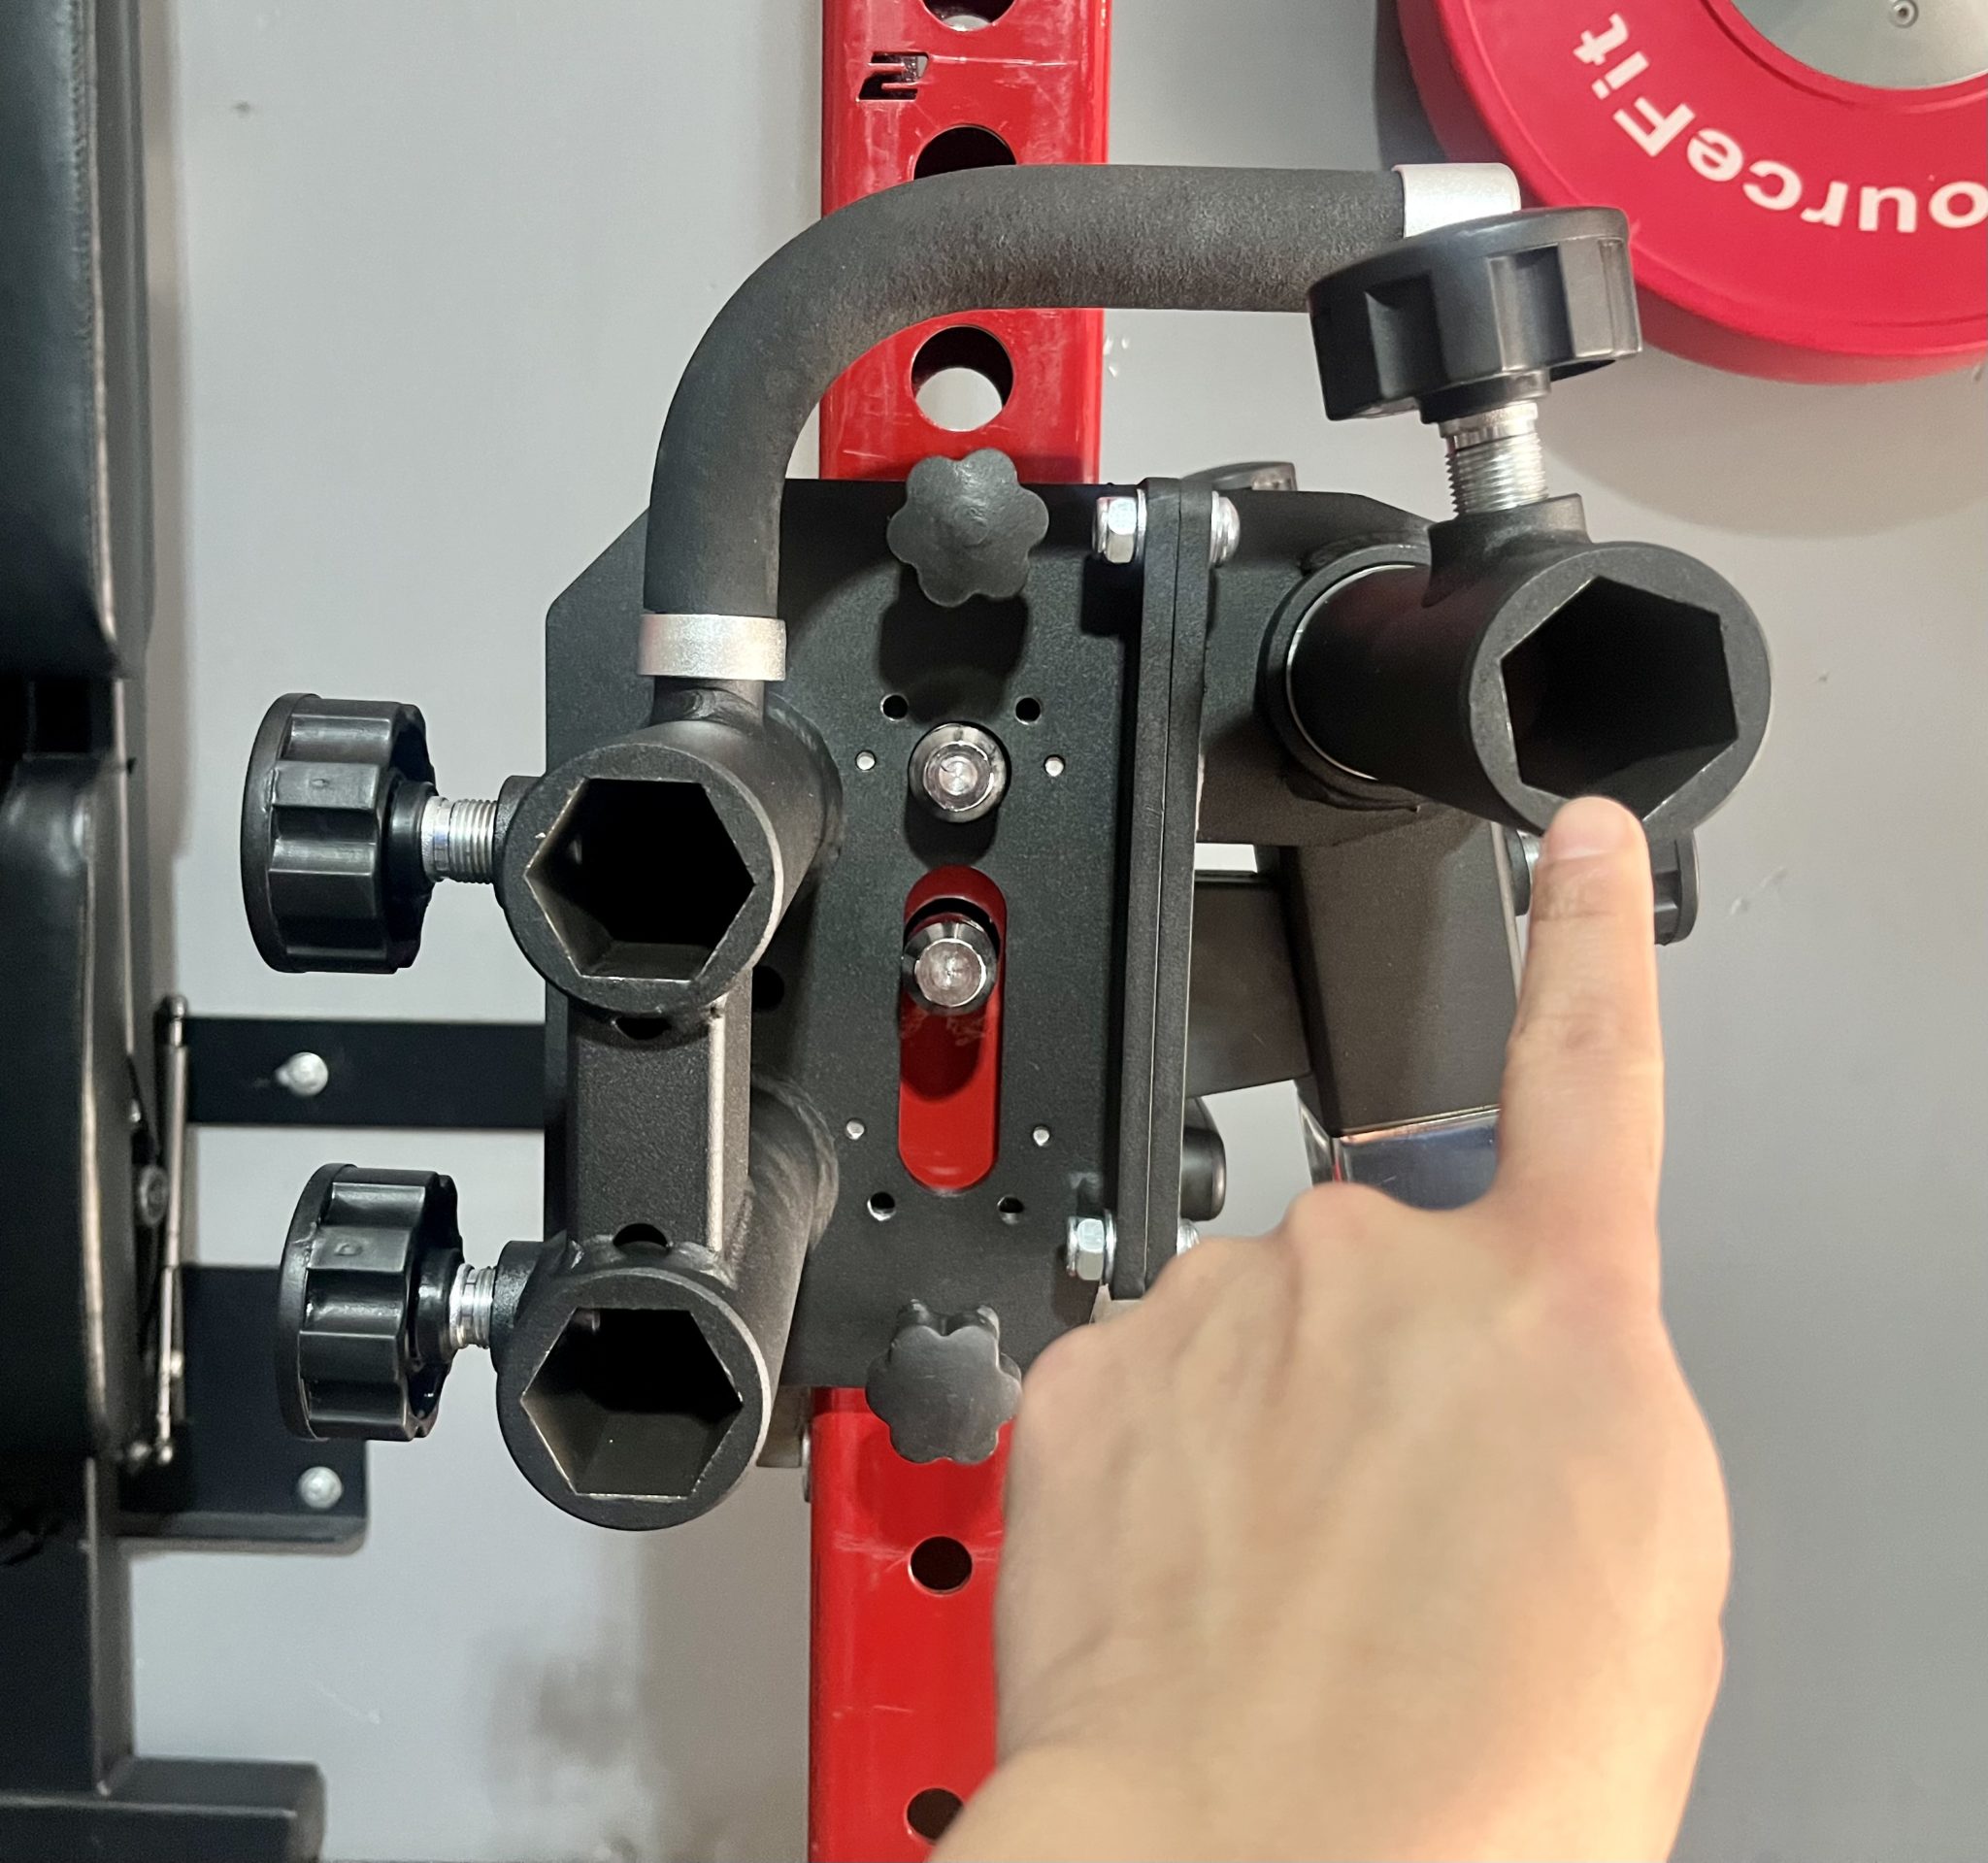
The lever arm goes on the hex port I’m pointing to.
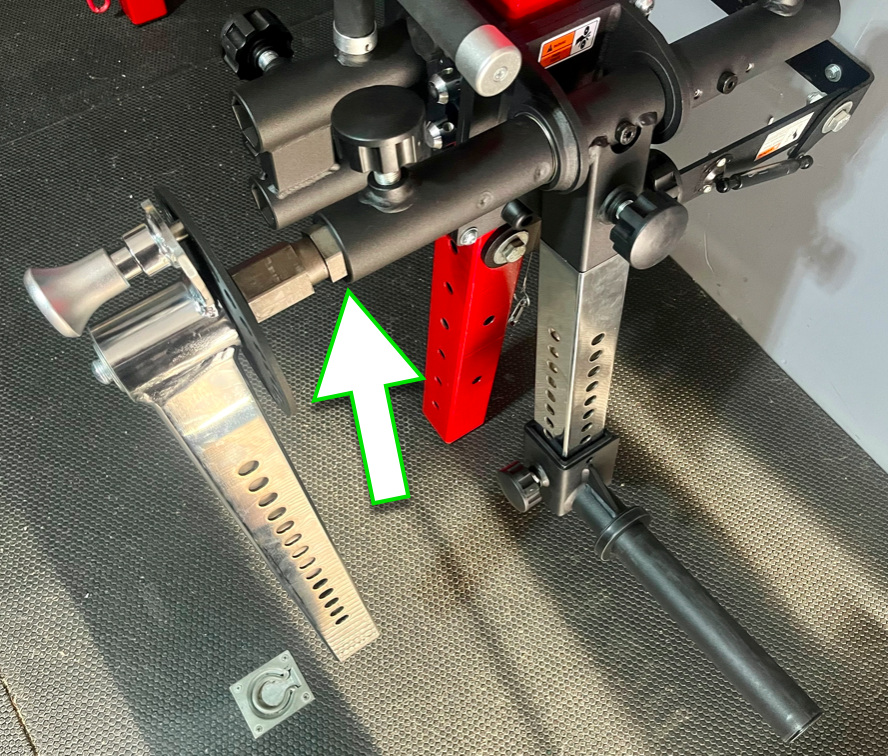
I push the male piece of the lever arm into the hex port until it clicks.
Then turn the knob right above it until it’s tight.
The other end of the lever arm is where I add different attachments like the curl arm and roller pads.
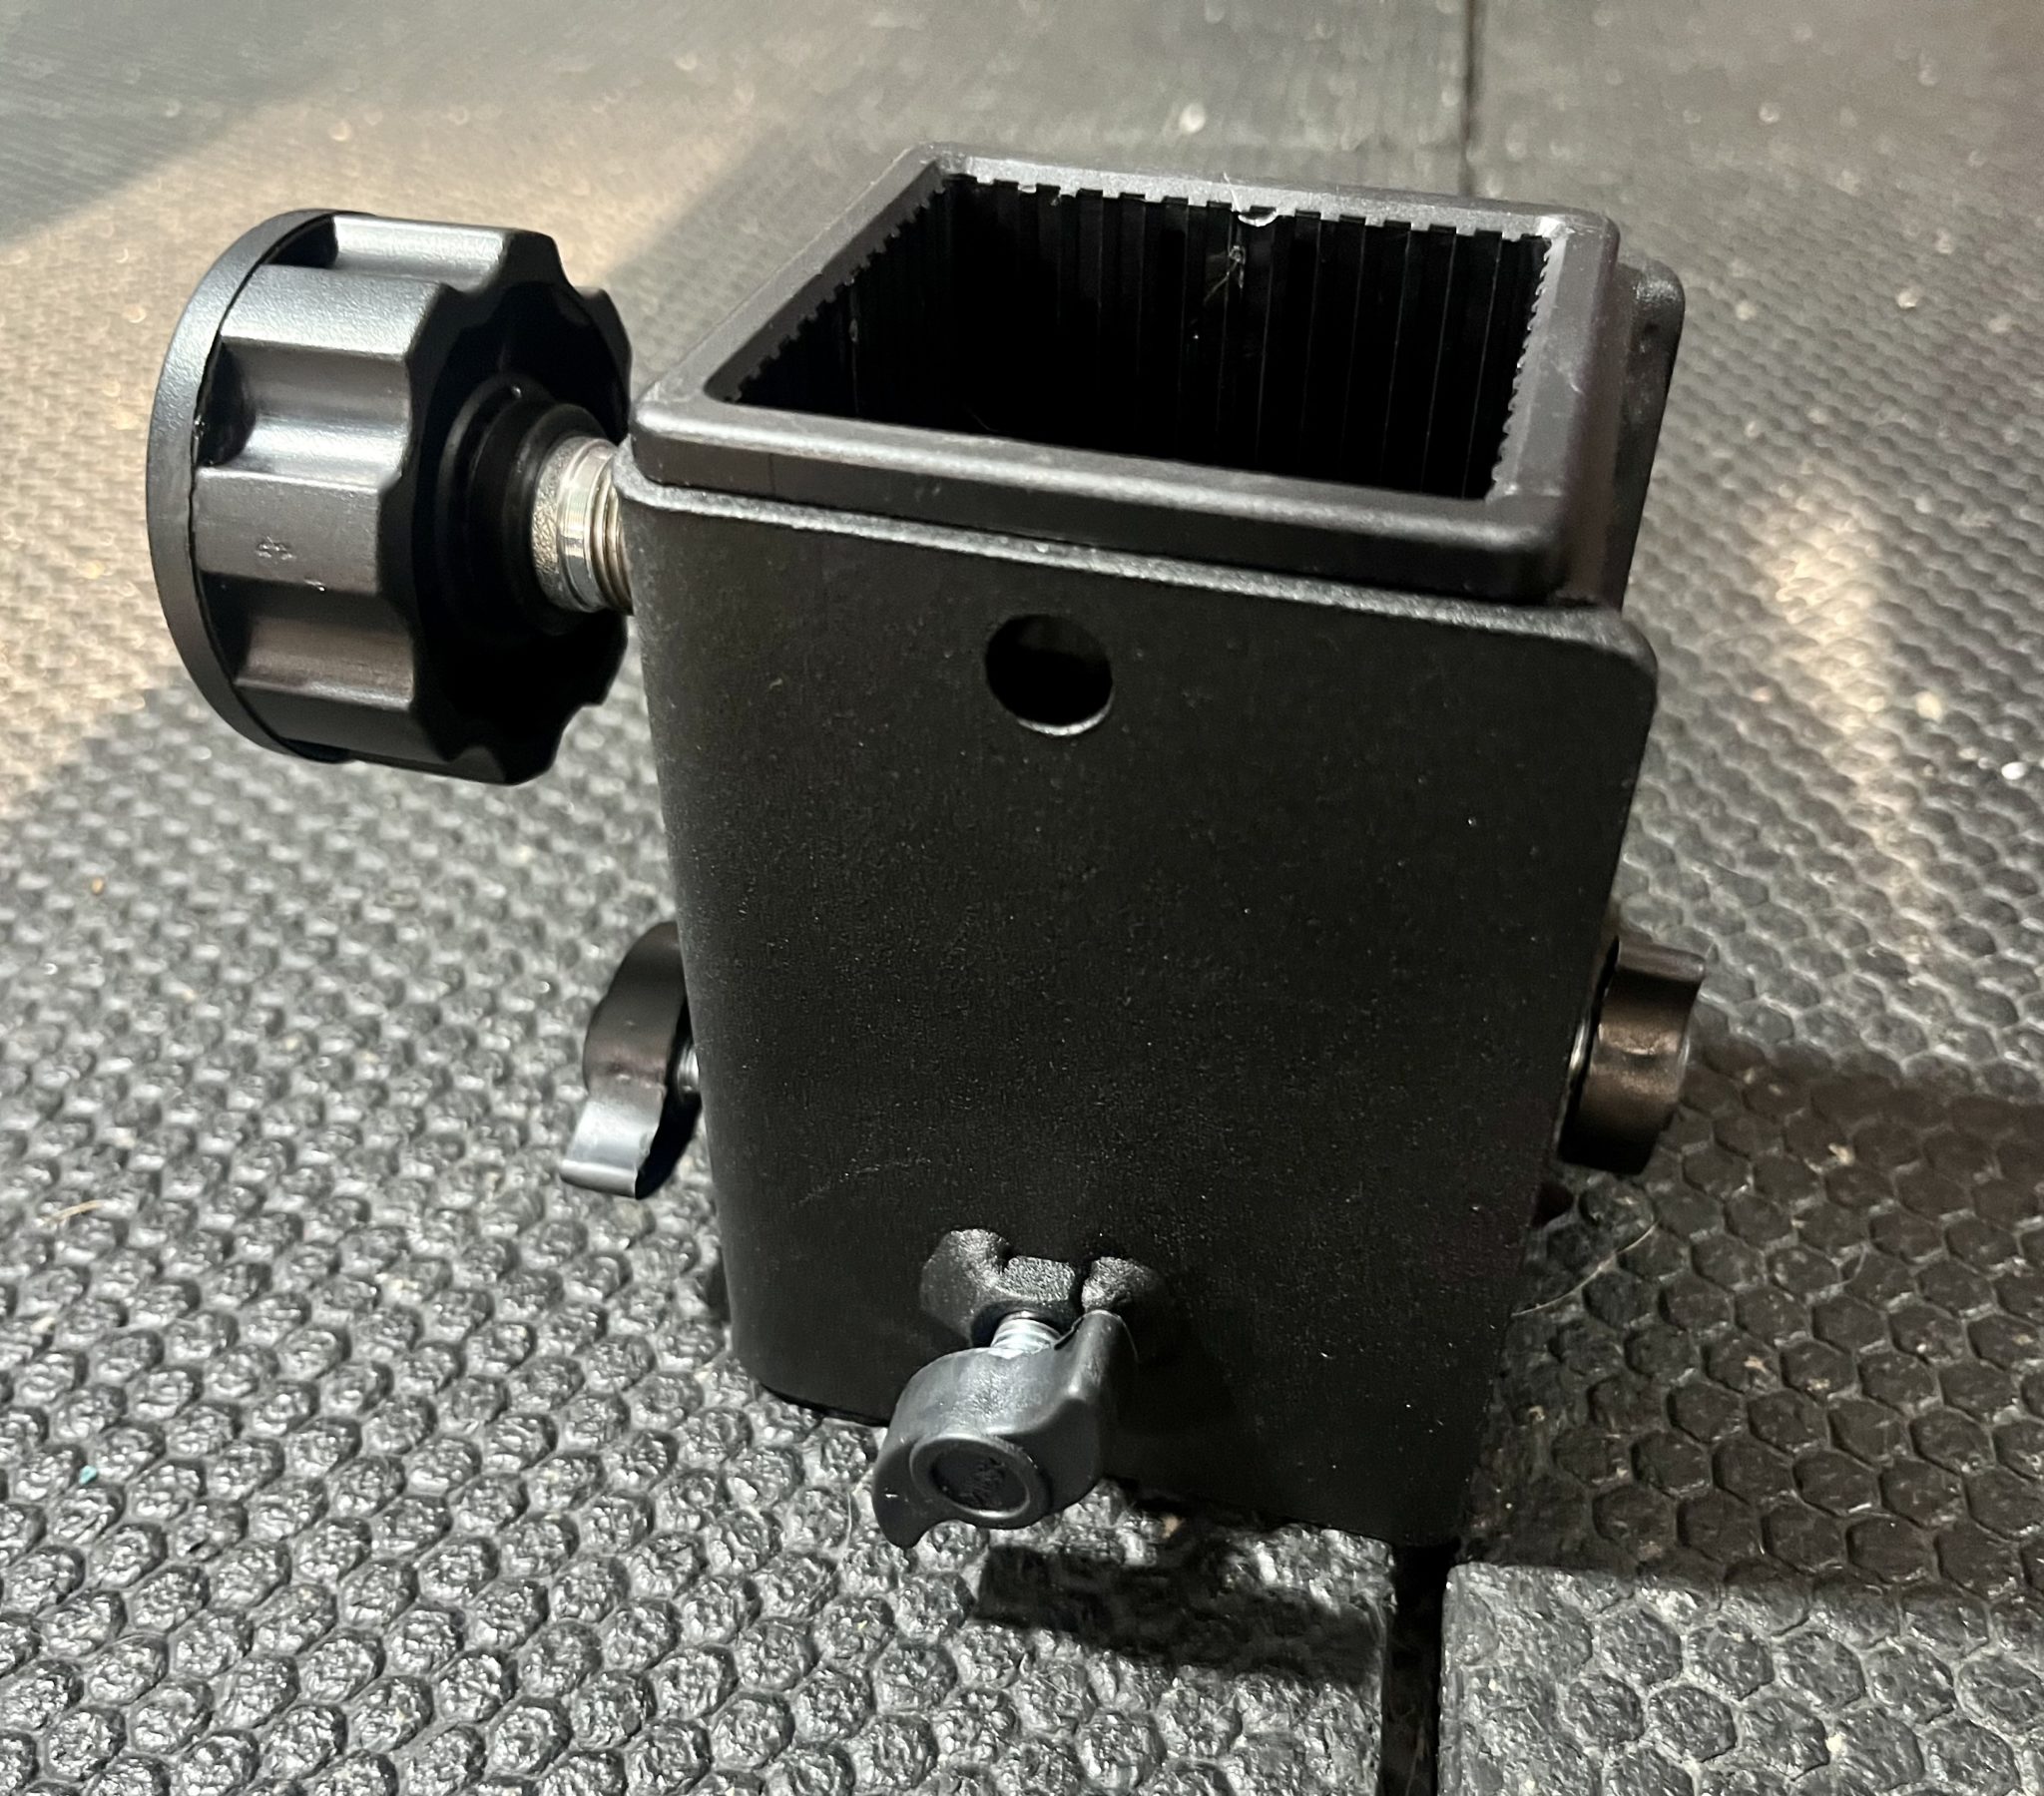
That’s done via this piece shown above.
The big knob clamps this piece down to the lever am, the other 3 smaller knobs act as counter torque.
Counter torque knobs are an excellent idea because this prevents uneven loading on the attachments that connect to the lever arm.
So when doing leg extensions/curls or preacher curls, the attachment remains even and both my legs/arms get an equal load.
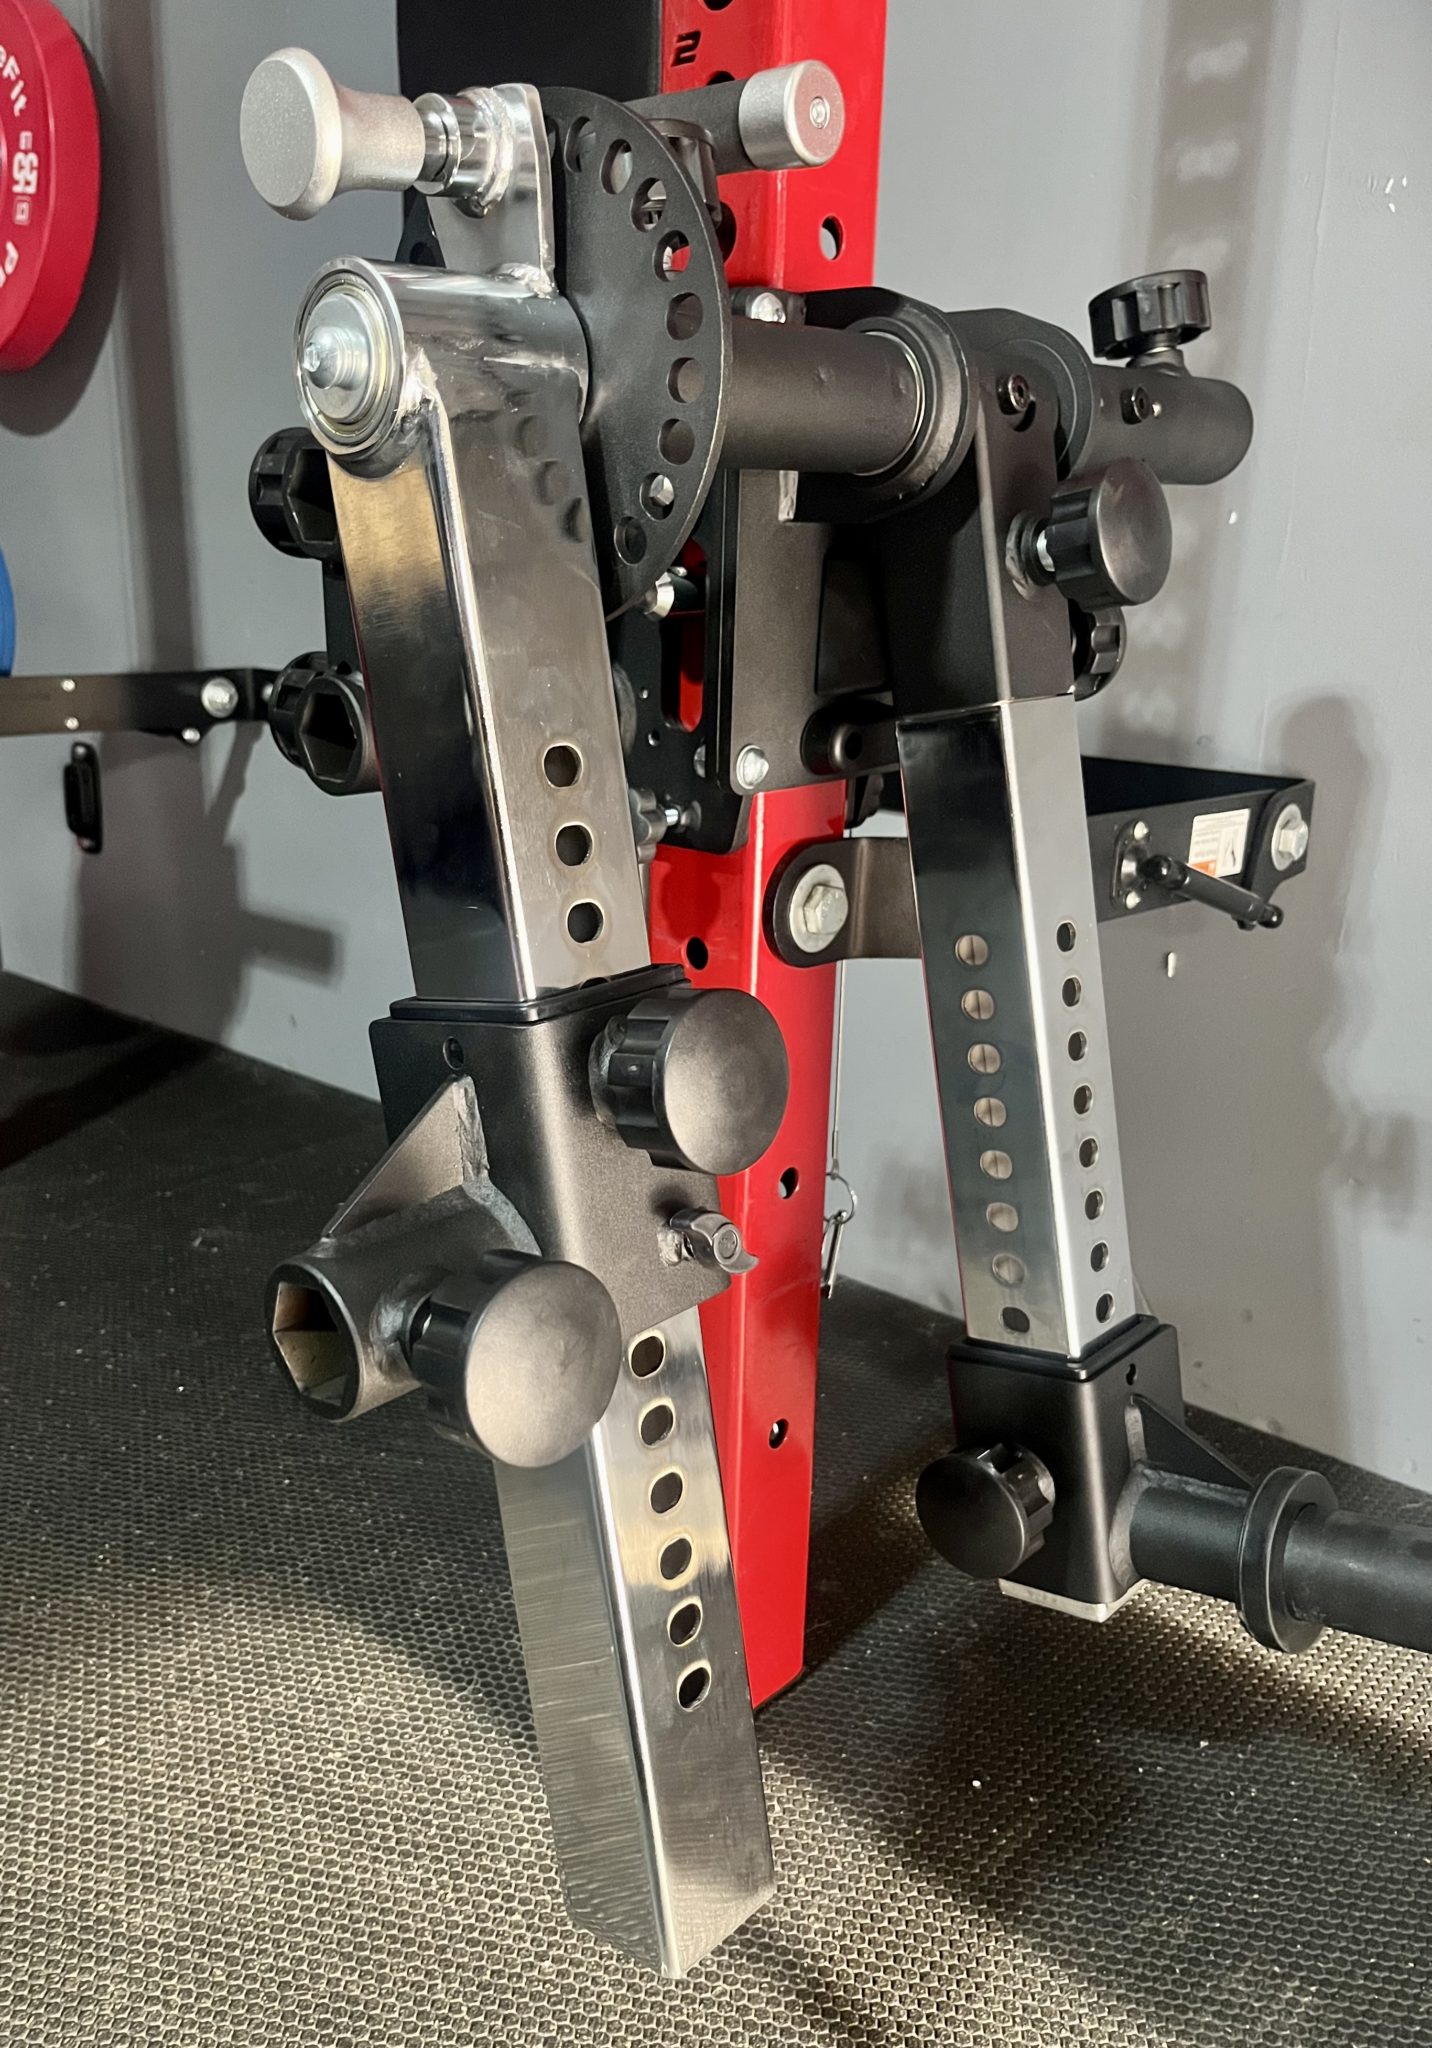
I slide this up the lever arm then screw in 4 knobs to hold it in place.
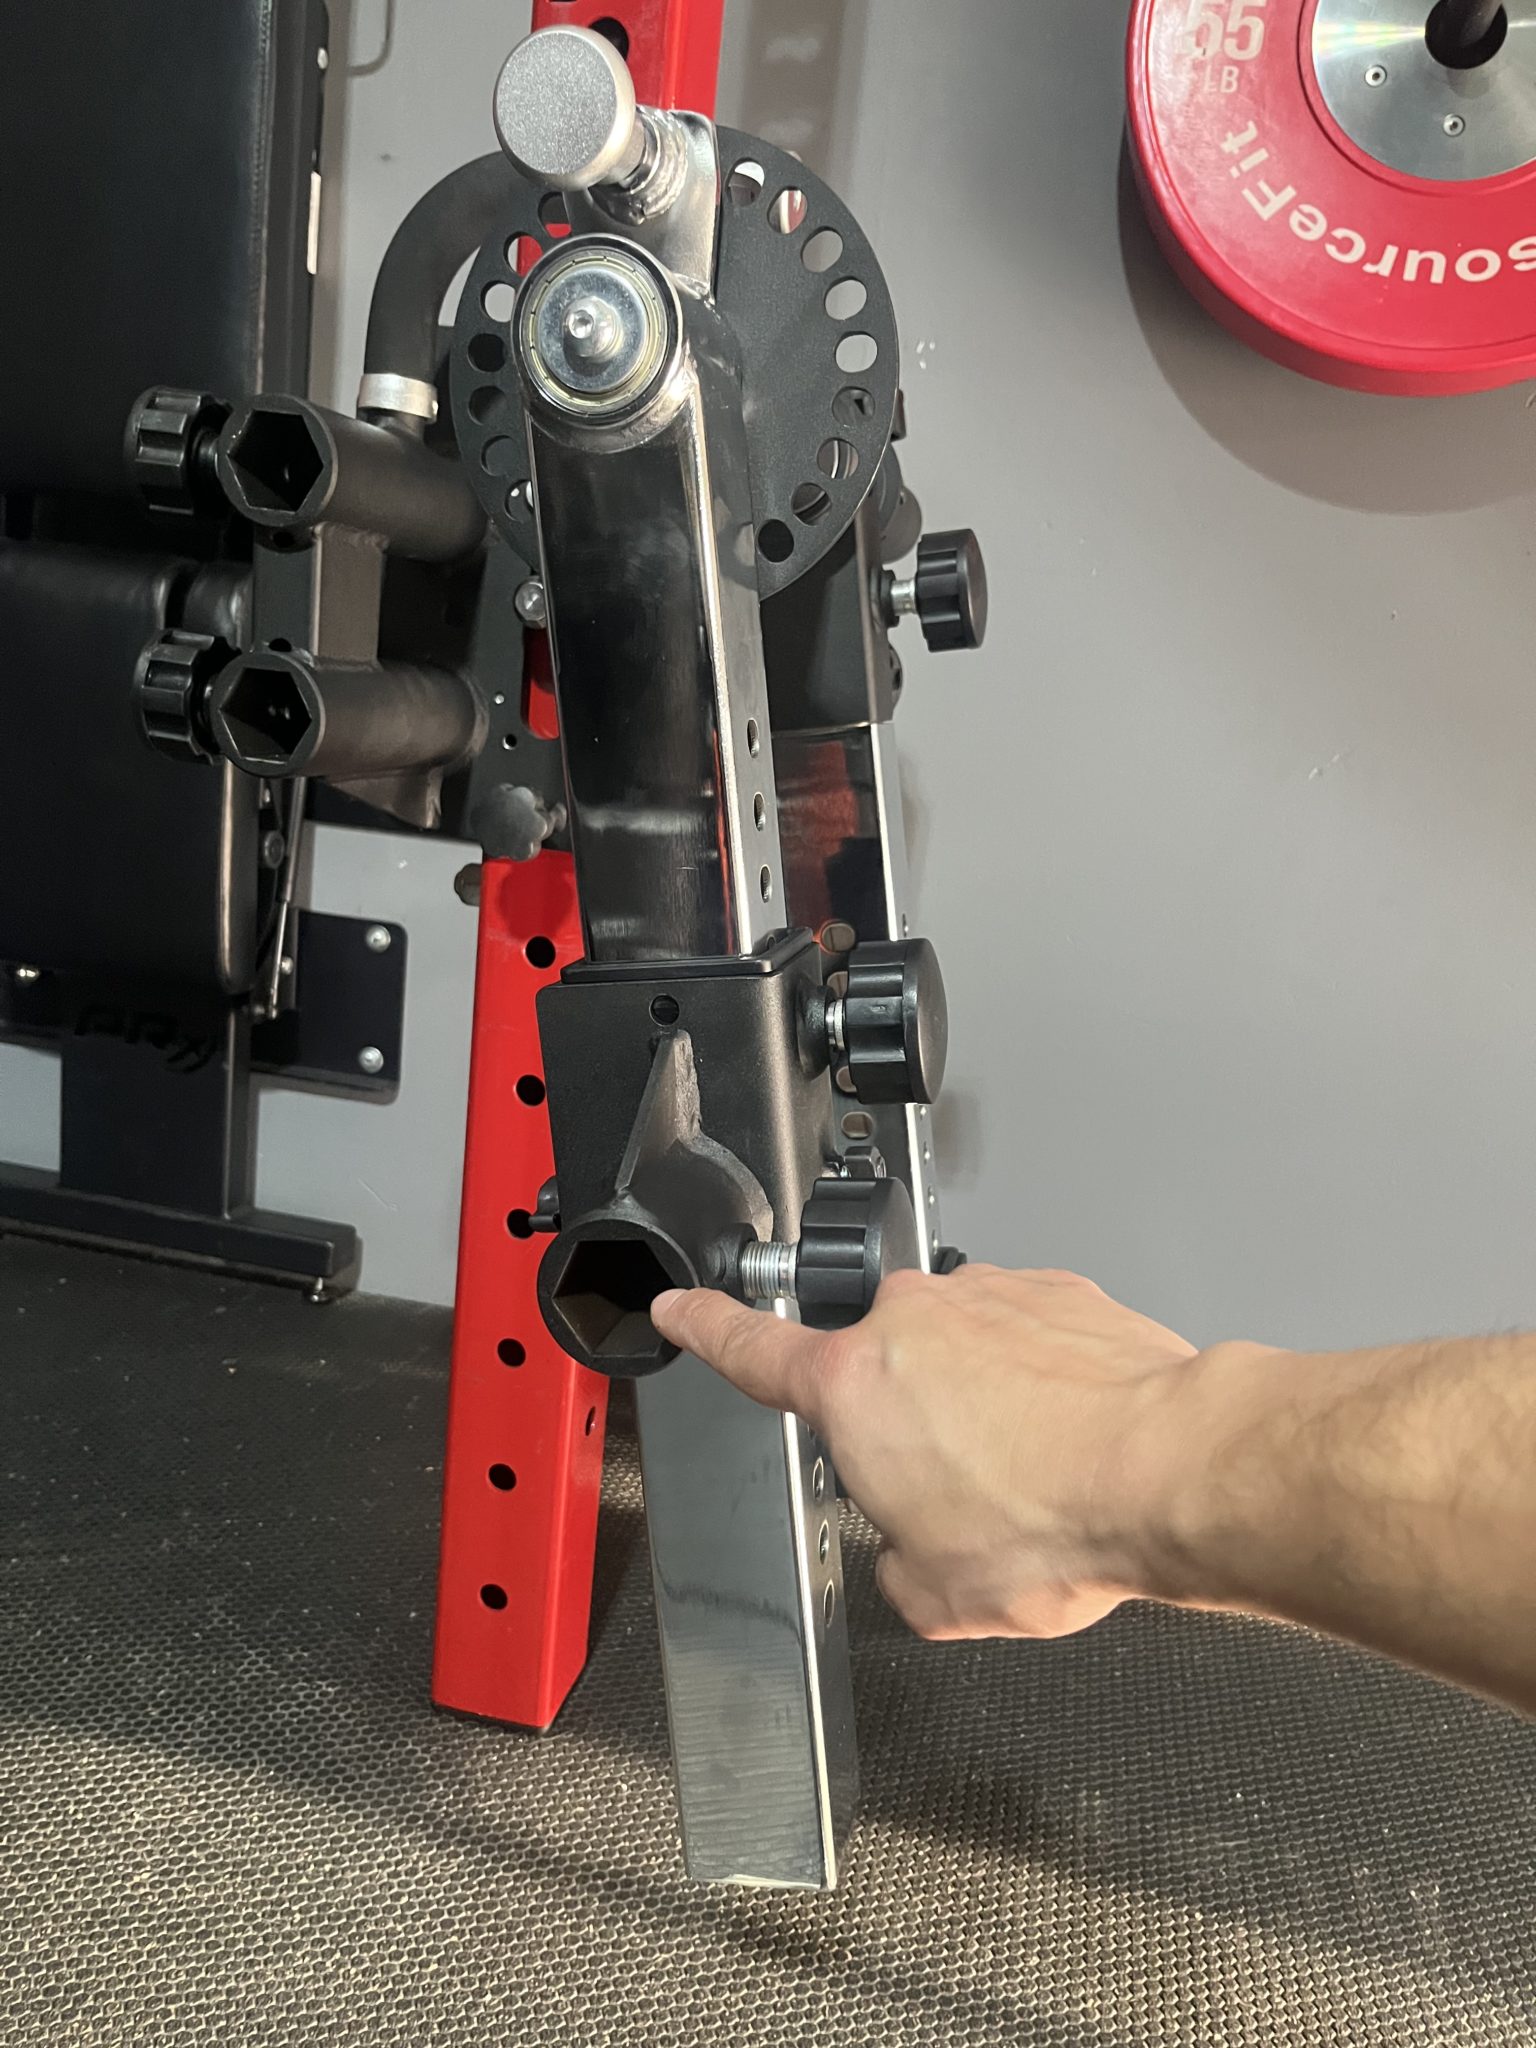
This piece has a hex port and this is where I’ll add either a roller pad or the curl arm.
I’ll add the curl arm first.
Curl Arm Attachment
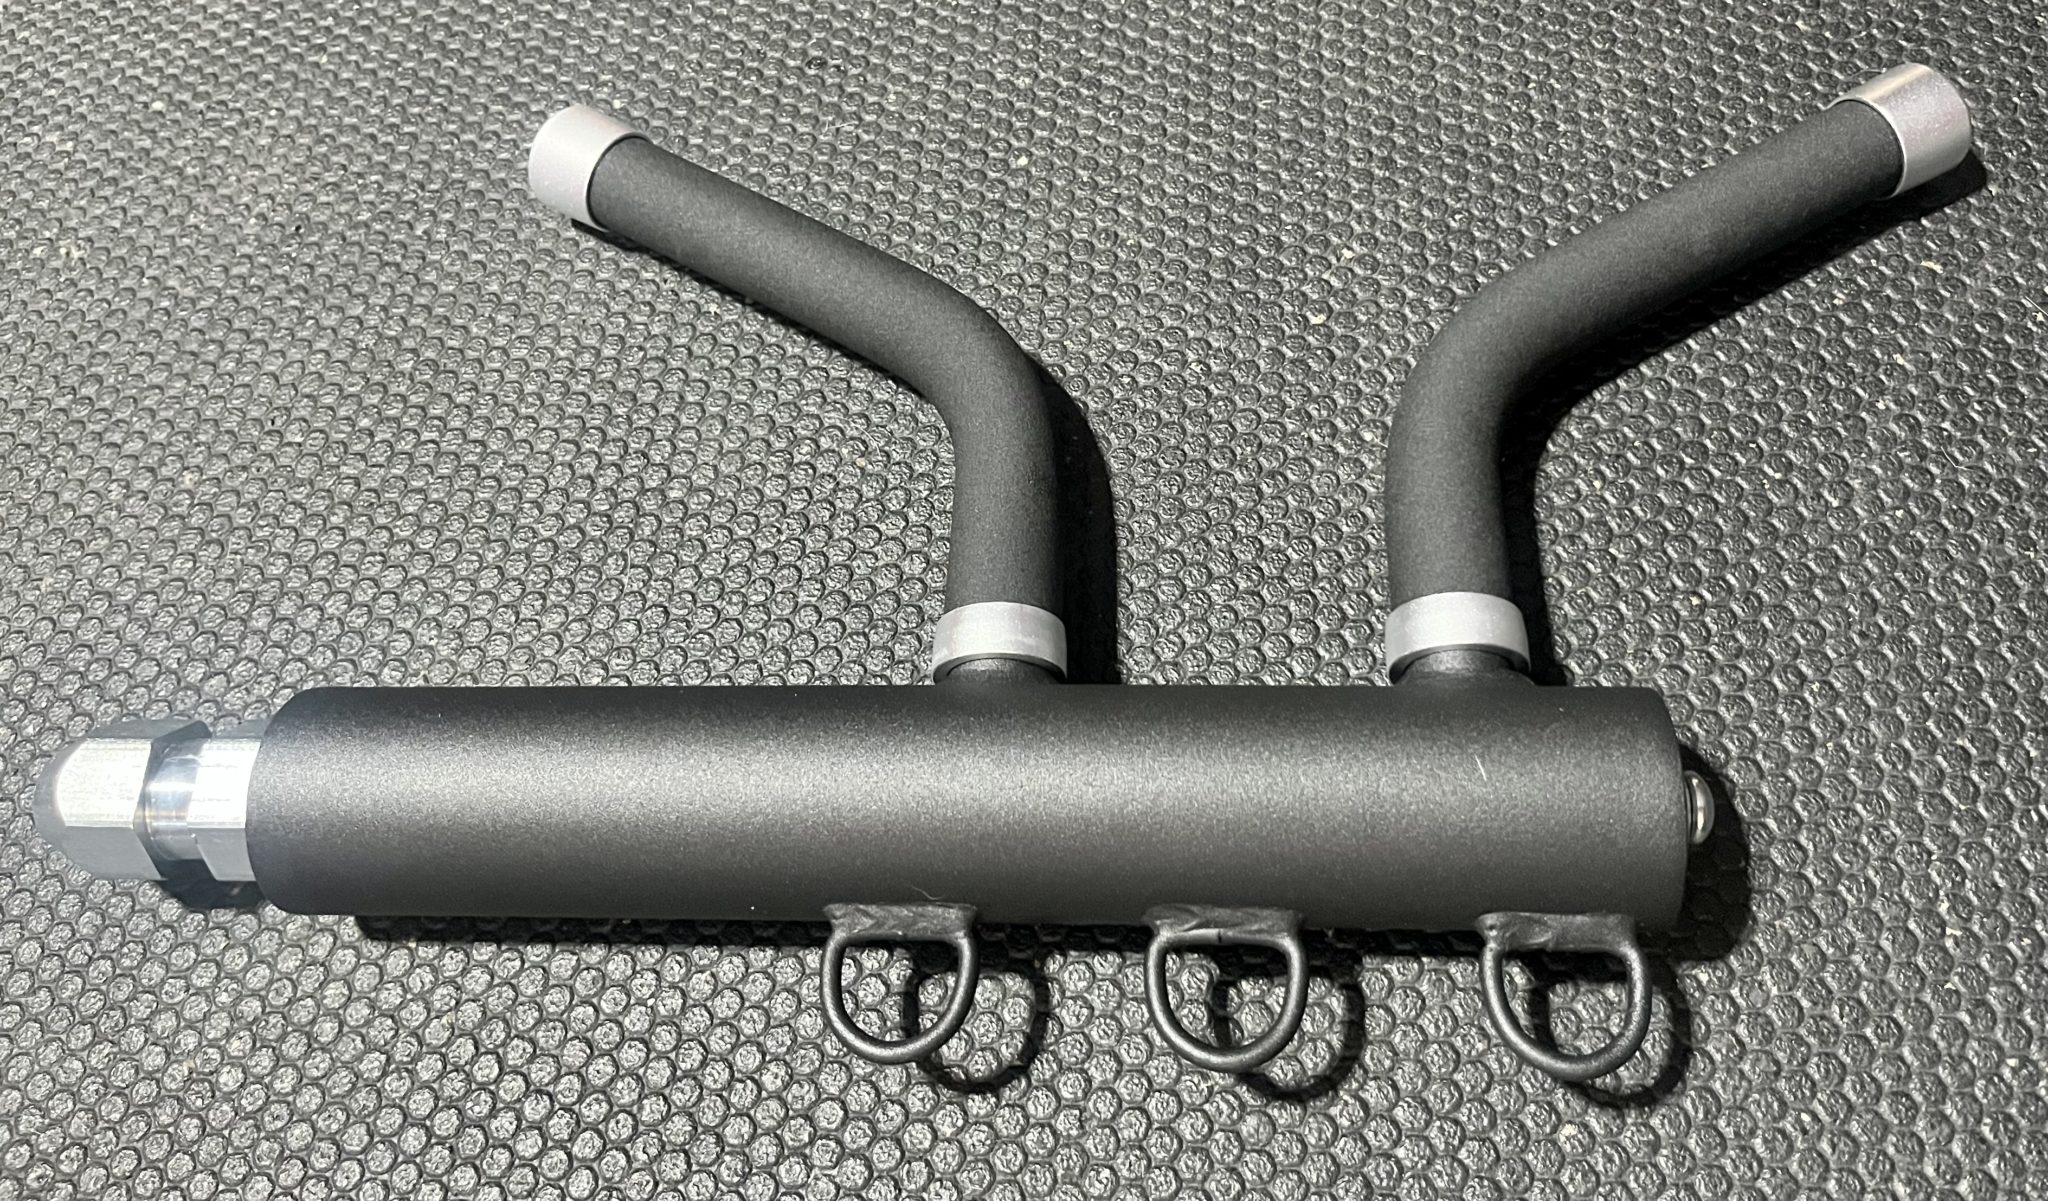
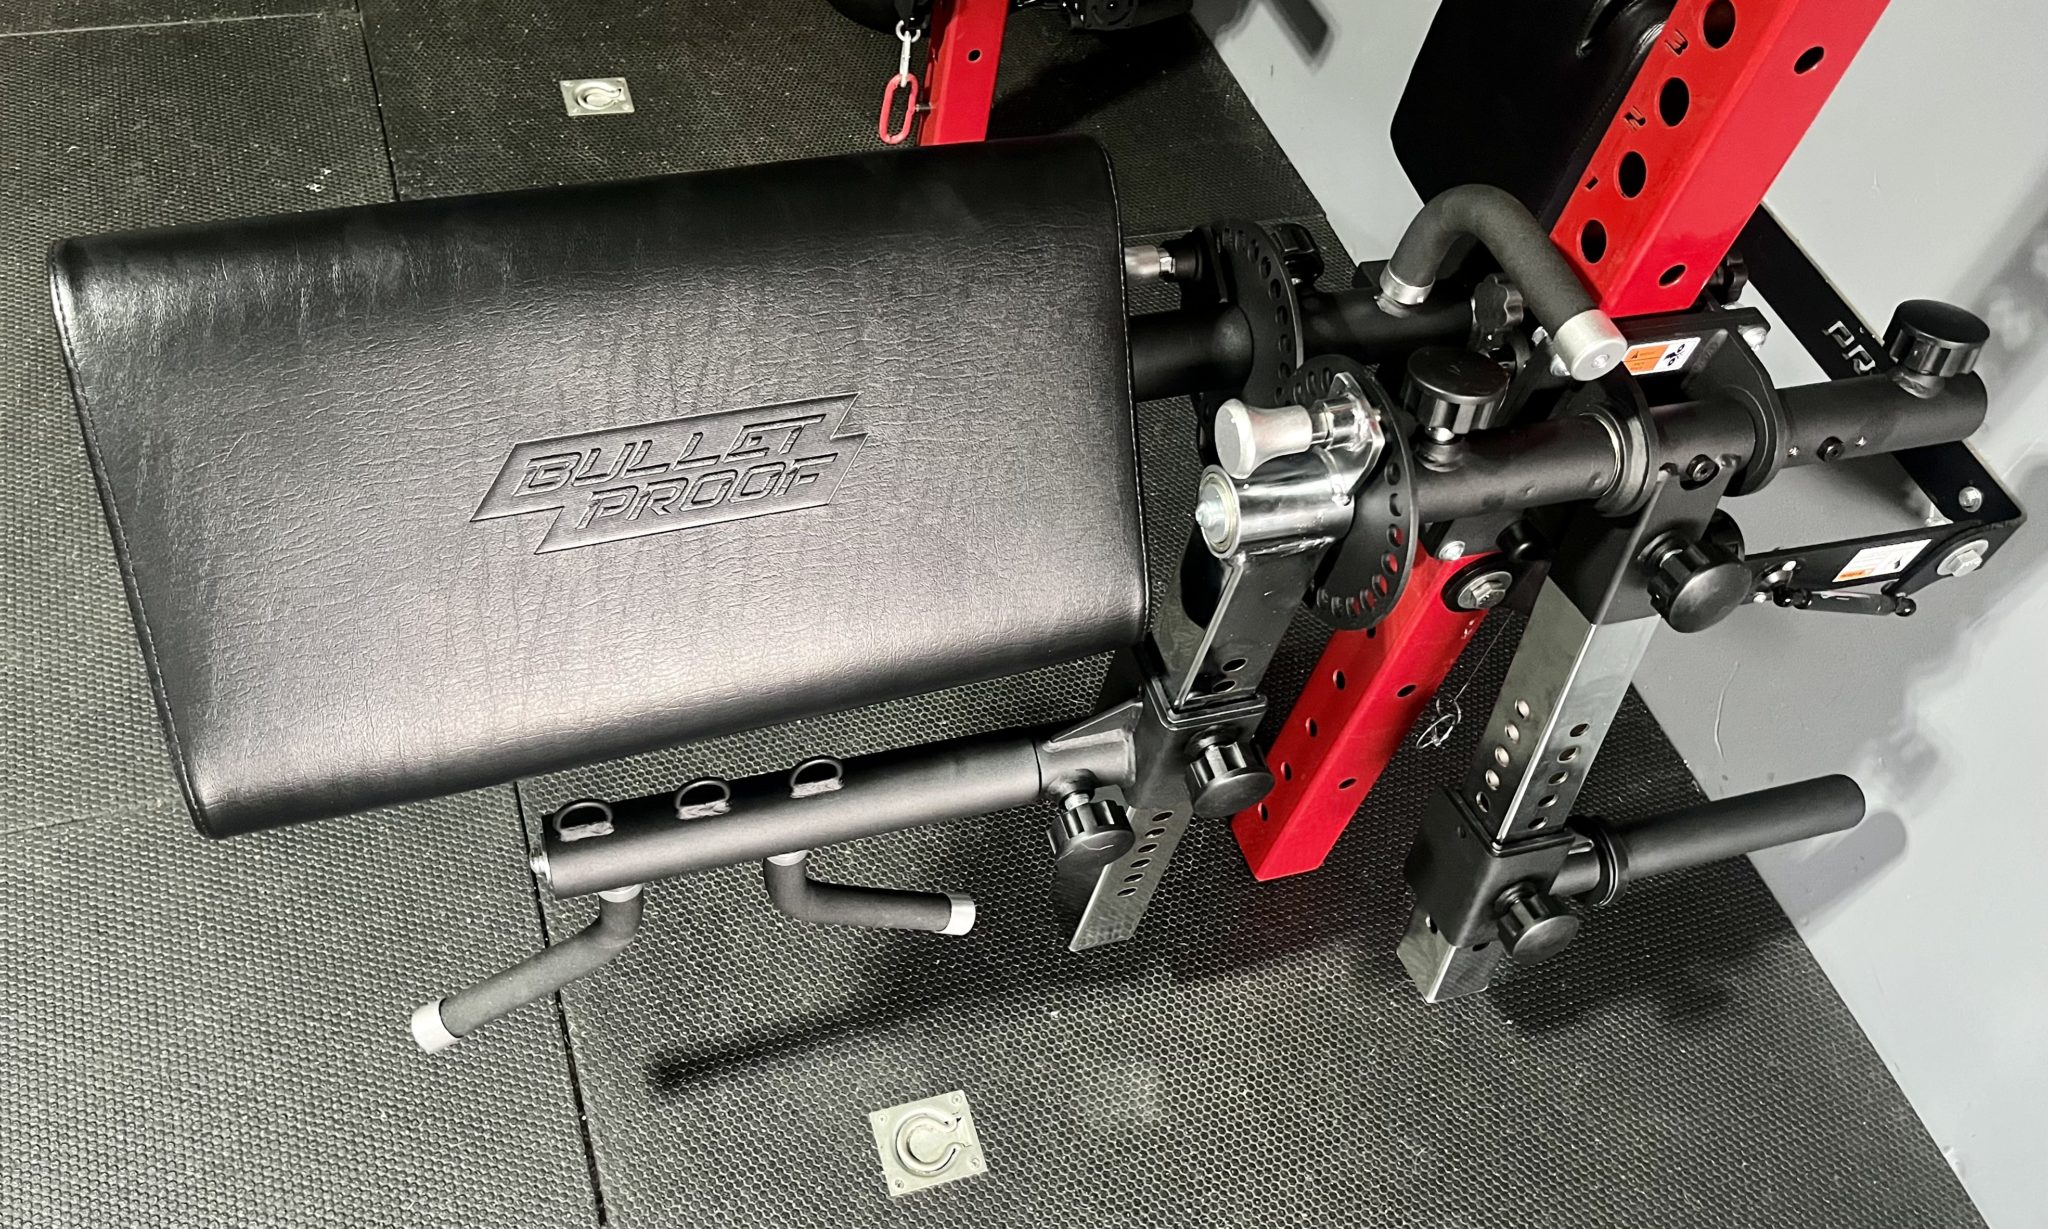
This is the curl arm attachment.
It has two handles angled at 45 degrees and three loops right below the handles.
The bottom loops are use to connect attachments with carabiners like triceps ropes.
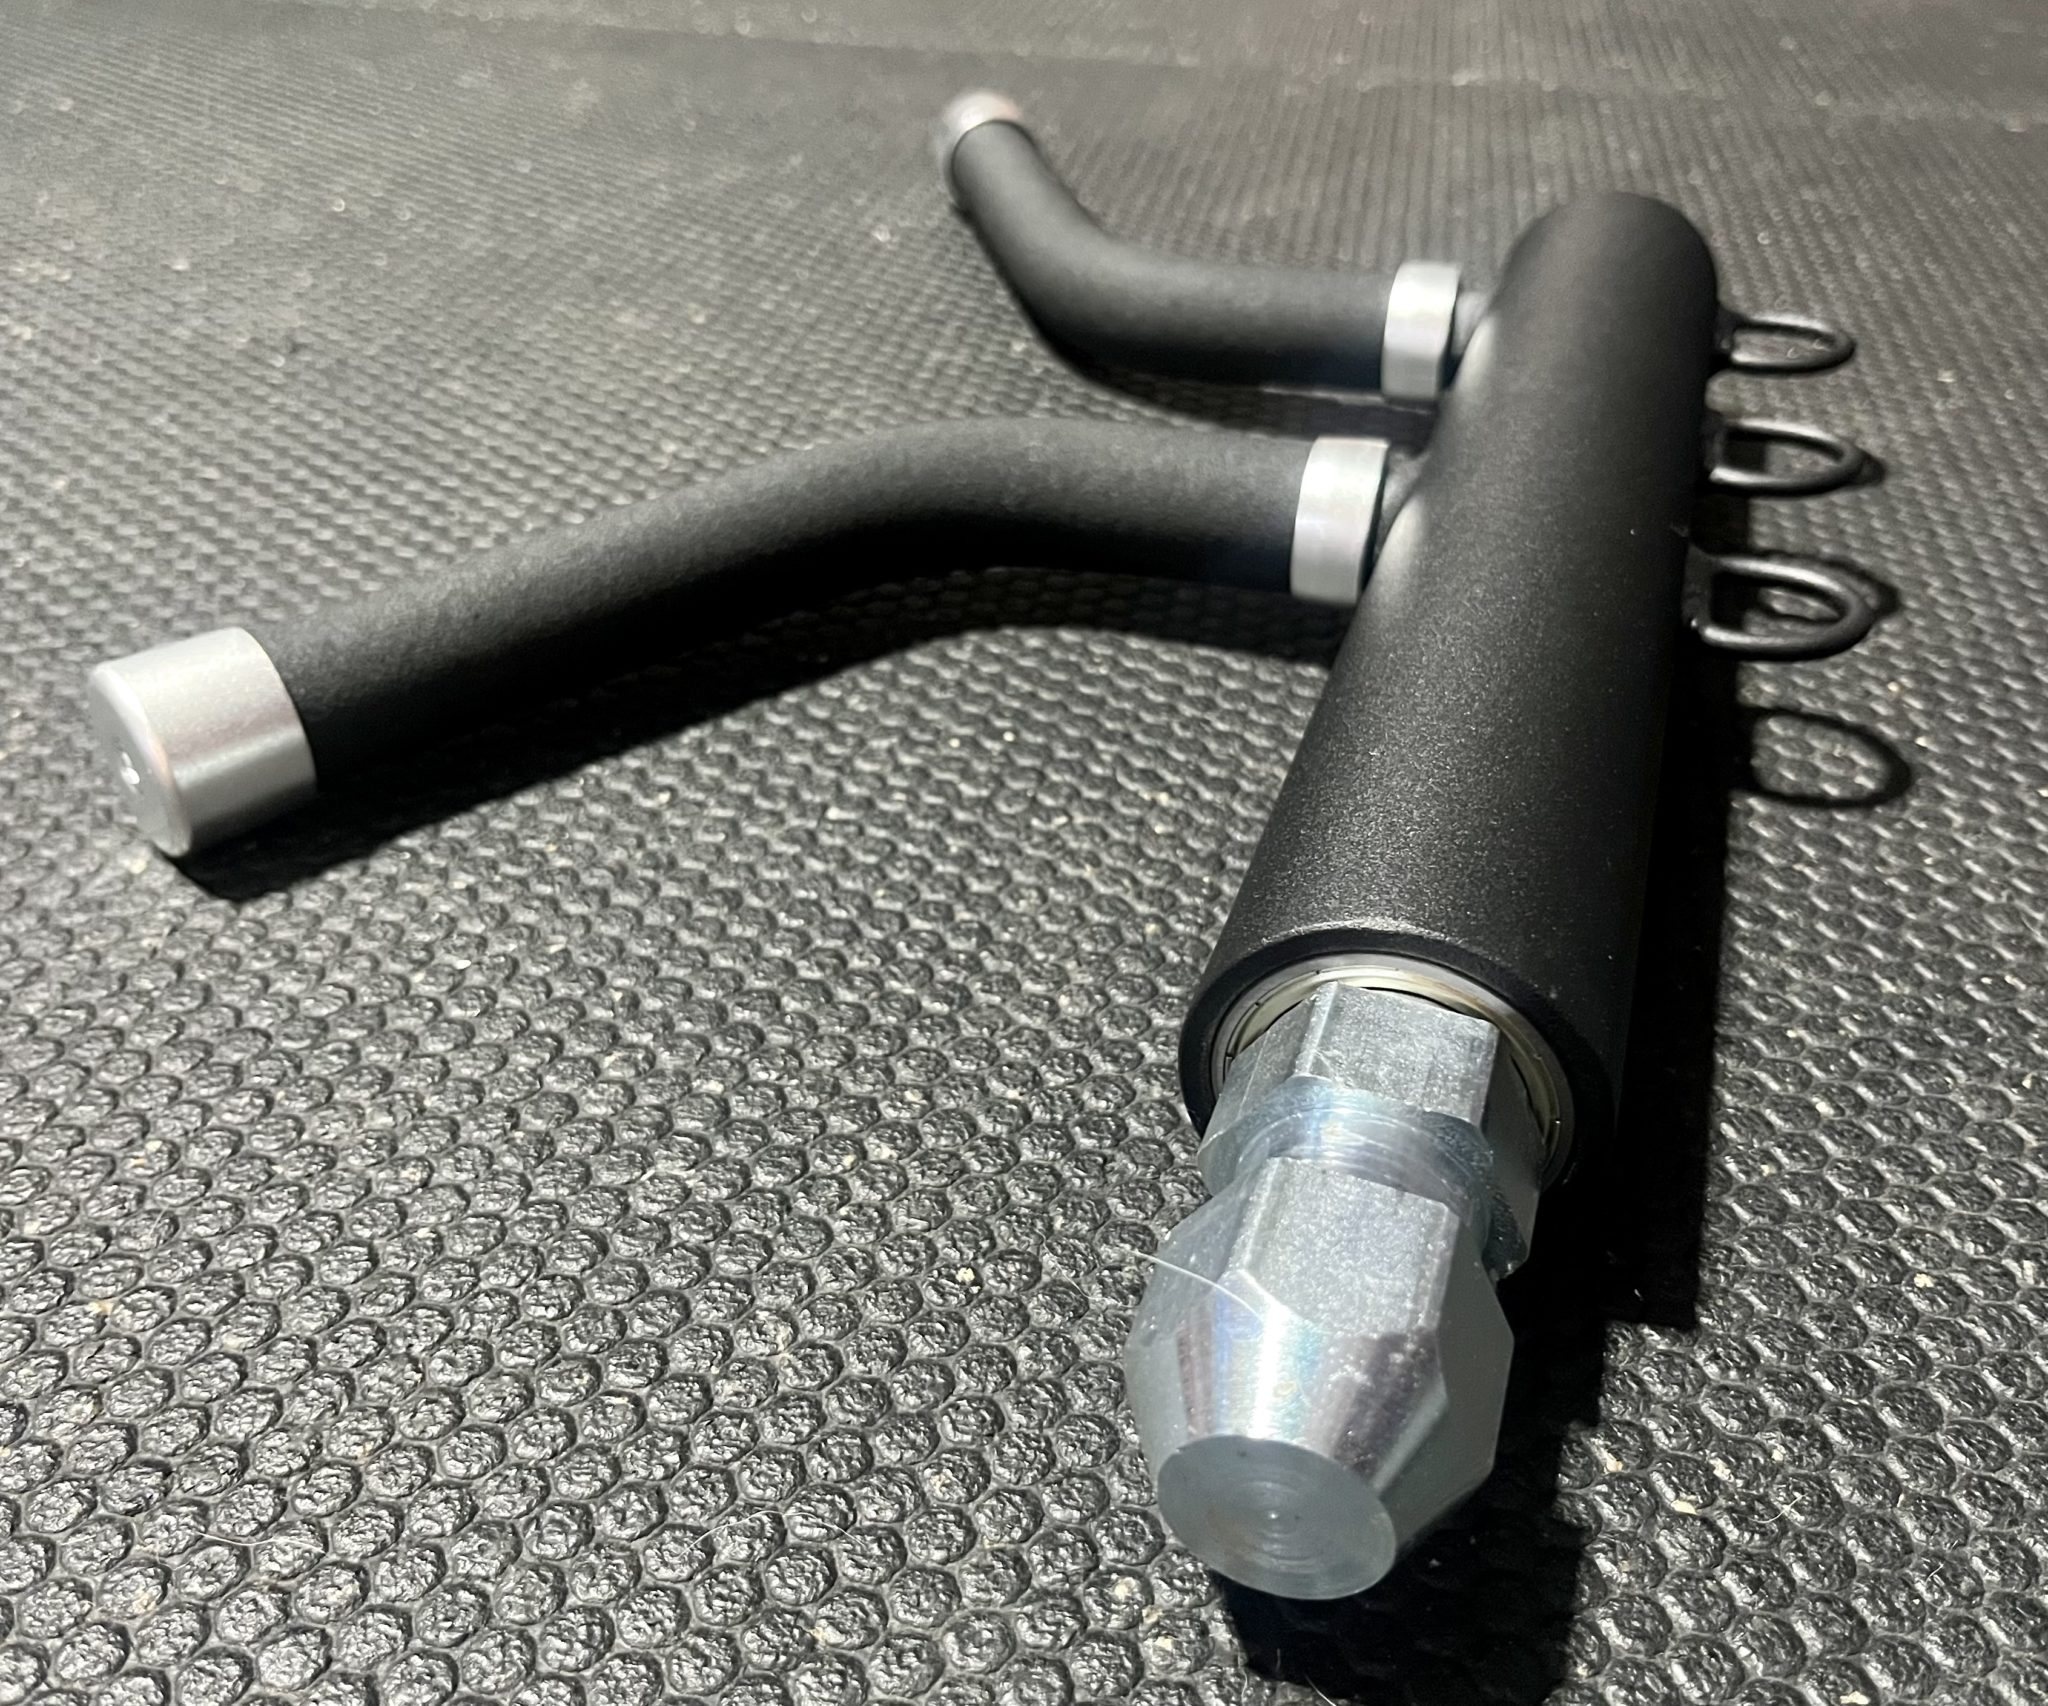
The Isolator curl arm connects to the lever arm via a male piece that goes into the hex port.
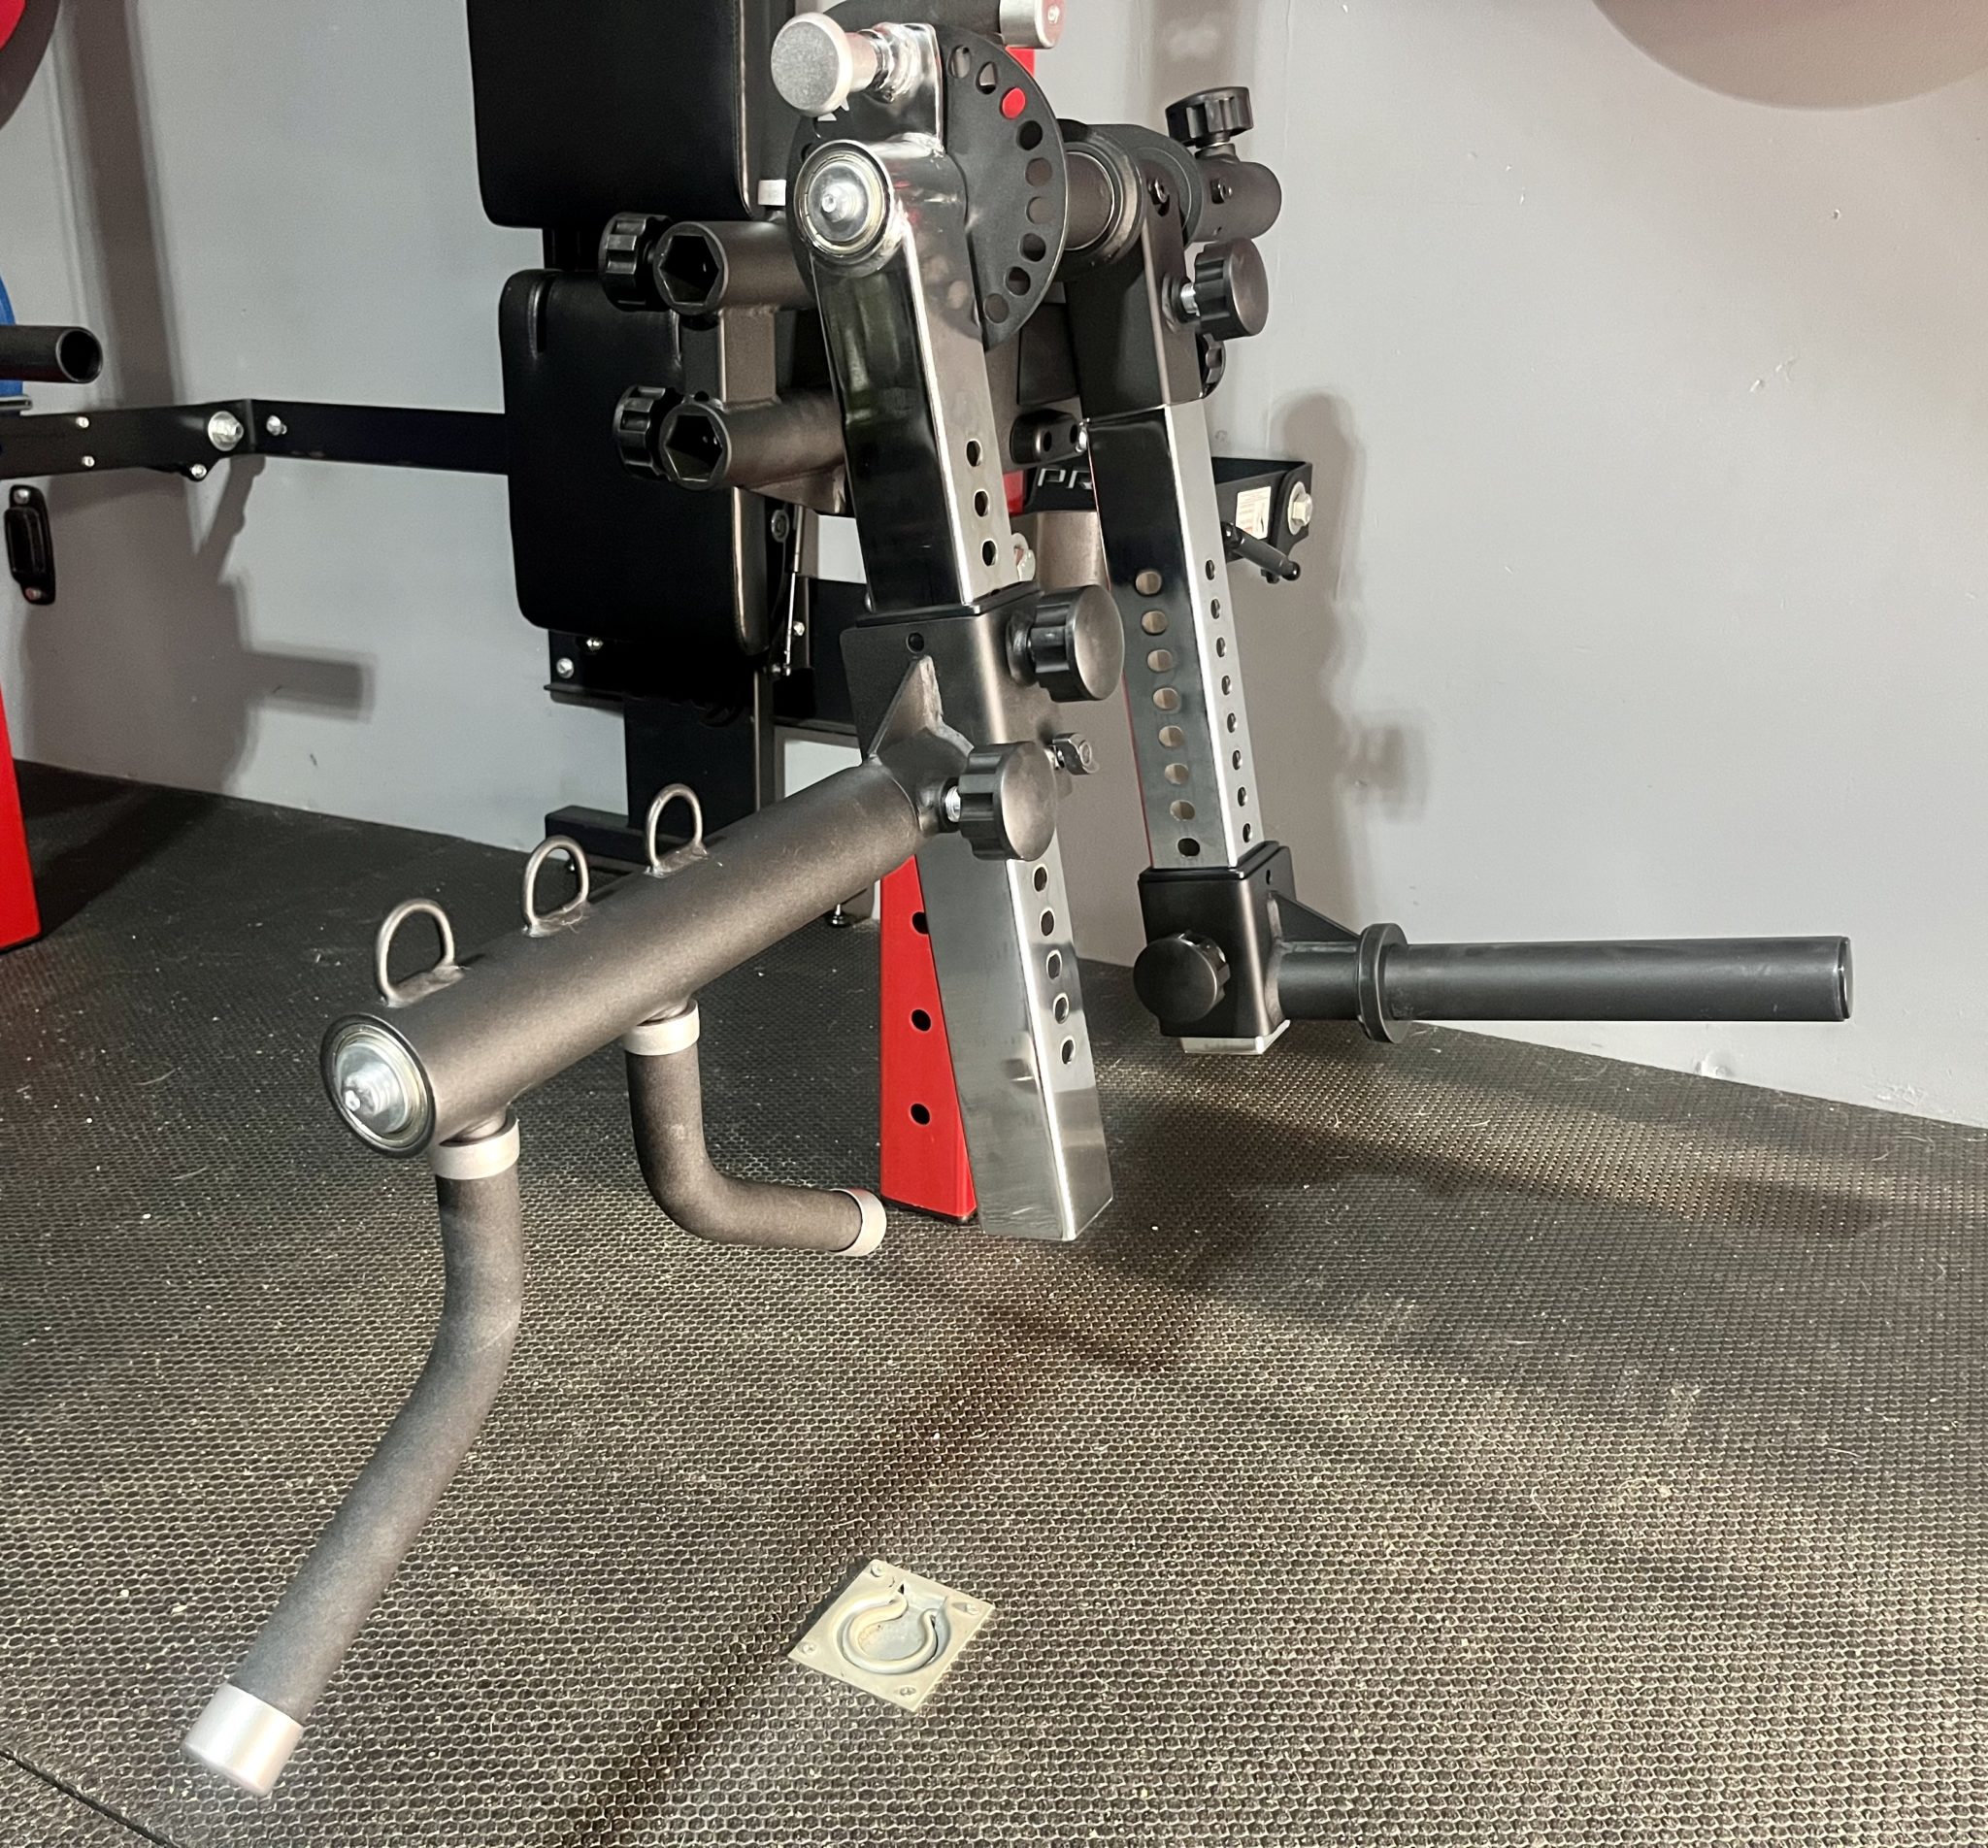
I push the curl arm into the hex port until it click and tighten the knob to secure it to the lever arm.
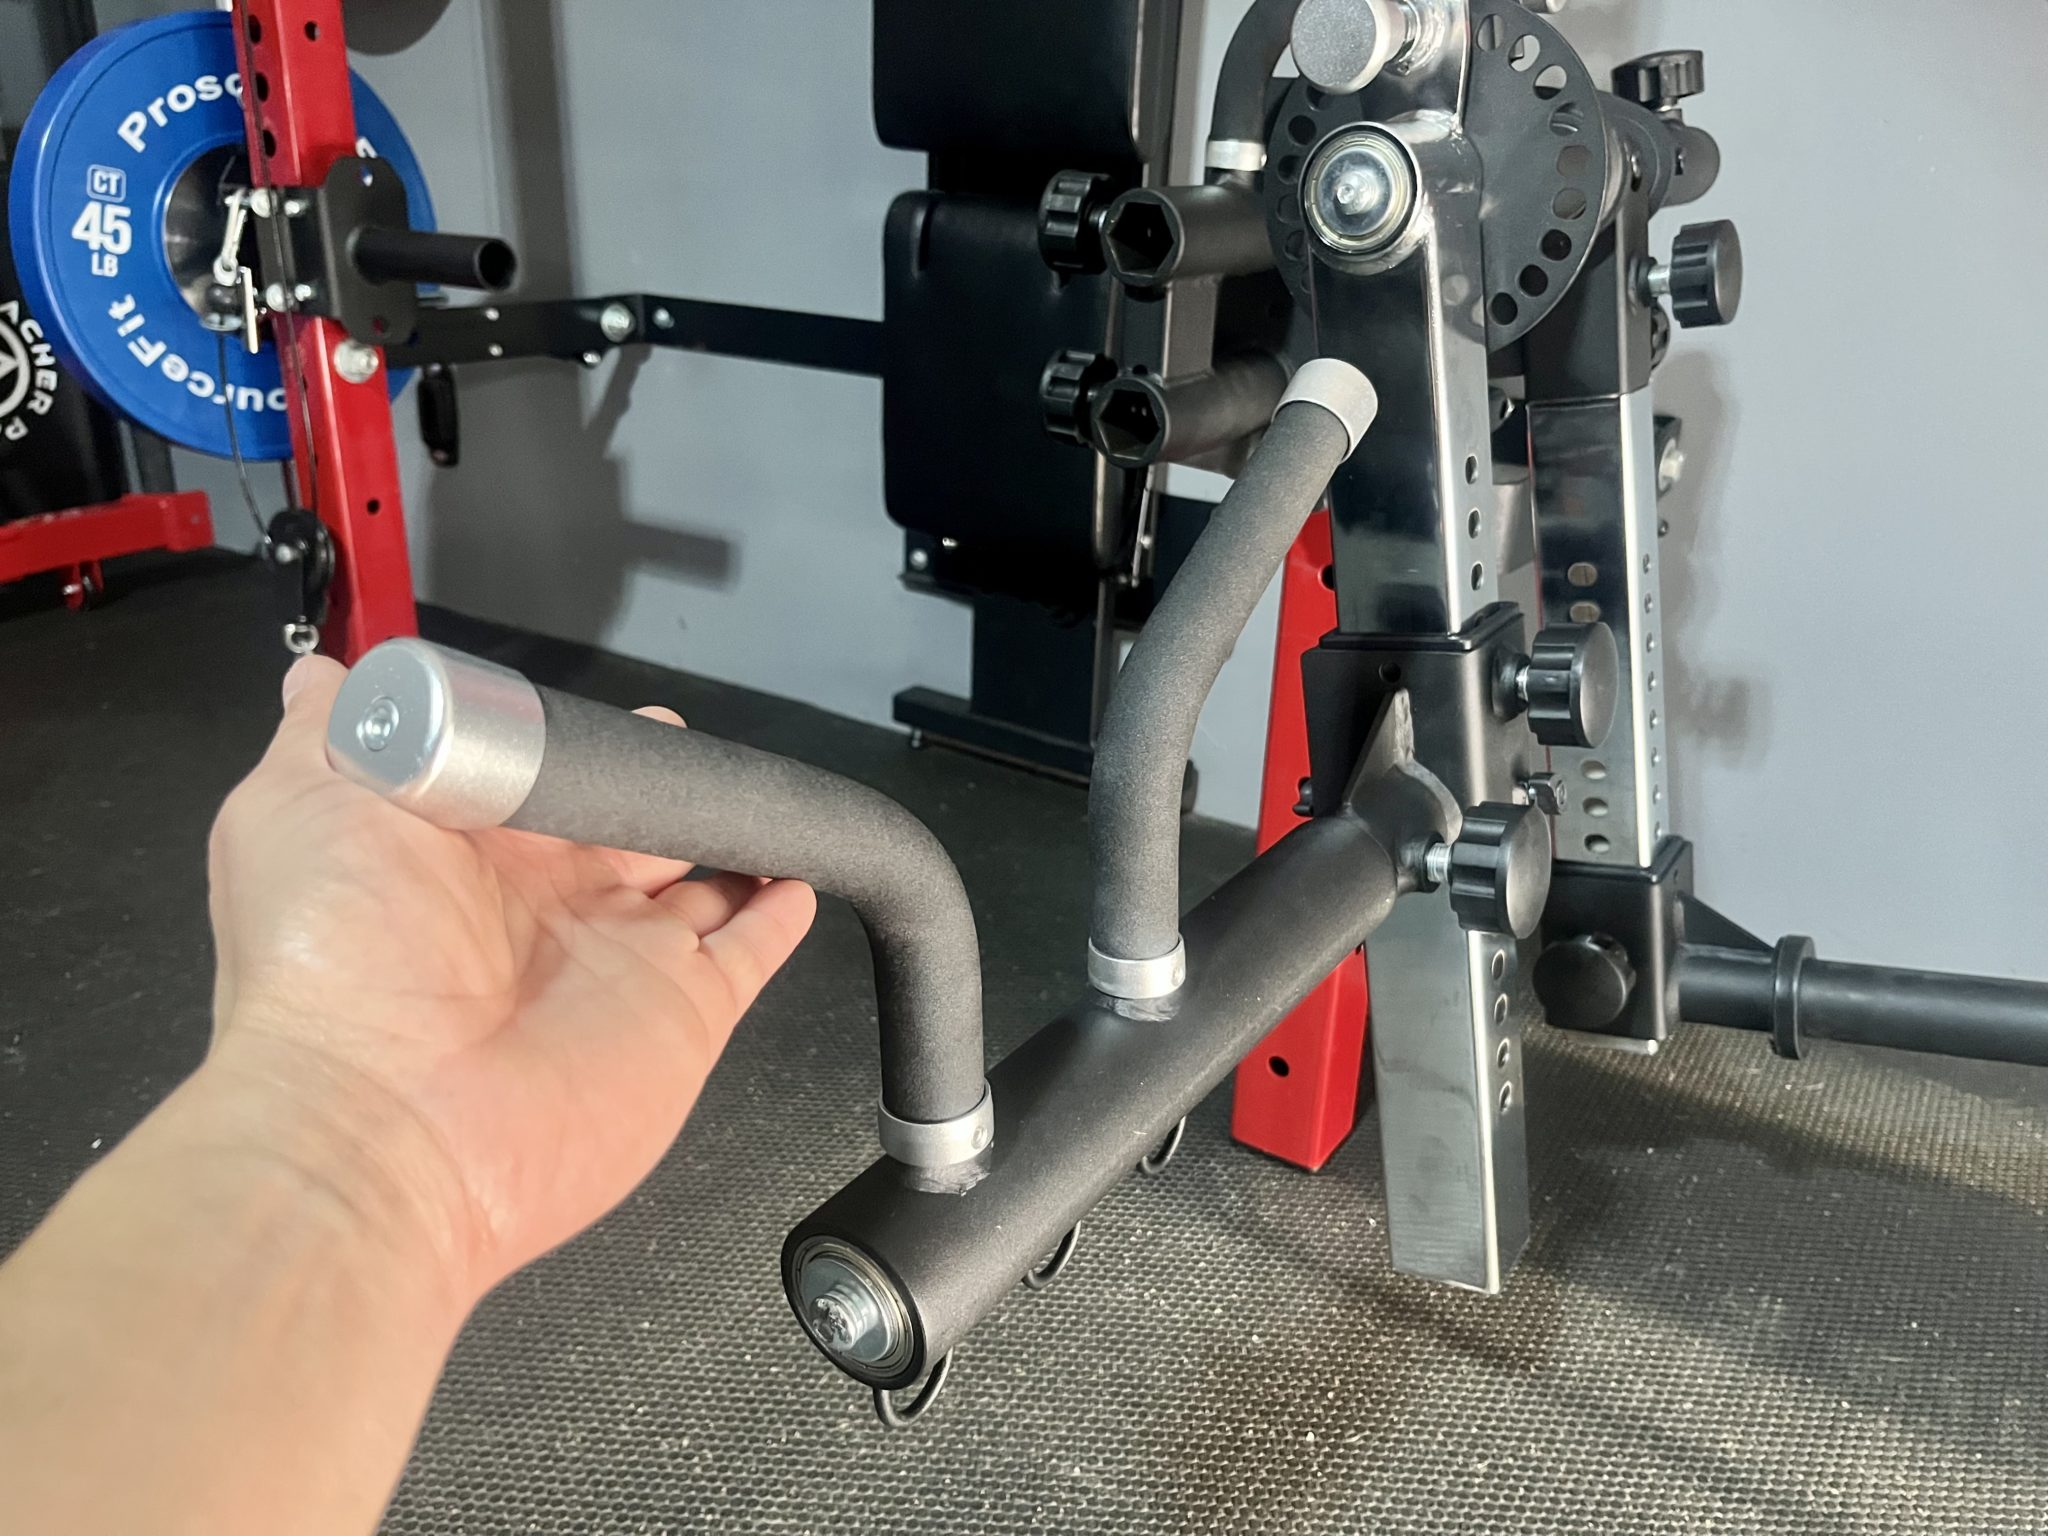
The curl arm is free to rotate 360 degrees so there’s no restrictions while exercising.
Now that the curl arm is on, I’ll add the seat pad / preacher pad to the carriage.
Preacher Pad / Seat
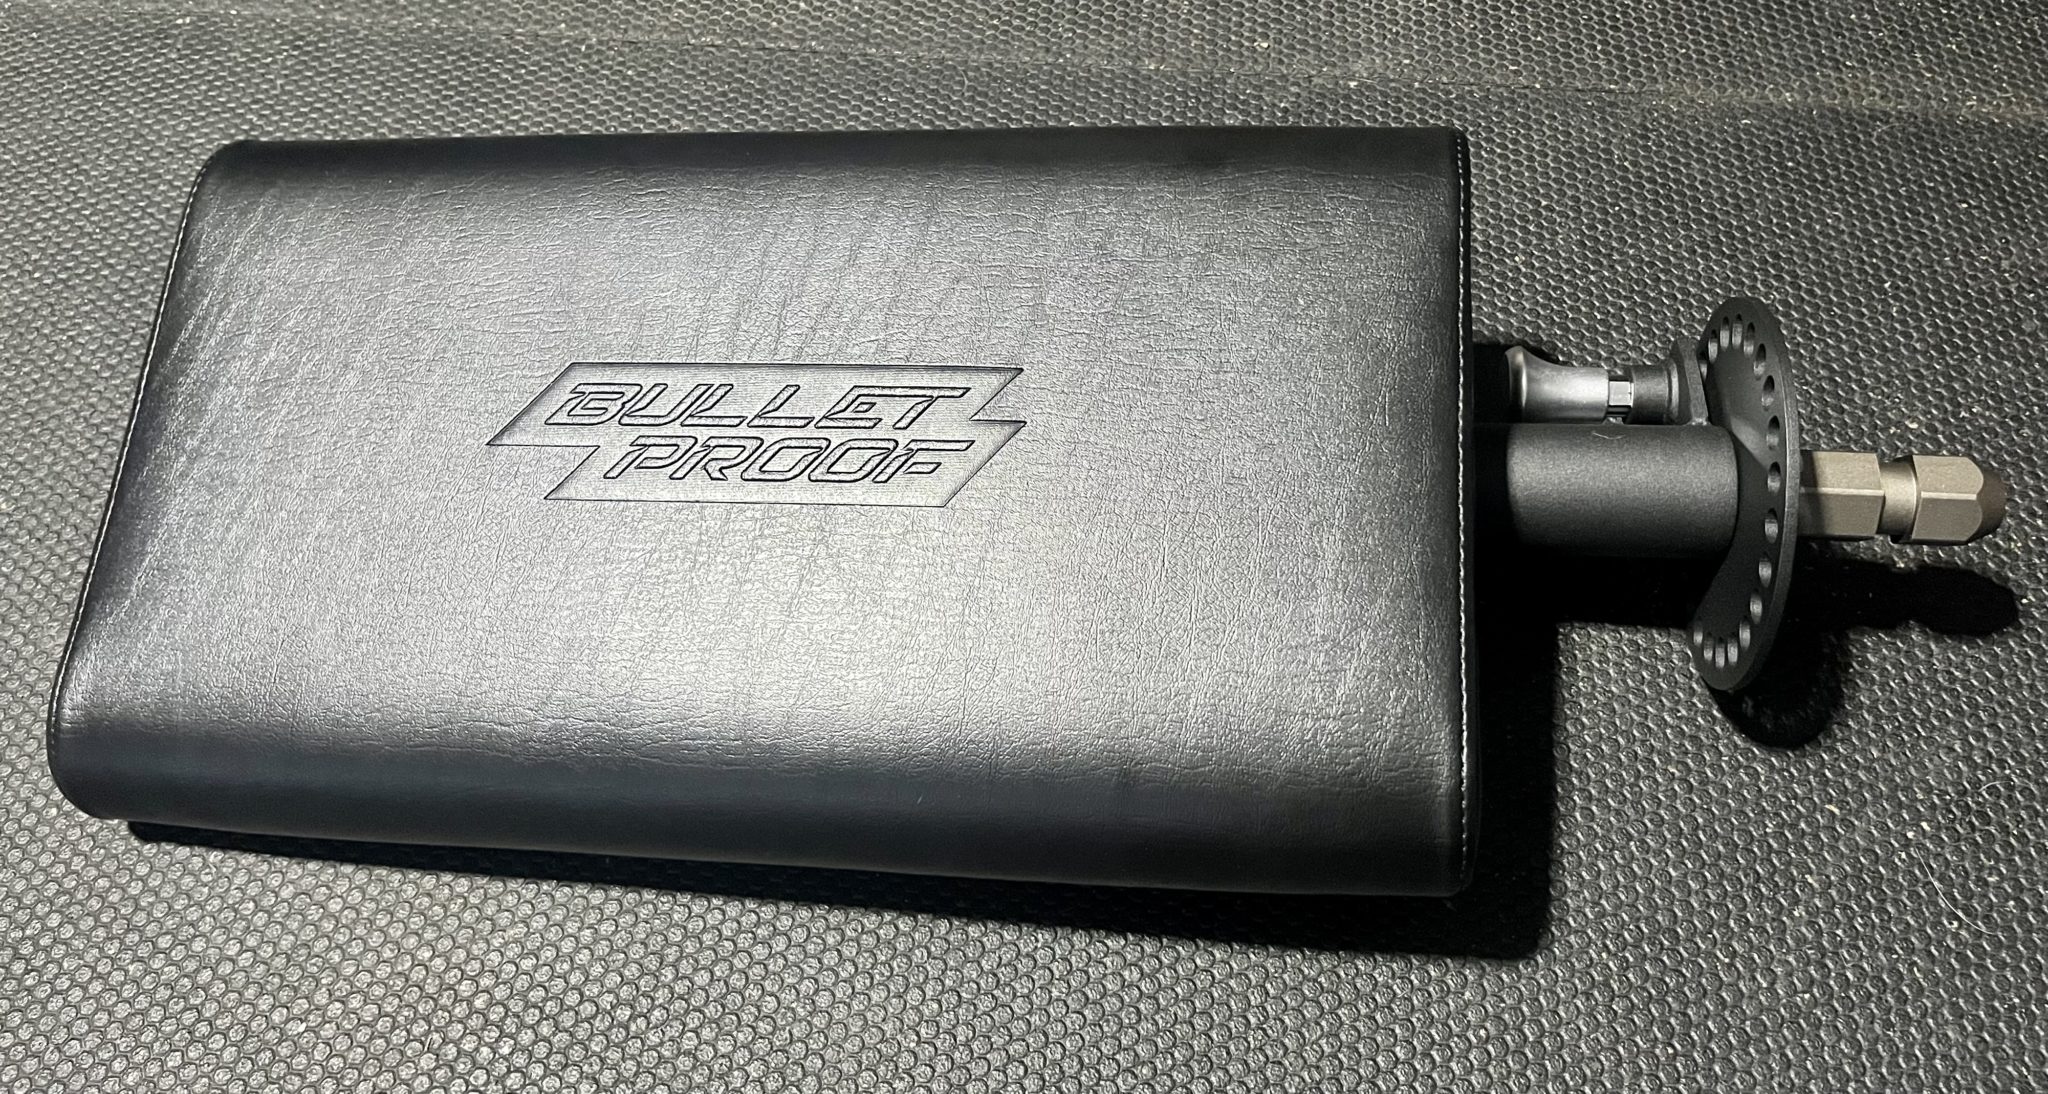
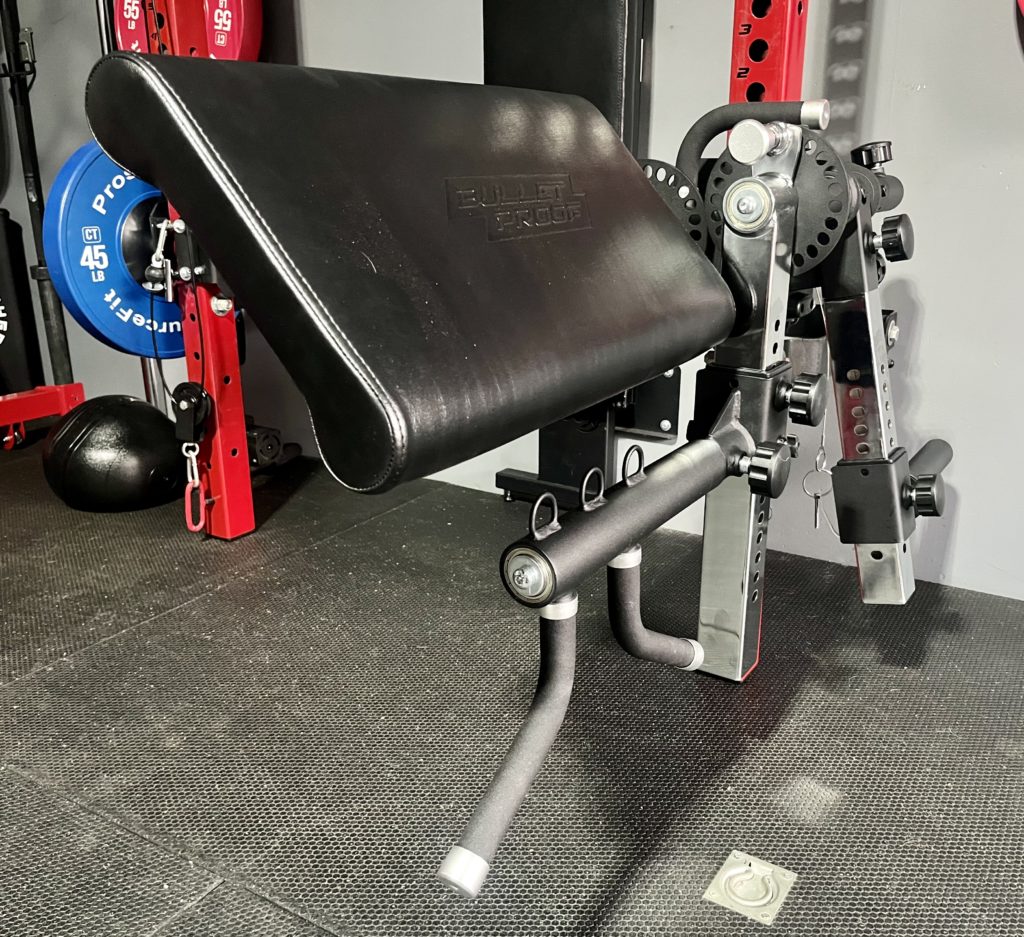
I like that the seat pad also doubles as a preacher curl pad.
The padding is comfortable and the upholstery and stitching are quality.
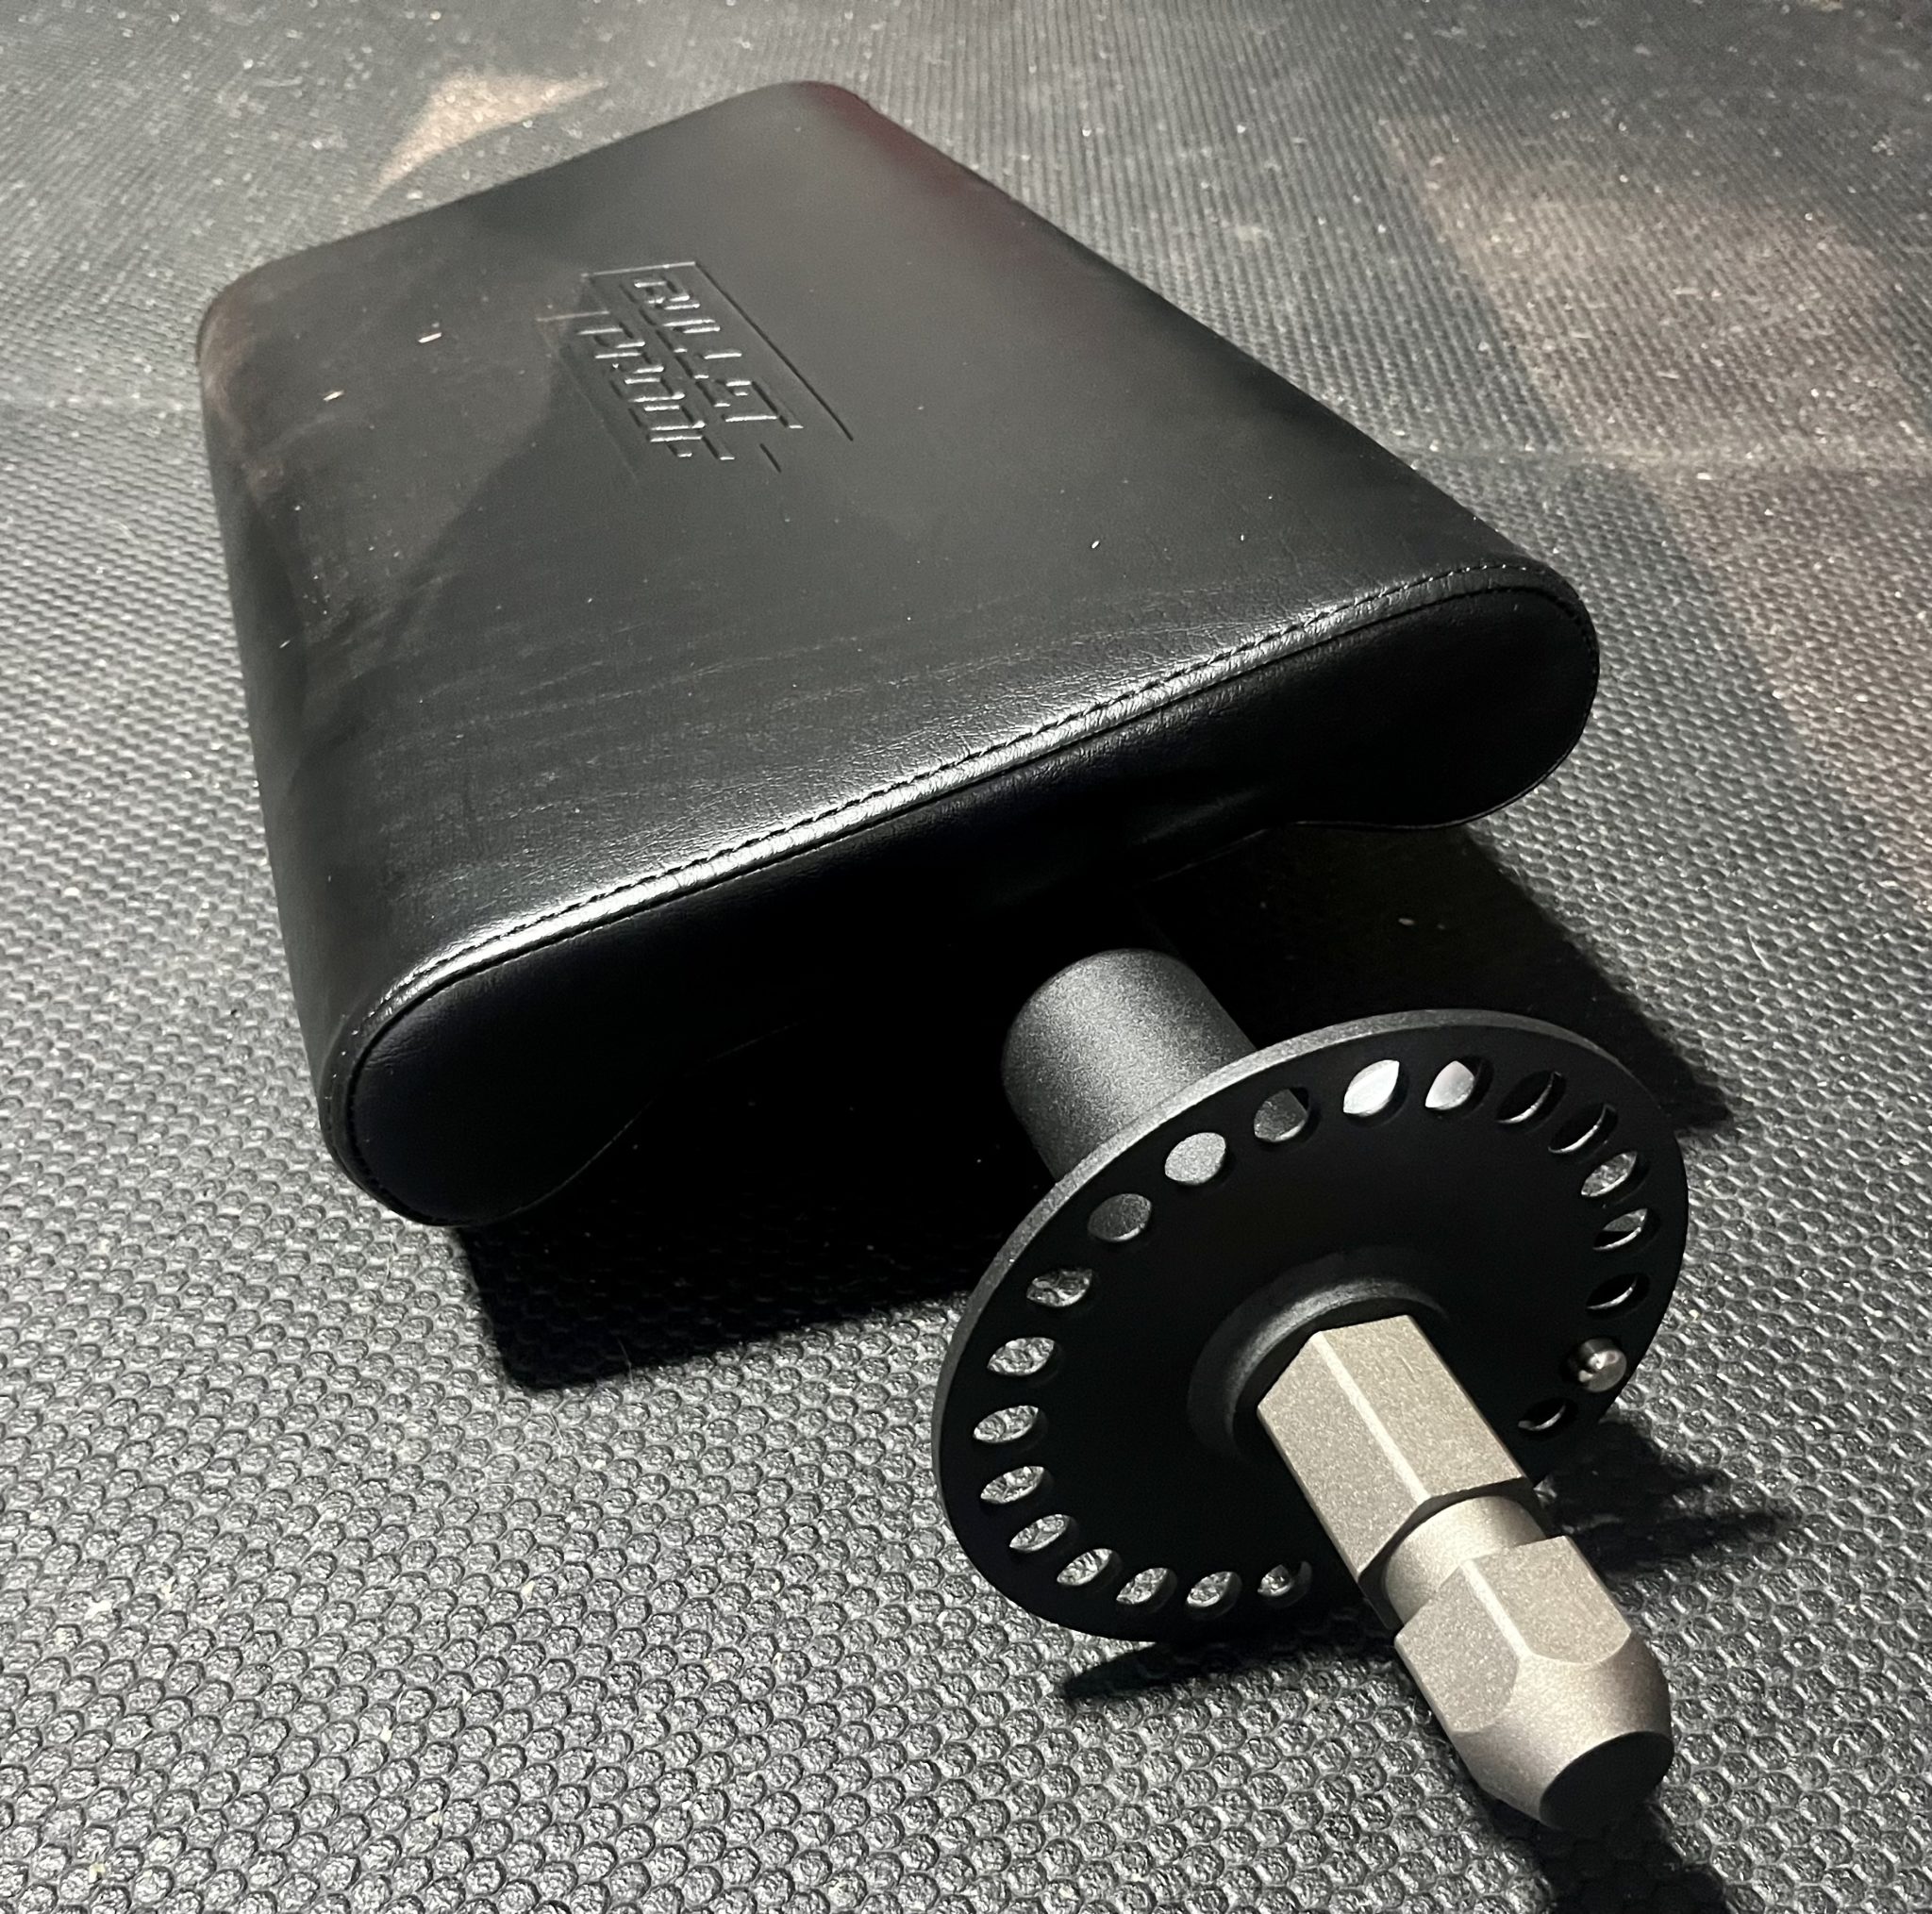
And just like the lever arm, I can rotate the pad 360 degrees because of the wheel and pop pin attached to it.
All these angle settings are what give the Isolator so much versatility.
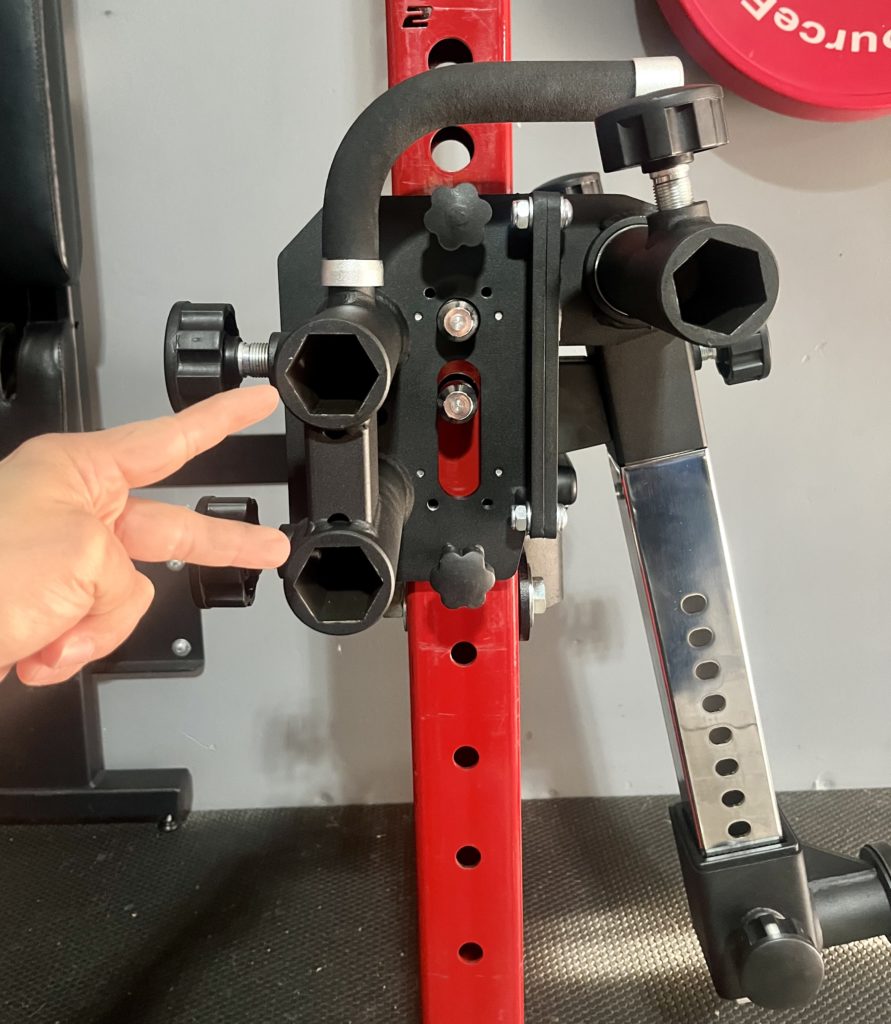
The preacher pad/seat can be inserted into any of the two hex ports right below the handle.
Both hex ports work the same way, it’s just a matter of height for different exercises.
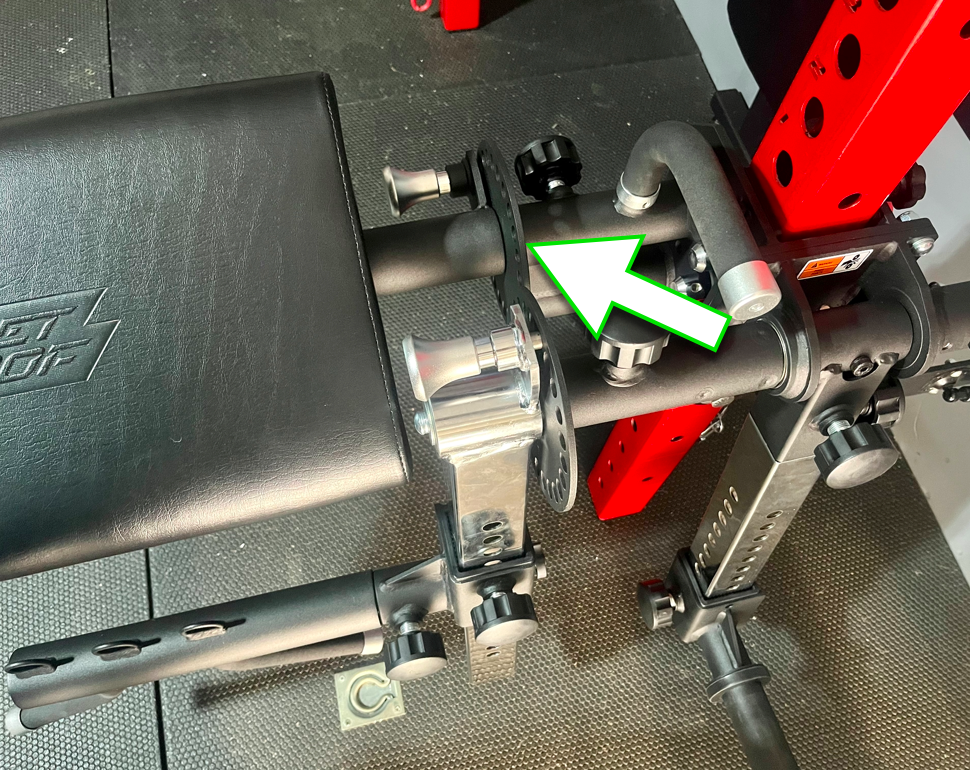
I push the preacher pad all the way until I hear a click.
Then tighten the black knob right next to it to give it more stability.
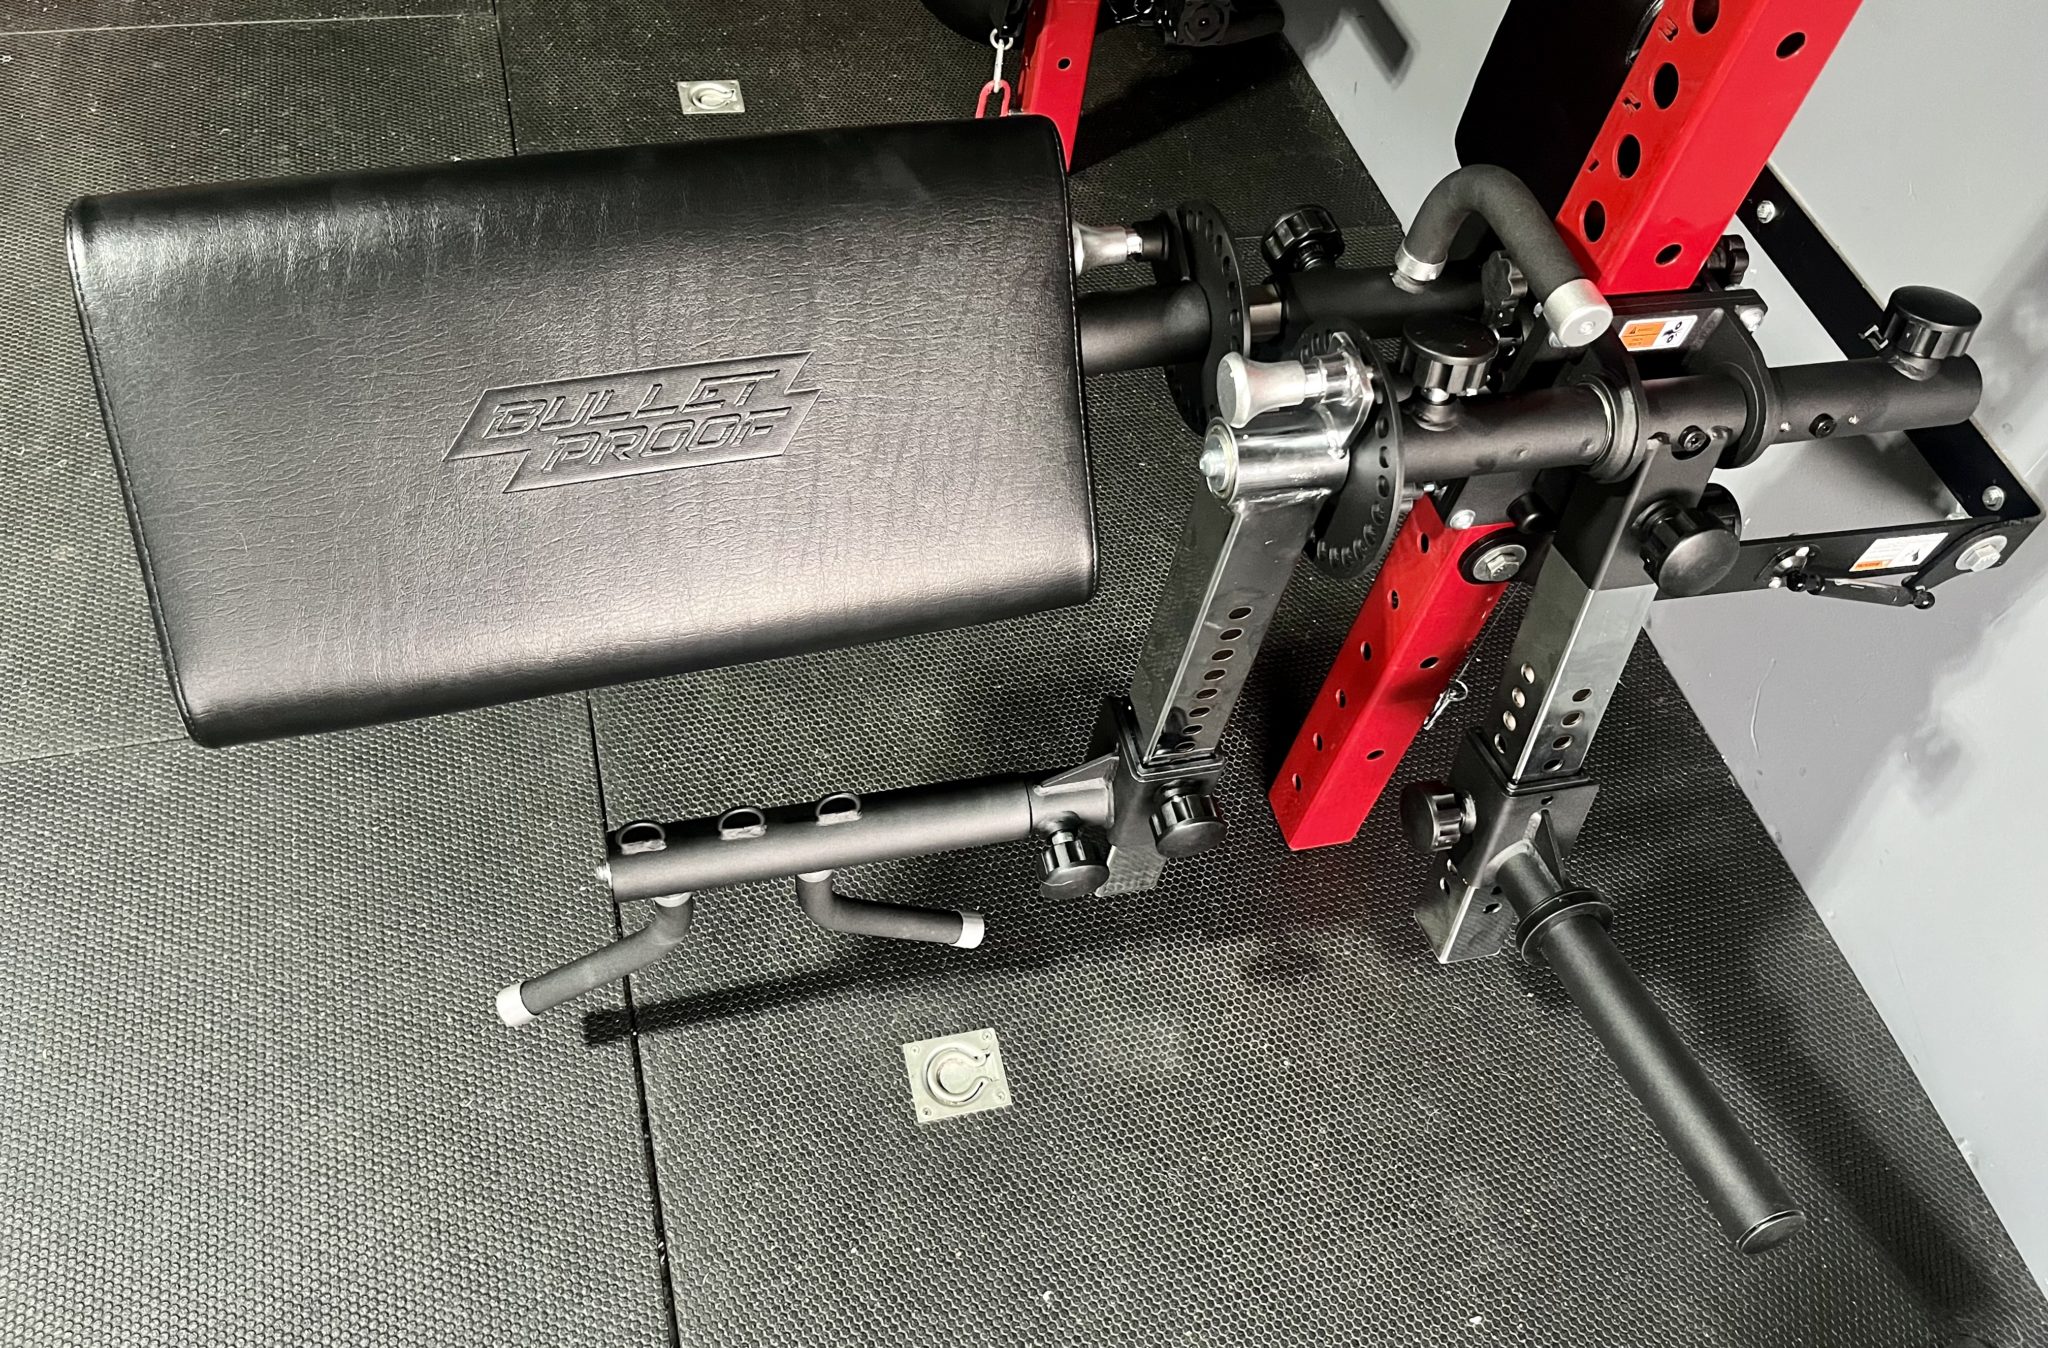
The preacher curl set up is now complete.
And yes, the pad is floating with nothing supporting it from below, yet it still supports my weight and the weight I lift.
This was designed and engineered incredibly well to pull this off without any tilting.
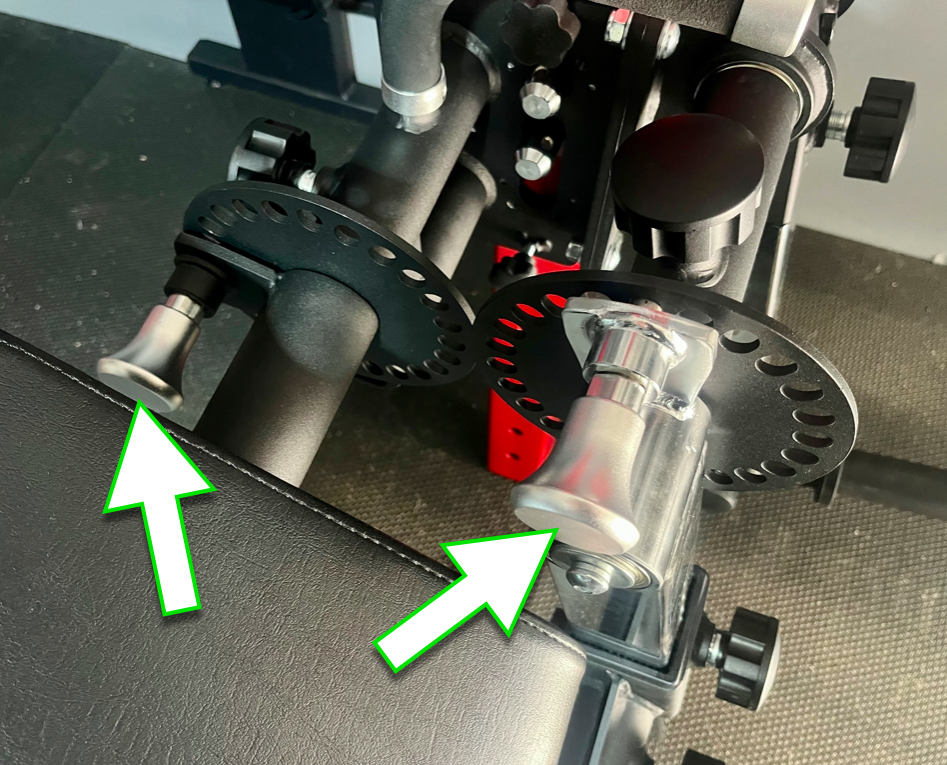
I can play around with different angles for both attachments by using these pins.
Both attachments can be rotated 360 degrees.
Only thing to show you is how I add the rollers to the lever arm.
Roller Pads
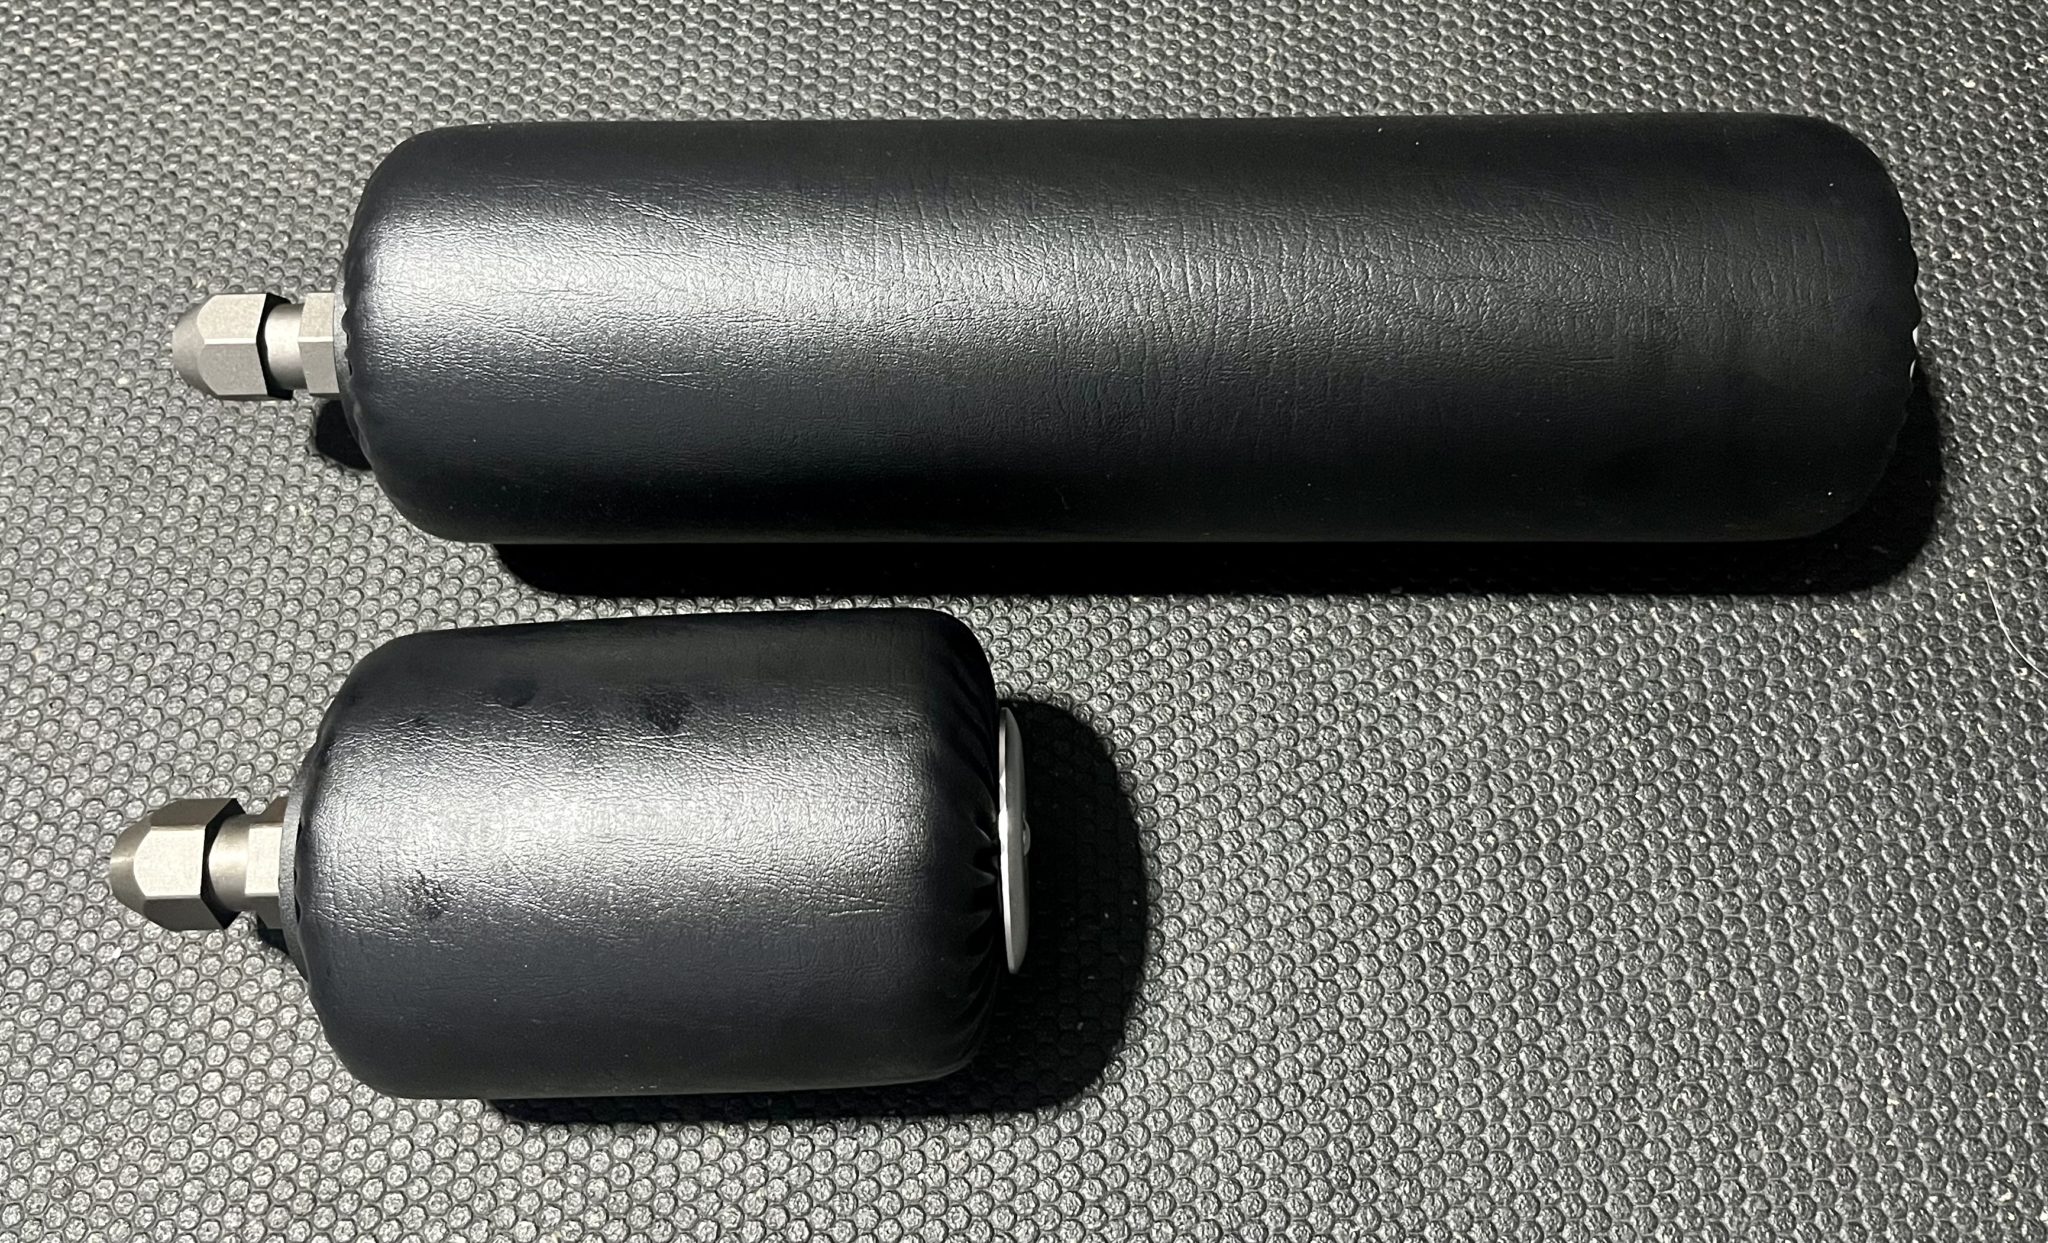
Bulletproof Fitness Equipment includes two different sized roller pads with the Isolator.
I use the long pad for exercises where I use both legs at the same time (leg curls, leg extensions, hip thrusts, etc).
And the short pad for unilateral exercises (hip extensions, hip flexions, hip abductions and adductions, lateral raises).
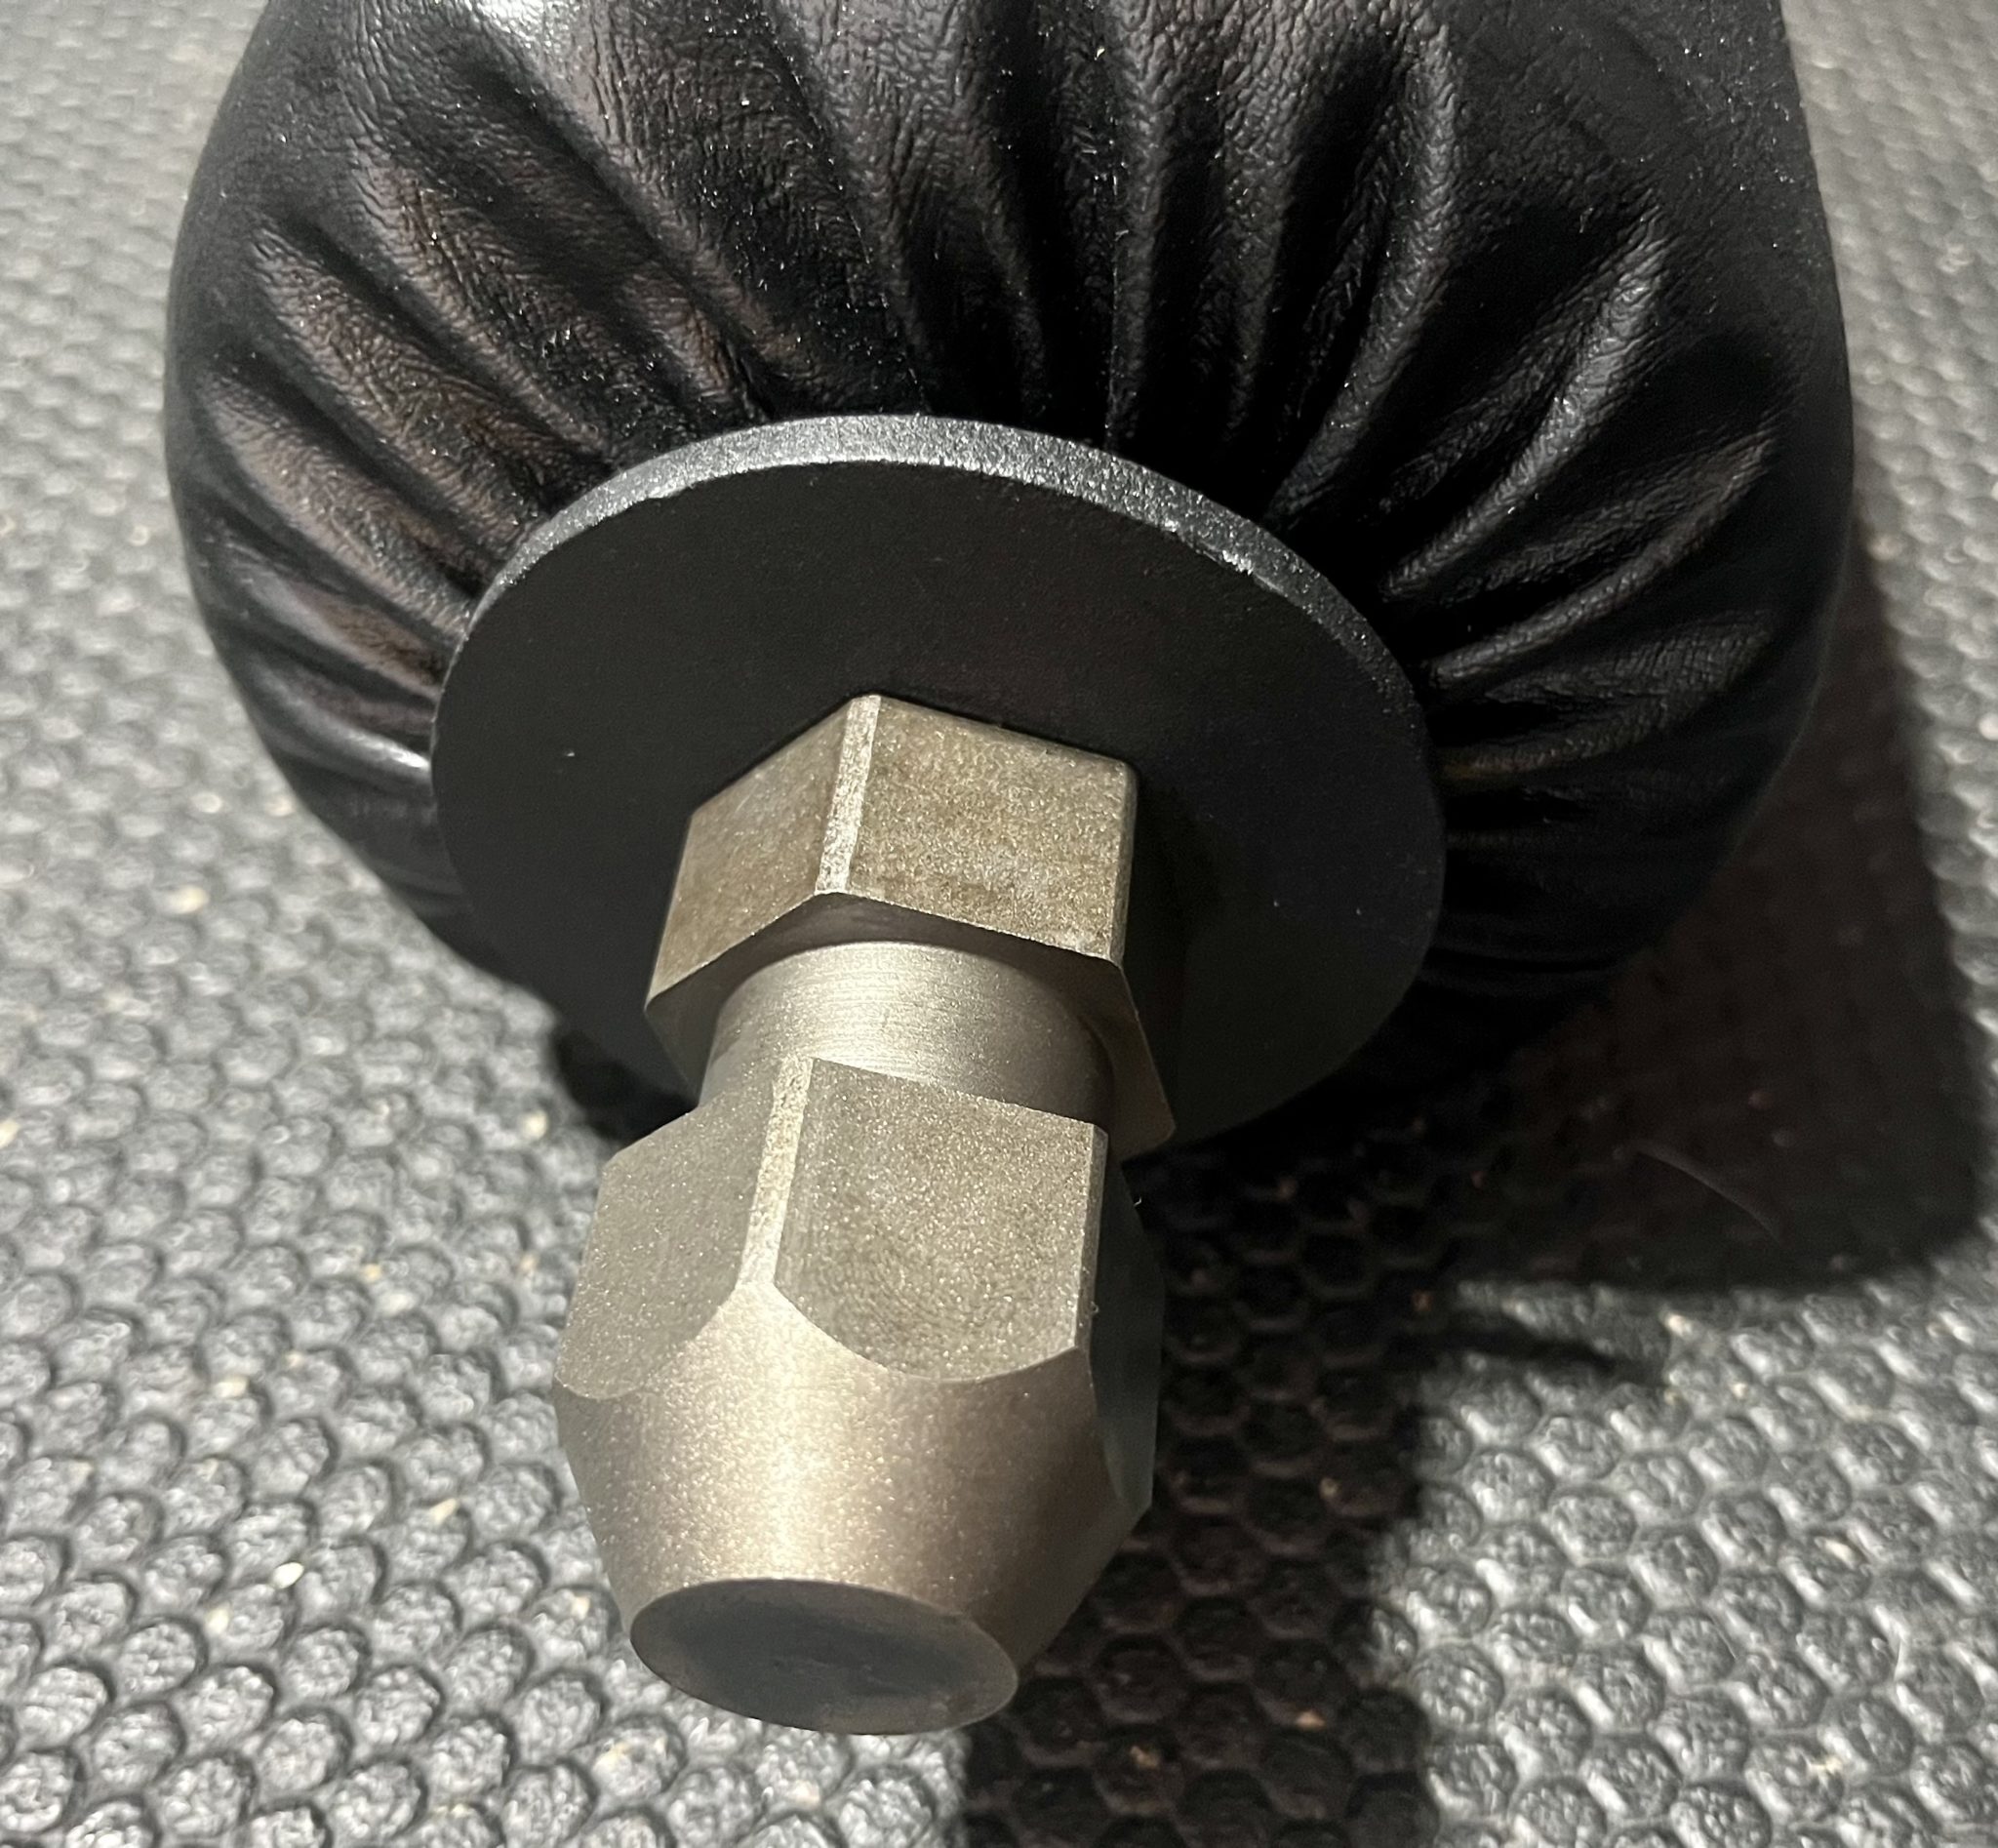
Like the curl arm and preacher pad attachment, the roller pads also use the hex port system.
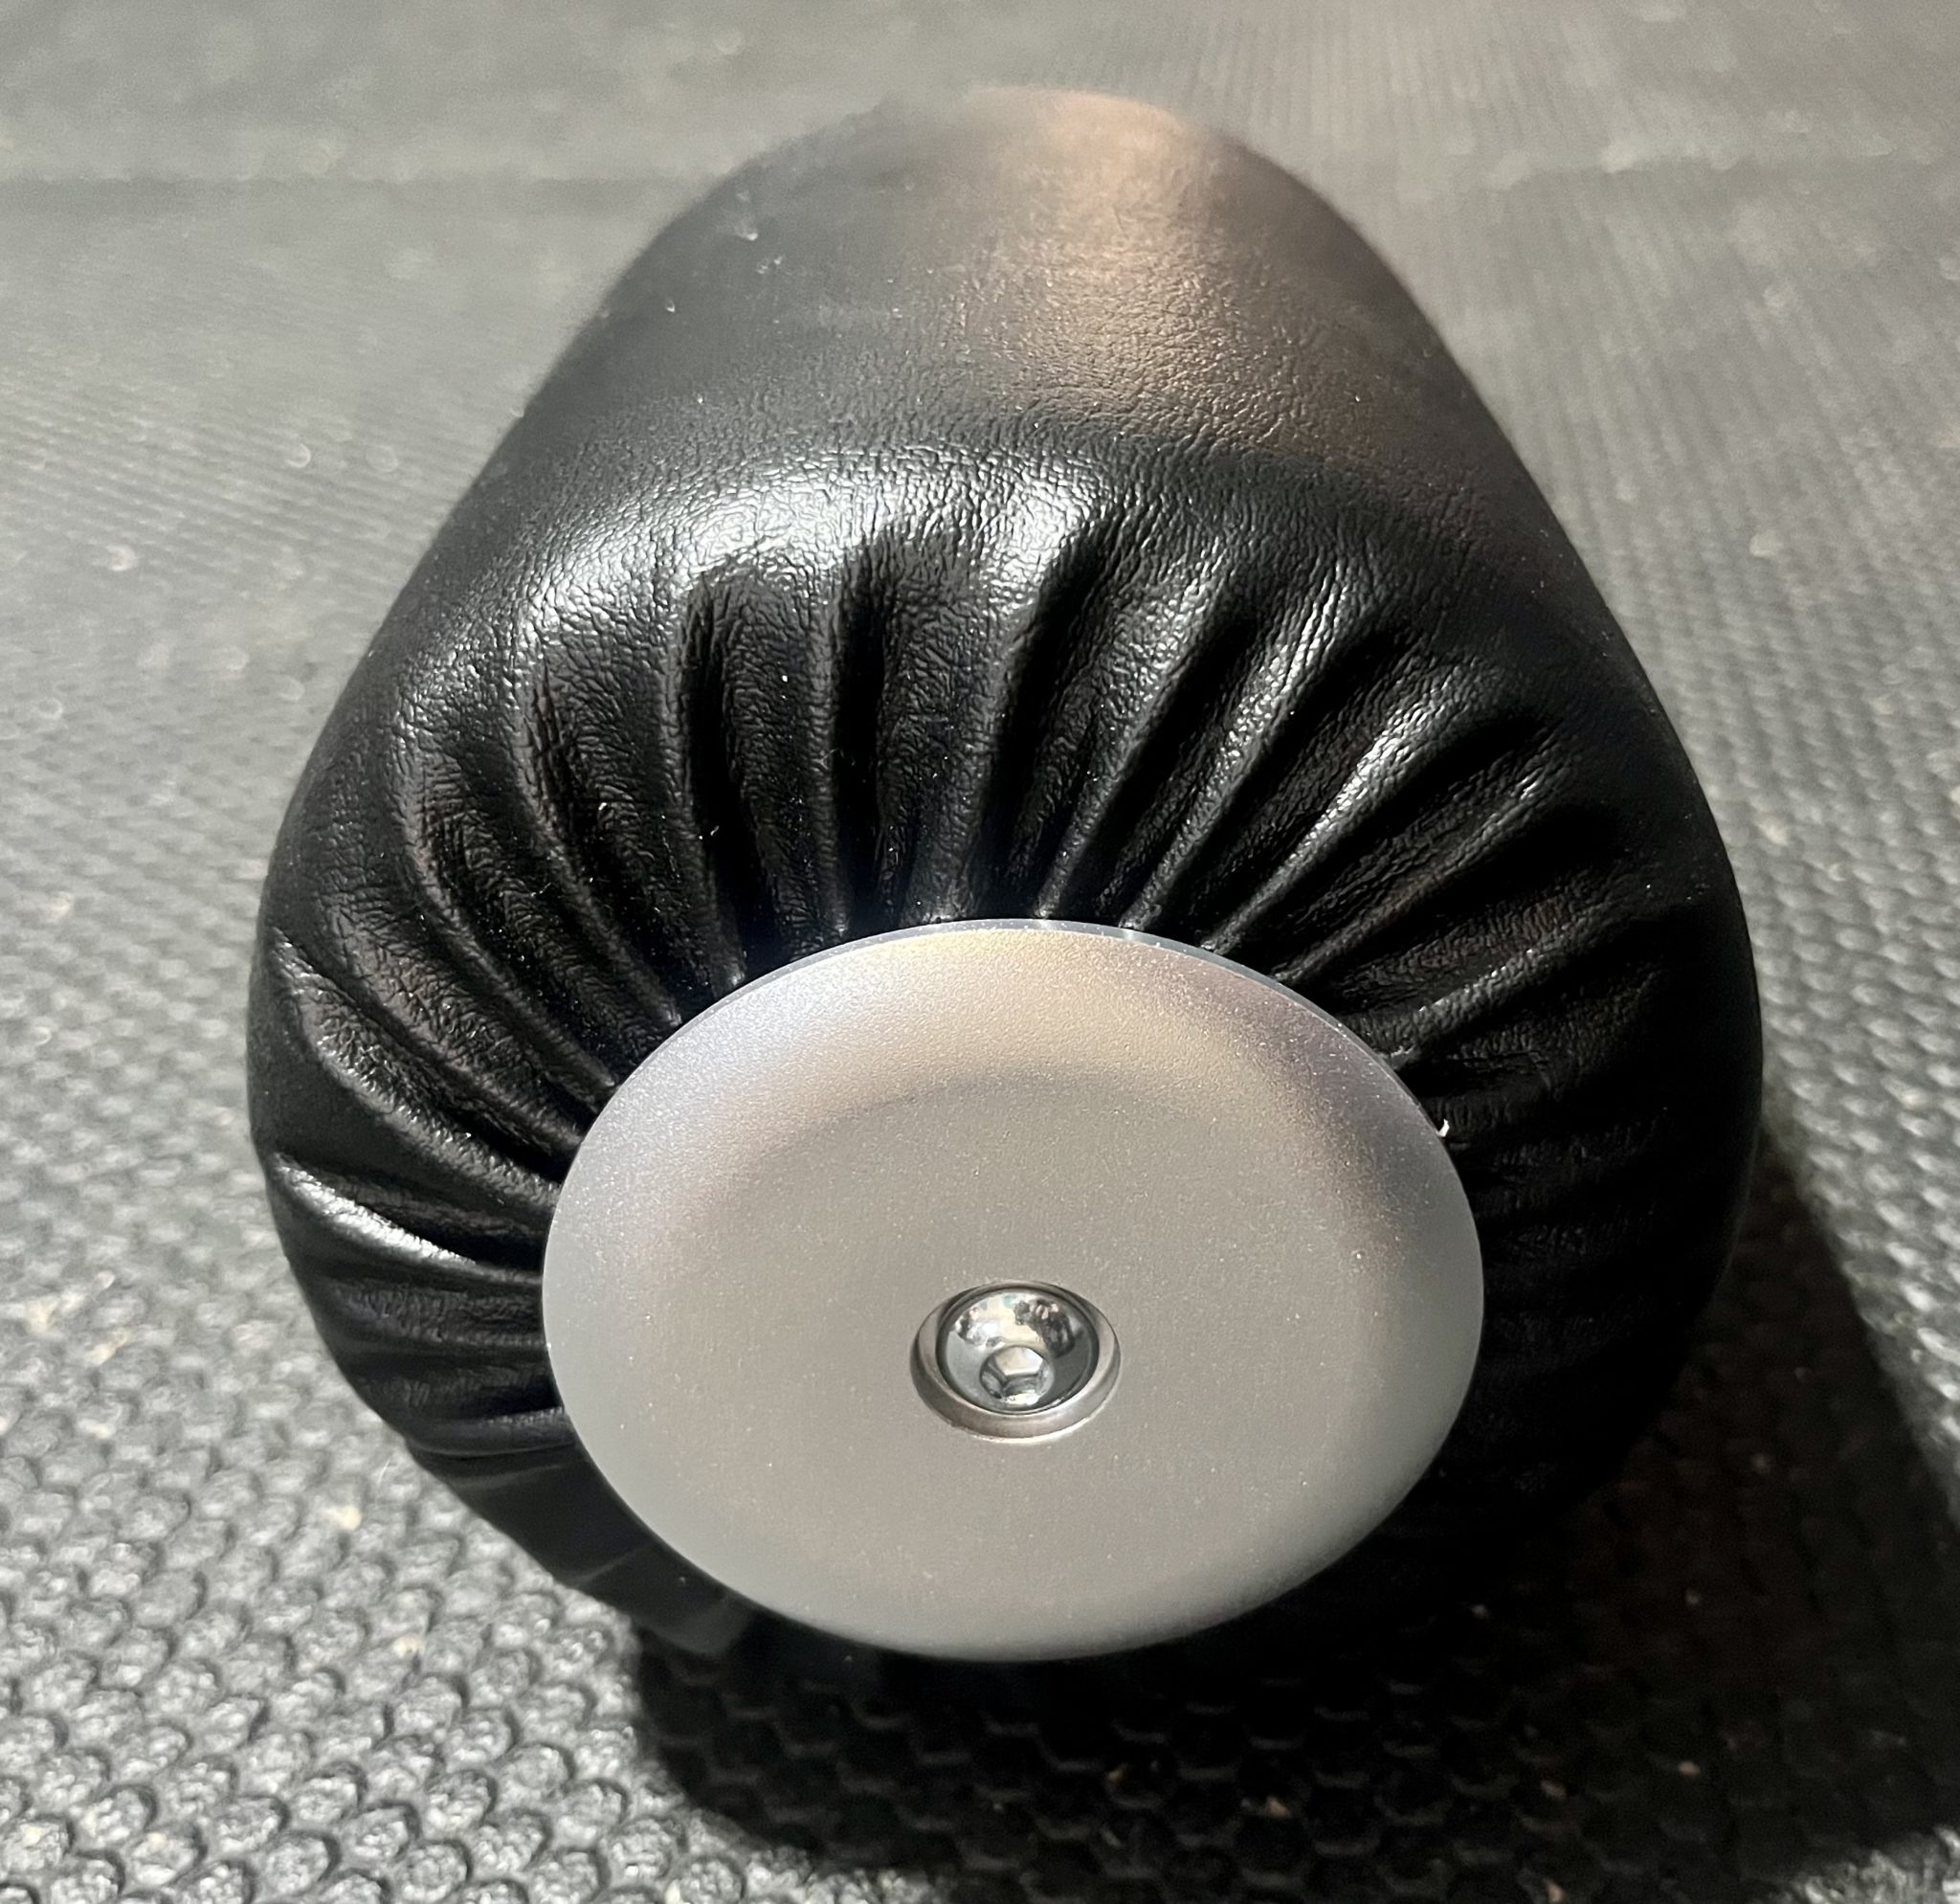
The thickness of the pads and the upholstery are commercial grade quality.
These pads are thicker than any pad I have in my garage gym, they are firm yet extremely comfortable.
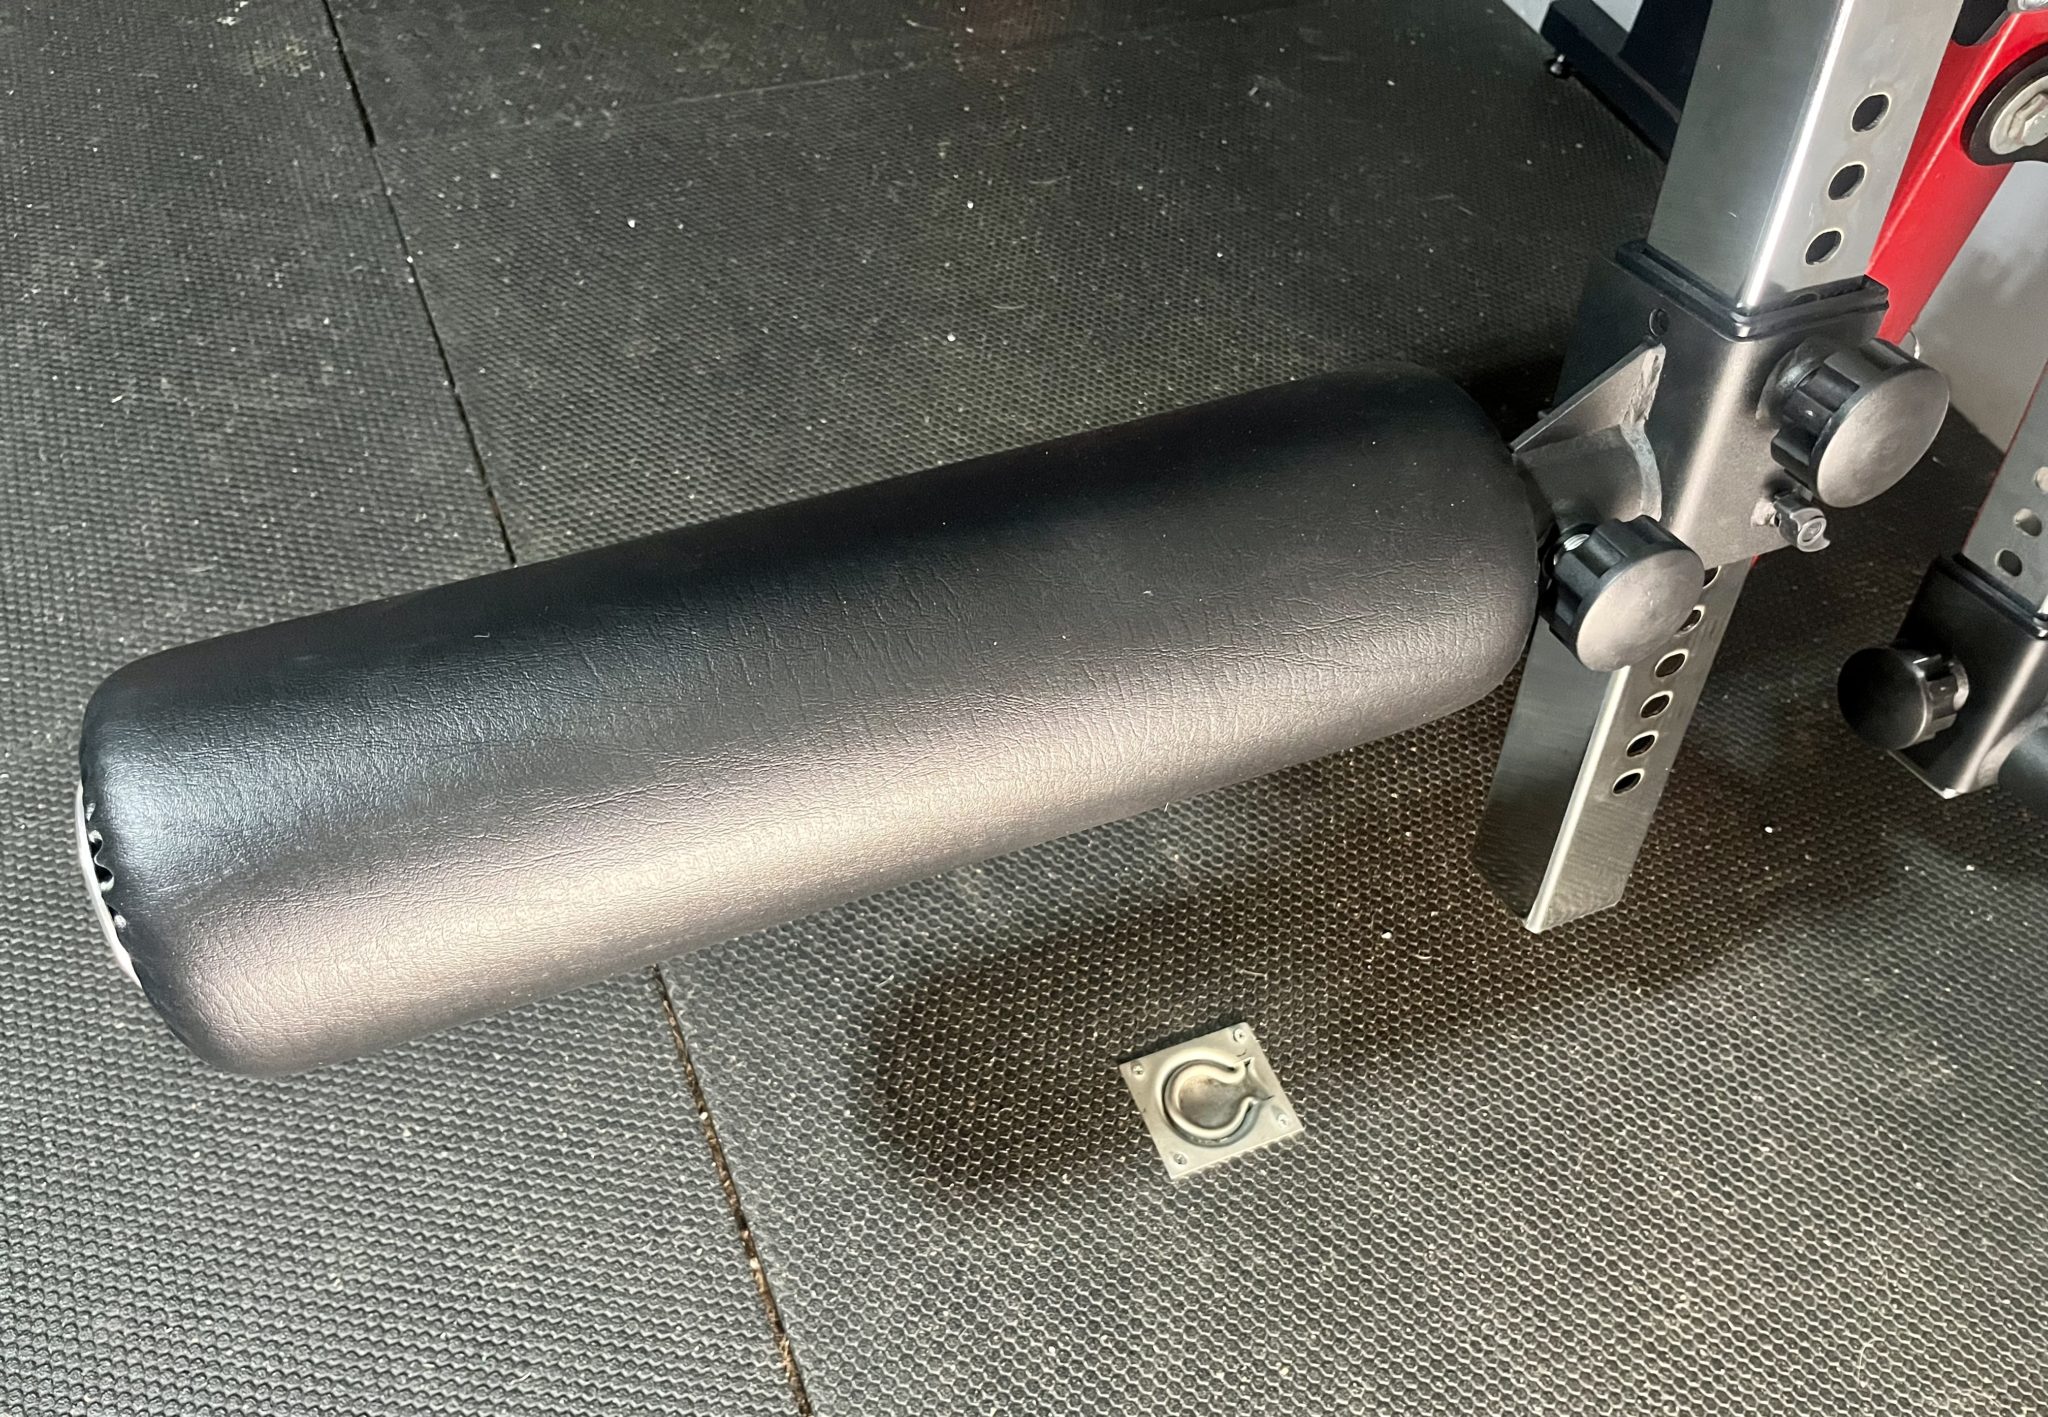
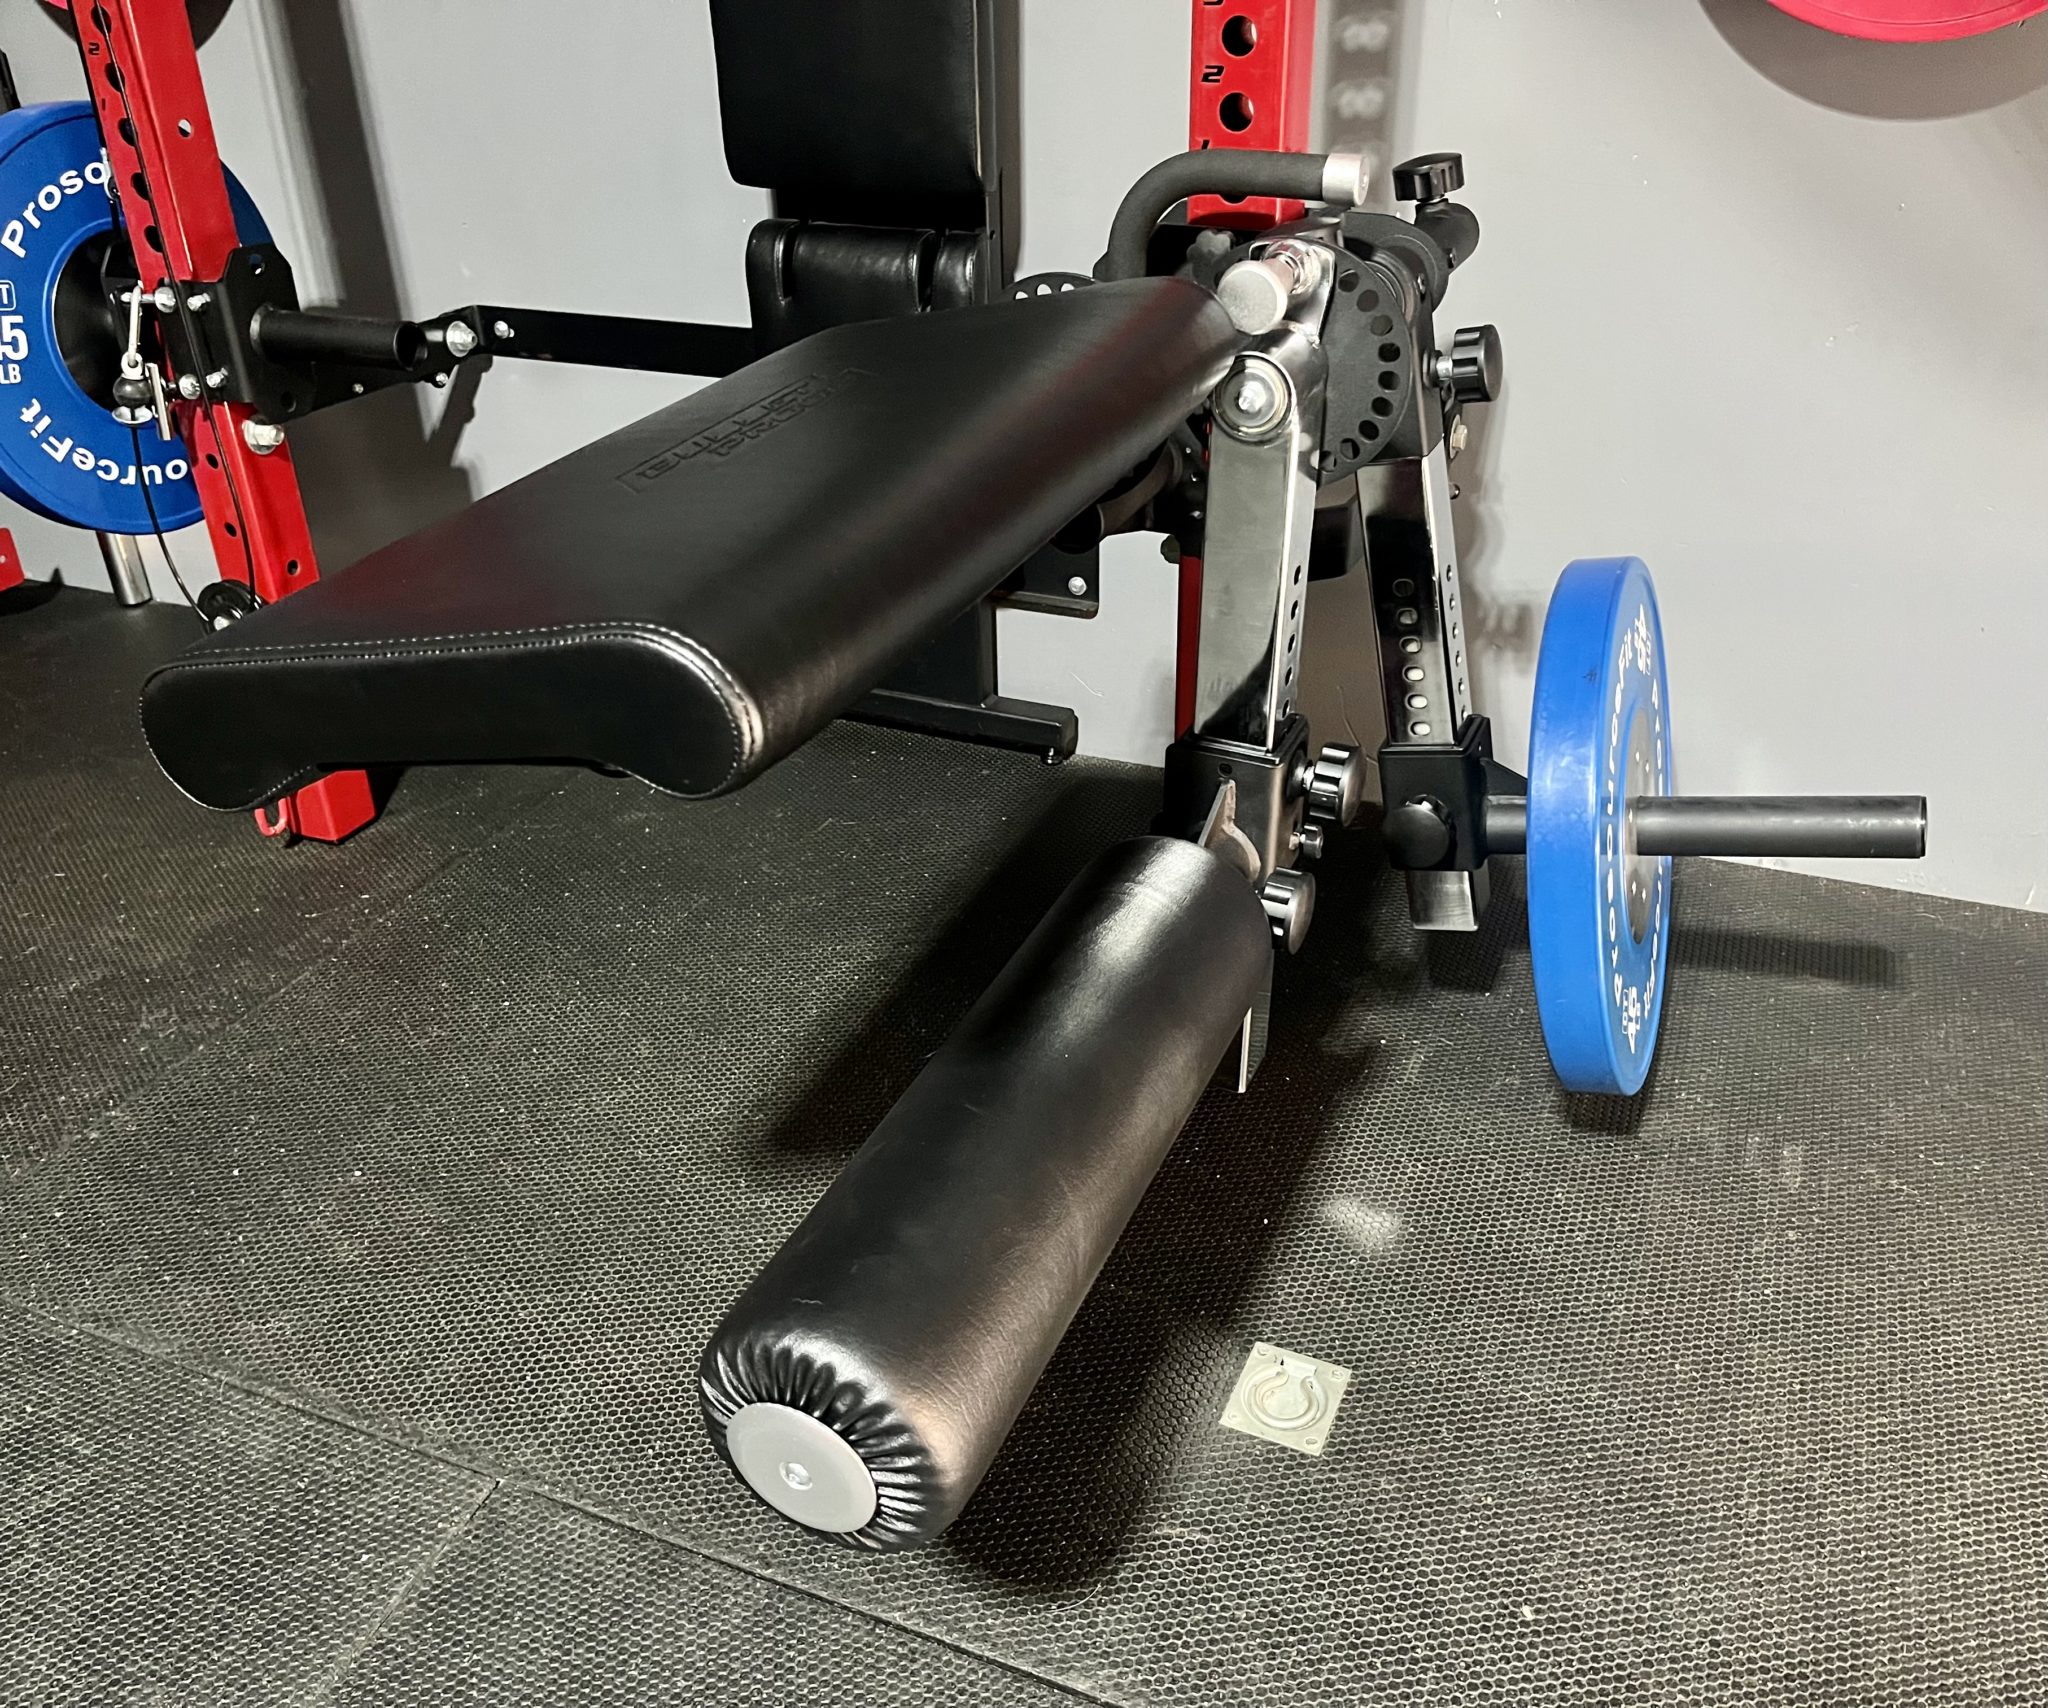
Here’s the long roller pad on the lever arm.
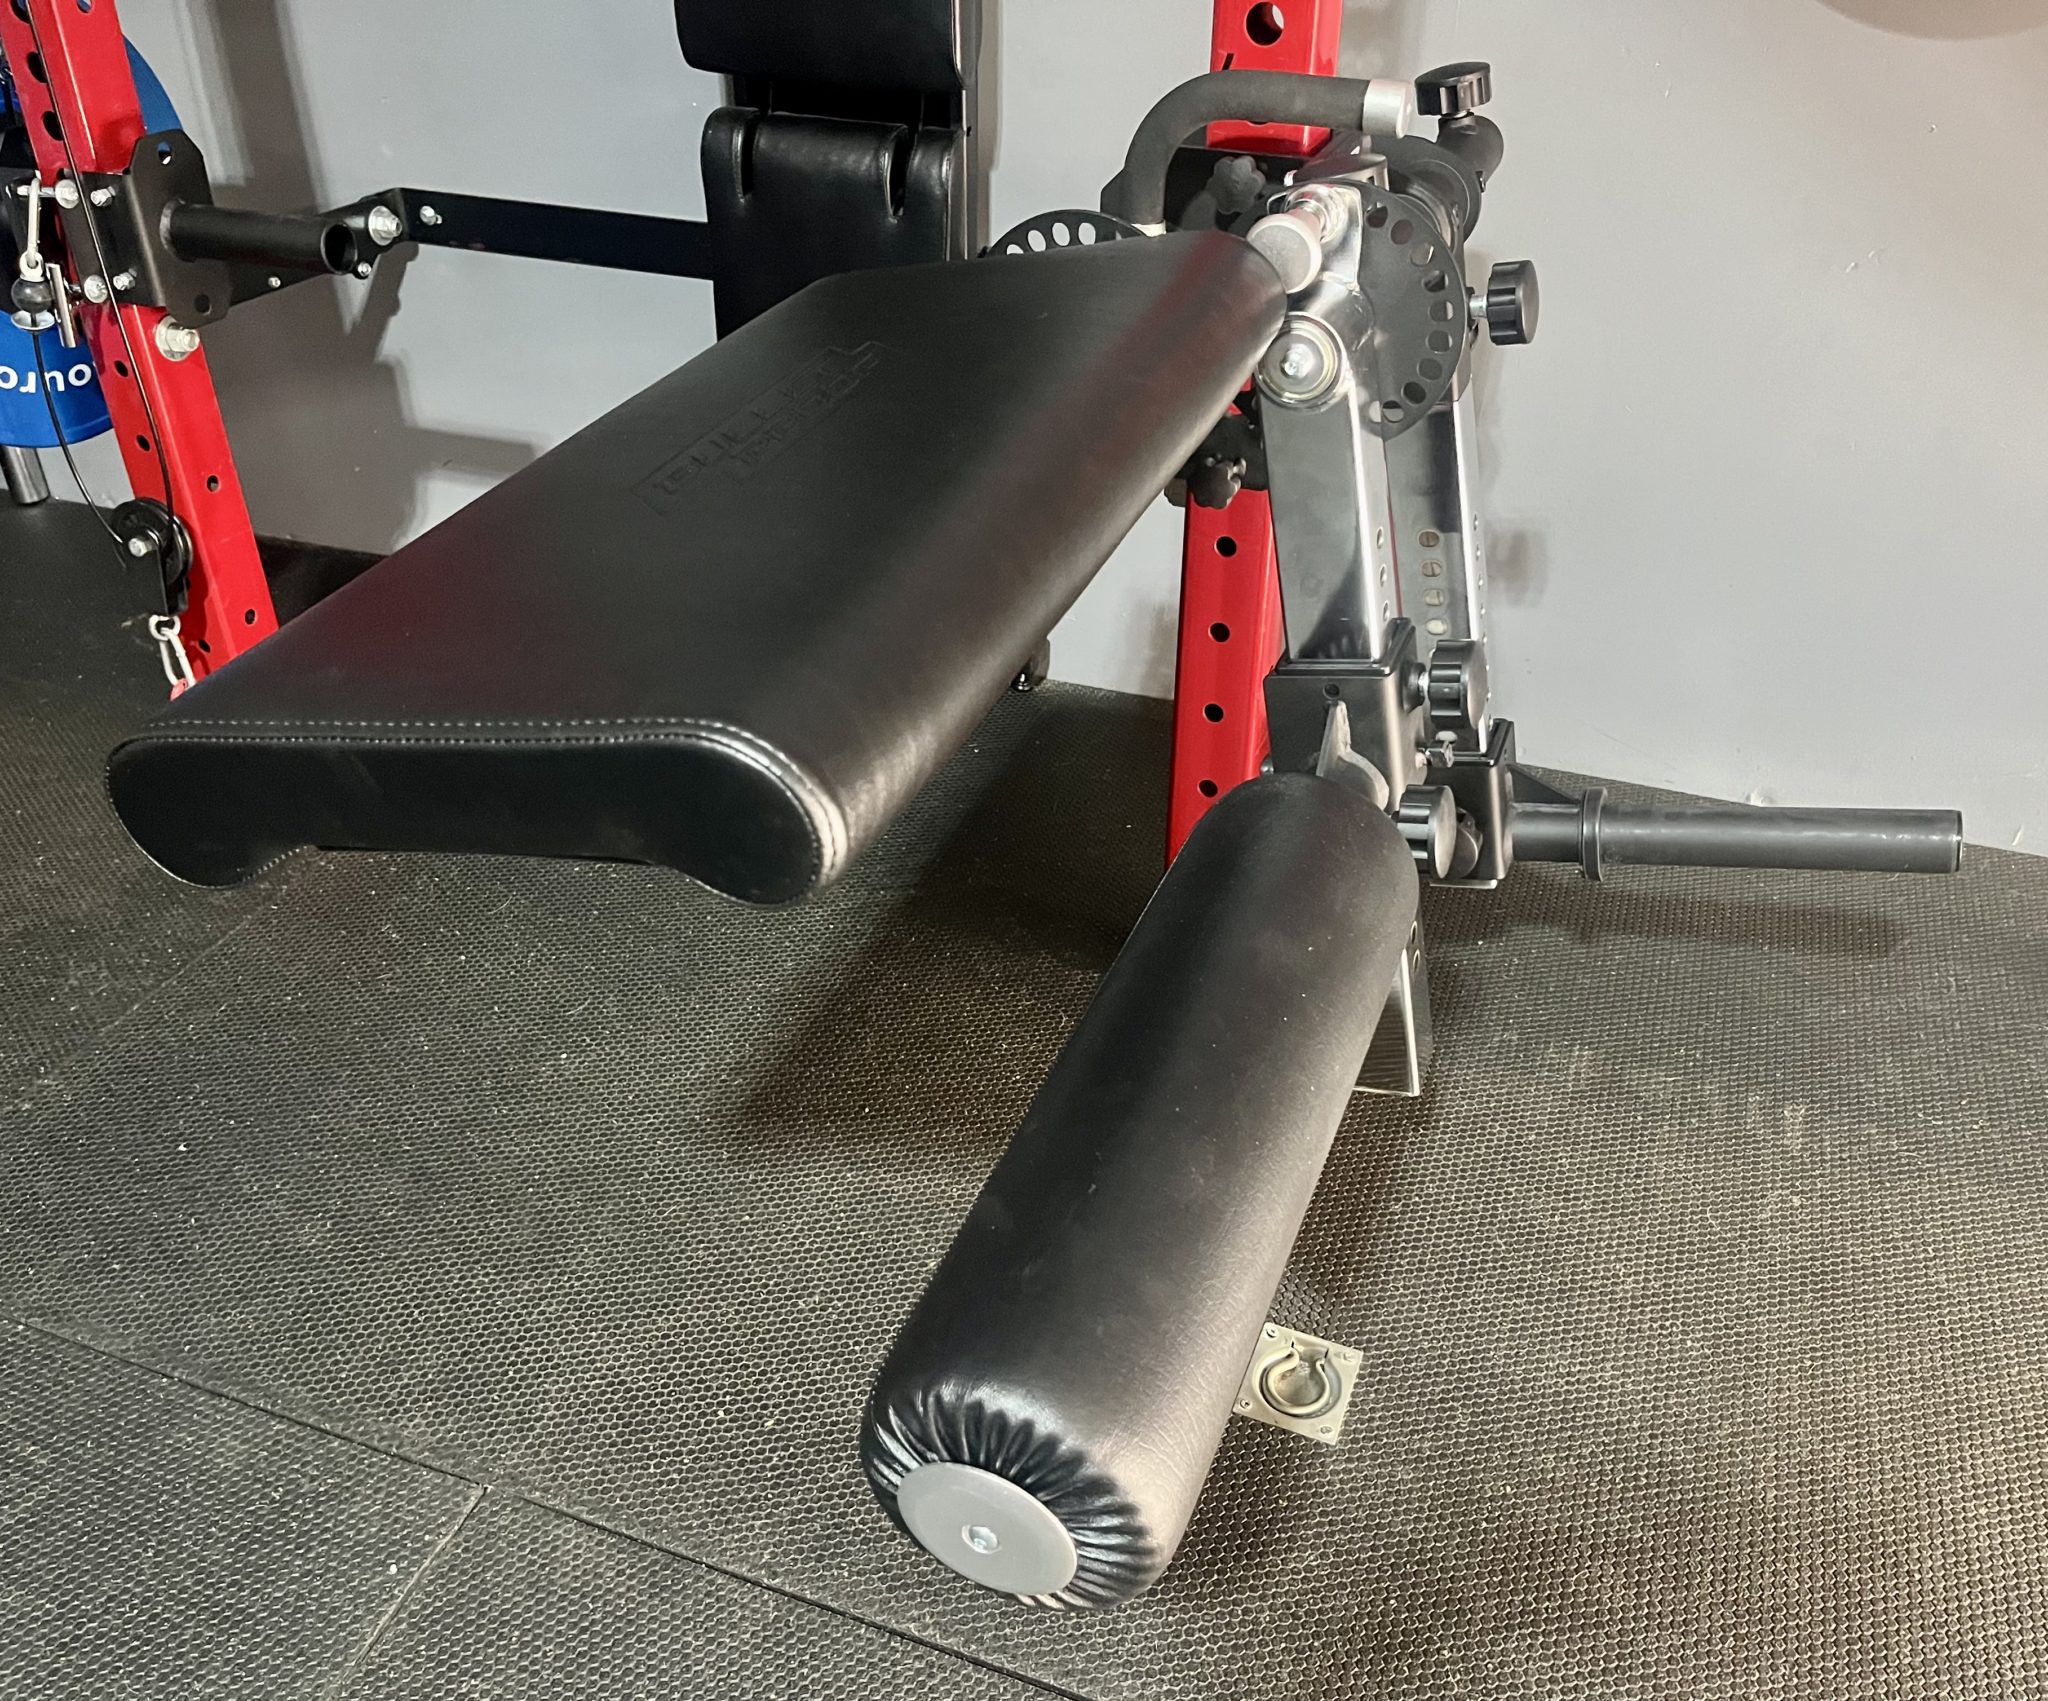
And here’s how I set up the long roller pad with the seat pad for leg extensions.
I like to tilt the front of the seat up and I can also bring the lever arm back some to get a bigger stretch on my quads.
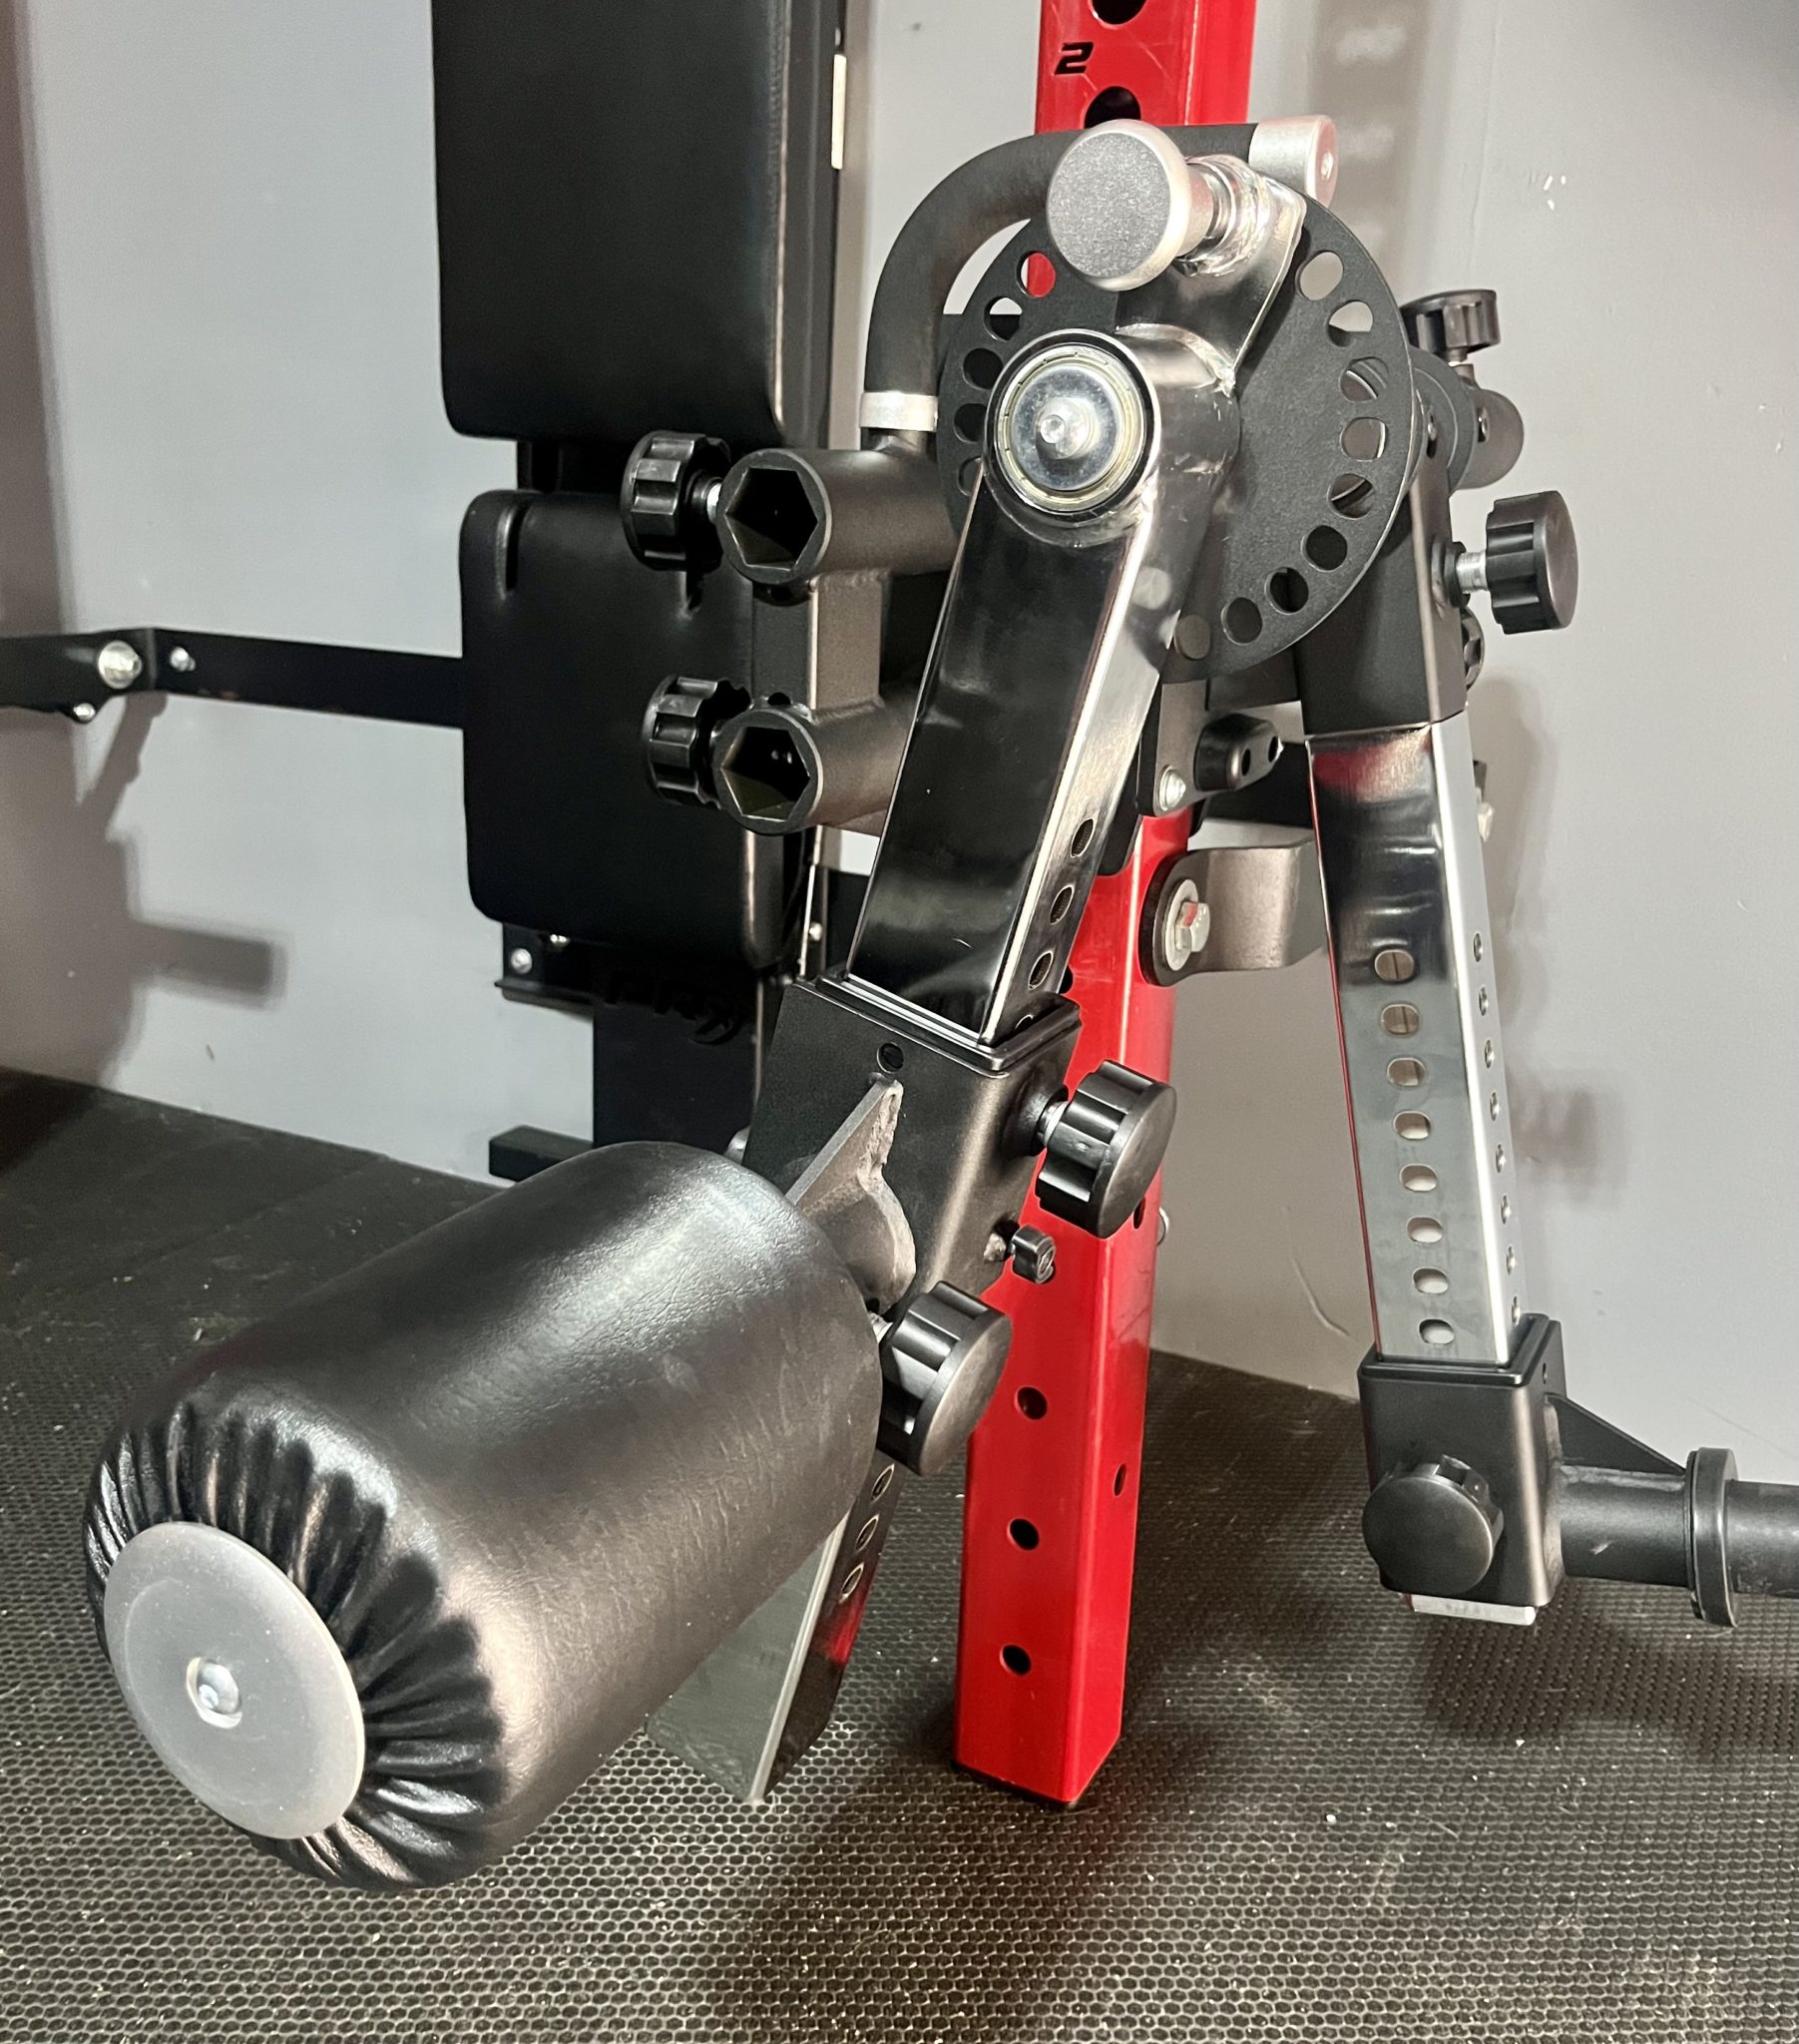
Here’s the short pad on the lever arm.
I removed the seat pad on this pic since I don’t need it for hip exercises where I’m standing up.
That’s the beauty about the Bulletproof Isolator, it can be modified in so many ways.
Bulletproof Isolator Exercises
I can do a lot of exercises with the Bulletproof Isolator so I’ll just show you a few here.
To keep it organized I’ll separate them by body parts.
Arms
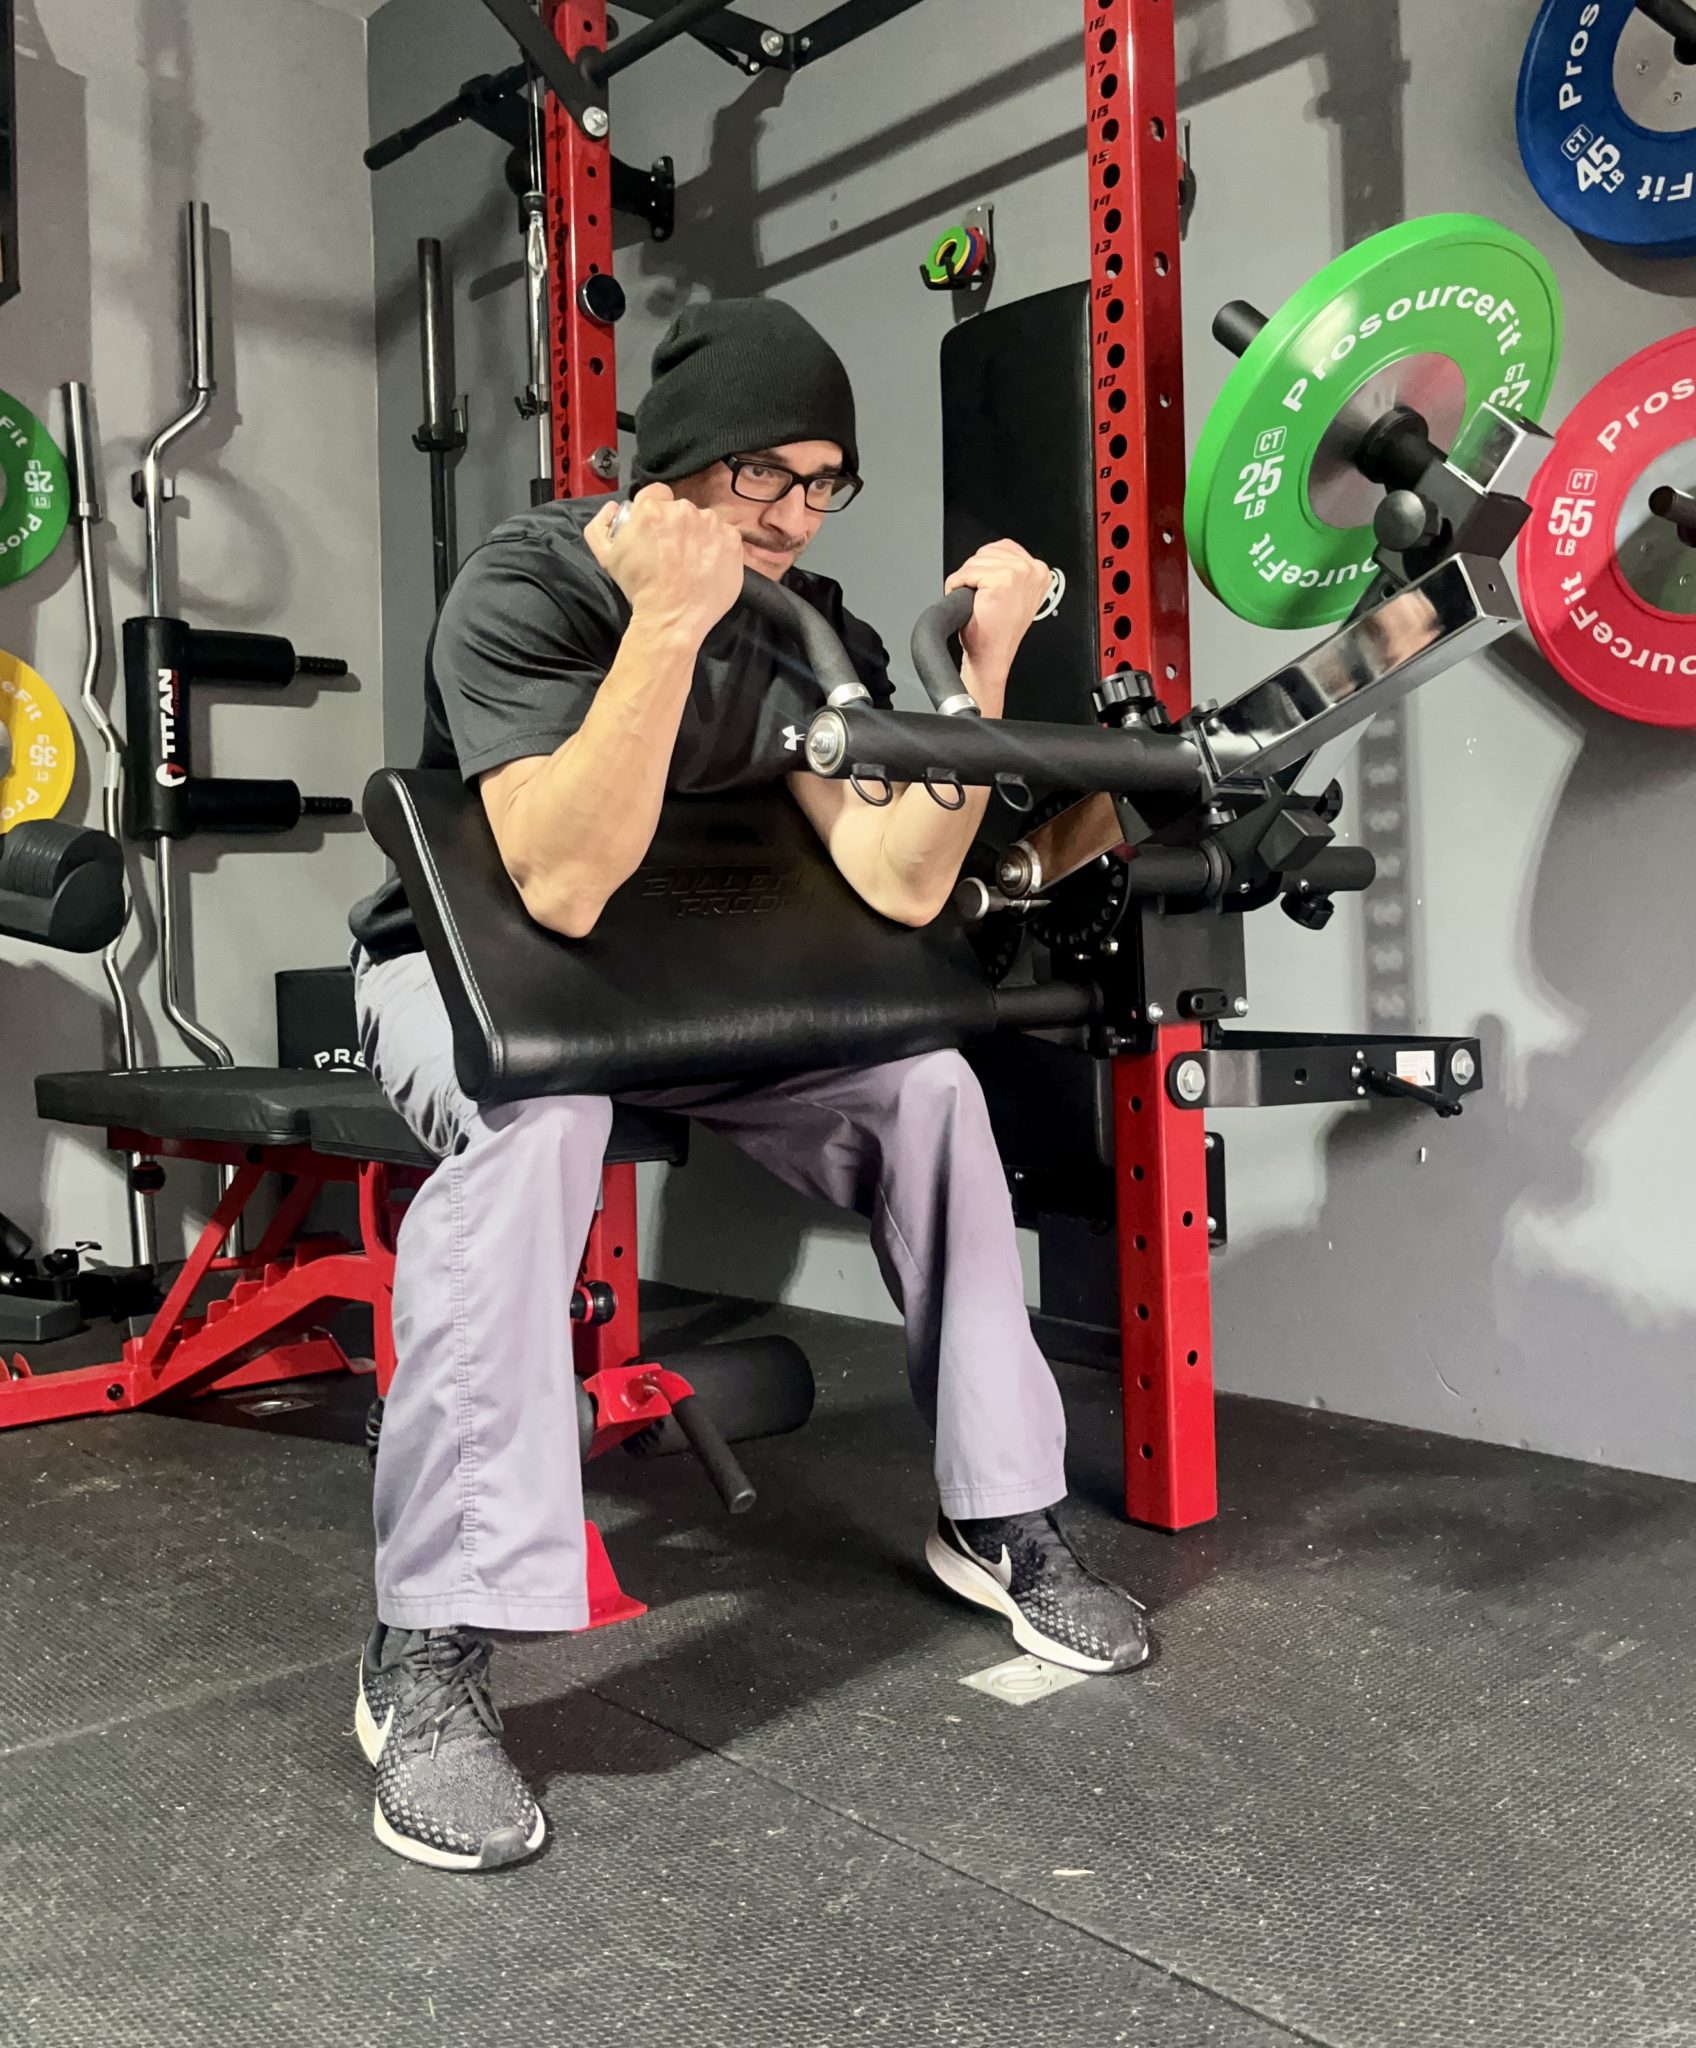
For preacher curls I have the pad angled at 45 degrees, the curl arm around 80 degrees, and I sit on my GetRxd weight bench.
I can also do these standing up by attaching the carriage higher on my rig.
Press play on the video above so you can how the preacher curl works on the Isolator.
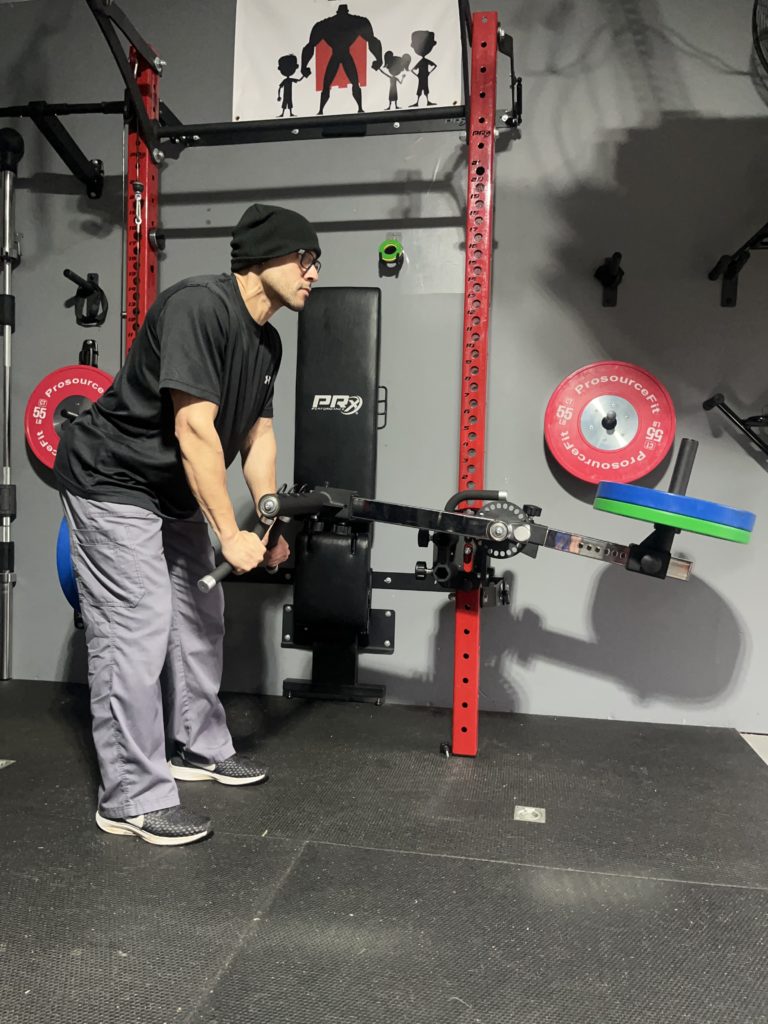
When doing tricep pushdowns I remove the preacher pad and keep the curl arm at the opposite end of the weight arm.
Then all the movement comes from my elbow pushing the curl arm down.
Below I’m showing you other variations of triceps exercises with the Isolator curl arm in different positions.
Legs
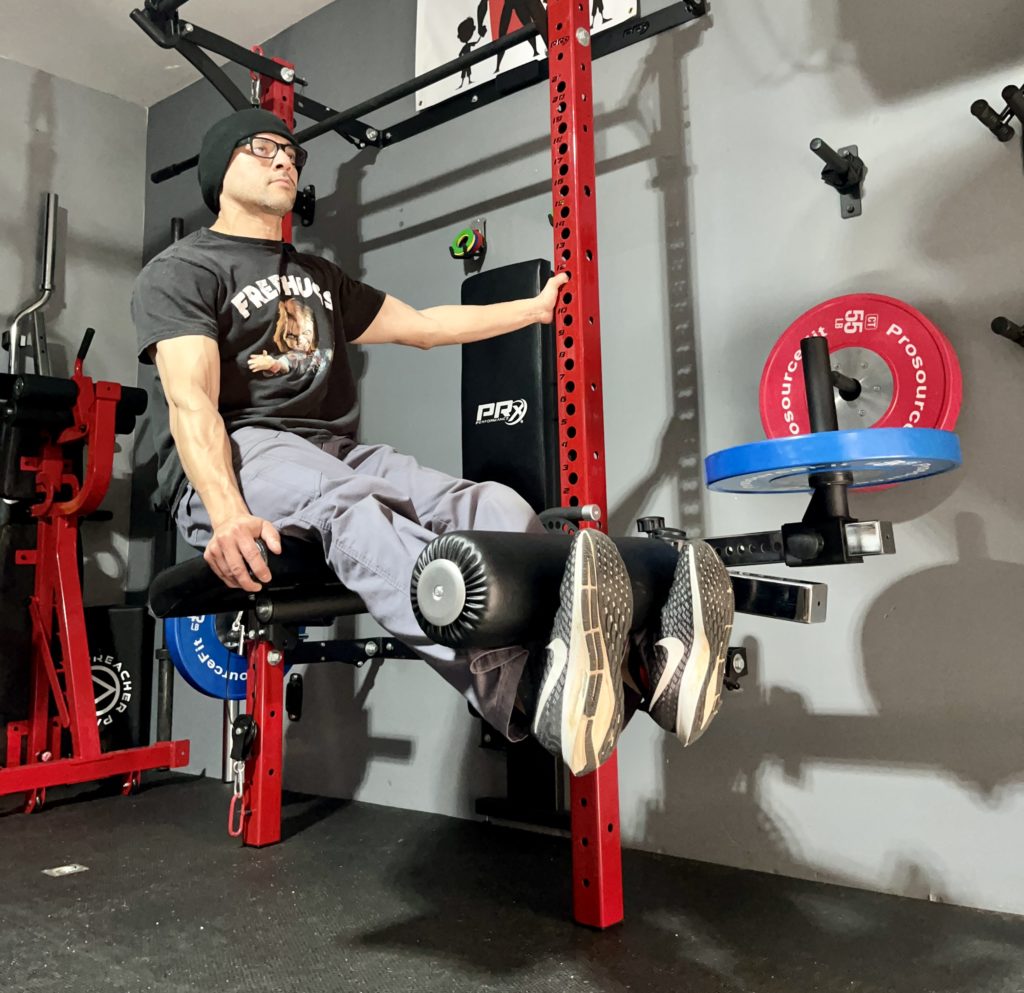
Leg extensions are one my favorites to do on the Isolator.
When I go heavy, I use the GymPin seatbelt so the weights don’t lift me off the pad.
I alternate between these and hack squats as quad finishers on leg day.
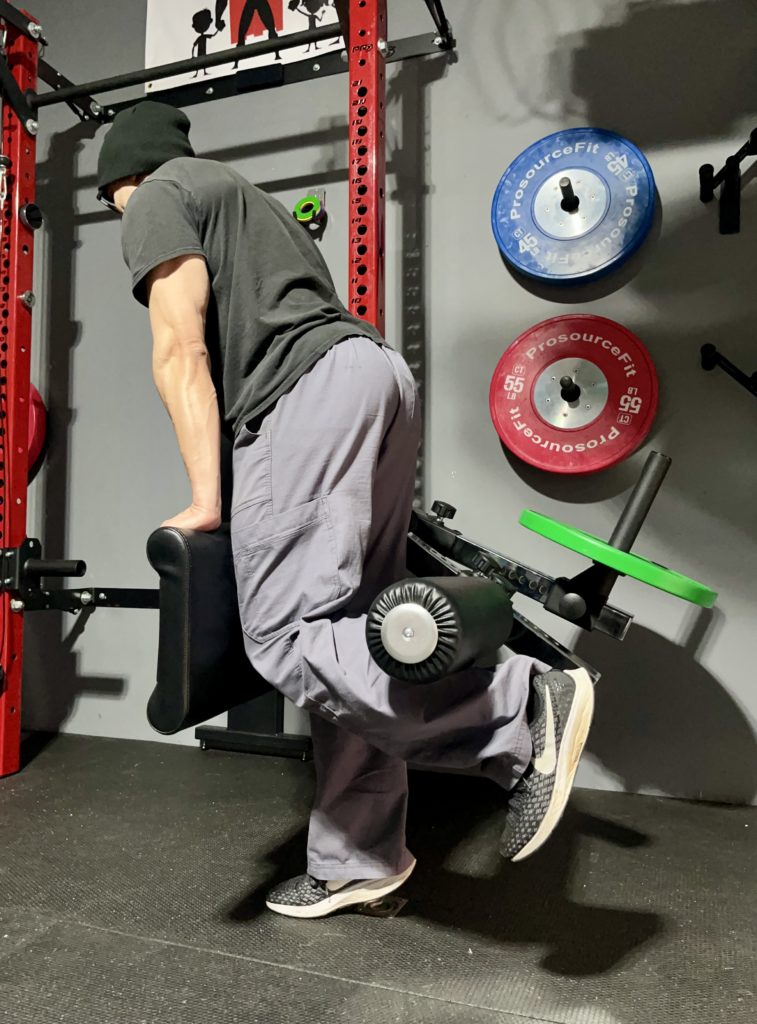
Here I’m doing a standing leg curl which feel very challenging since I’m constantly fighting gravity.
Before getting the Isolator, I was doing these with a dumbbell and the OmniStrap which I still love using.
The Isolator just makes it a bit easier to move from one leg to the other.
I can do leg curls either on my stomach or seated.
The seated leg curl is a bit more complicated since I have to set the Isolator carriage upside down to pull it off.
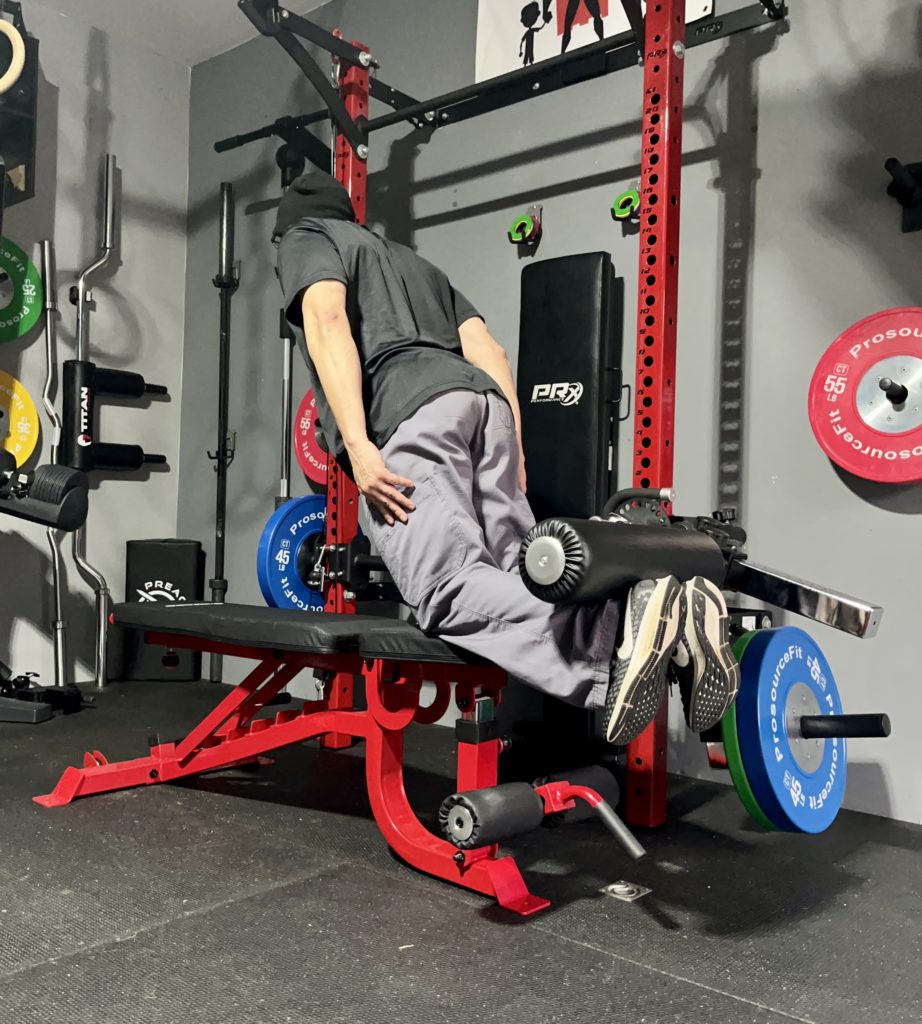
I can also use this set up to do Nordic curls.
To do Nordic curls I add more weight on the weight horn to offset my bodyweight.
This keeps the lever arm from moving while it holds down my legs.
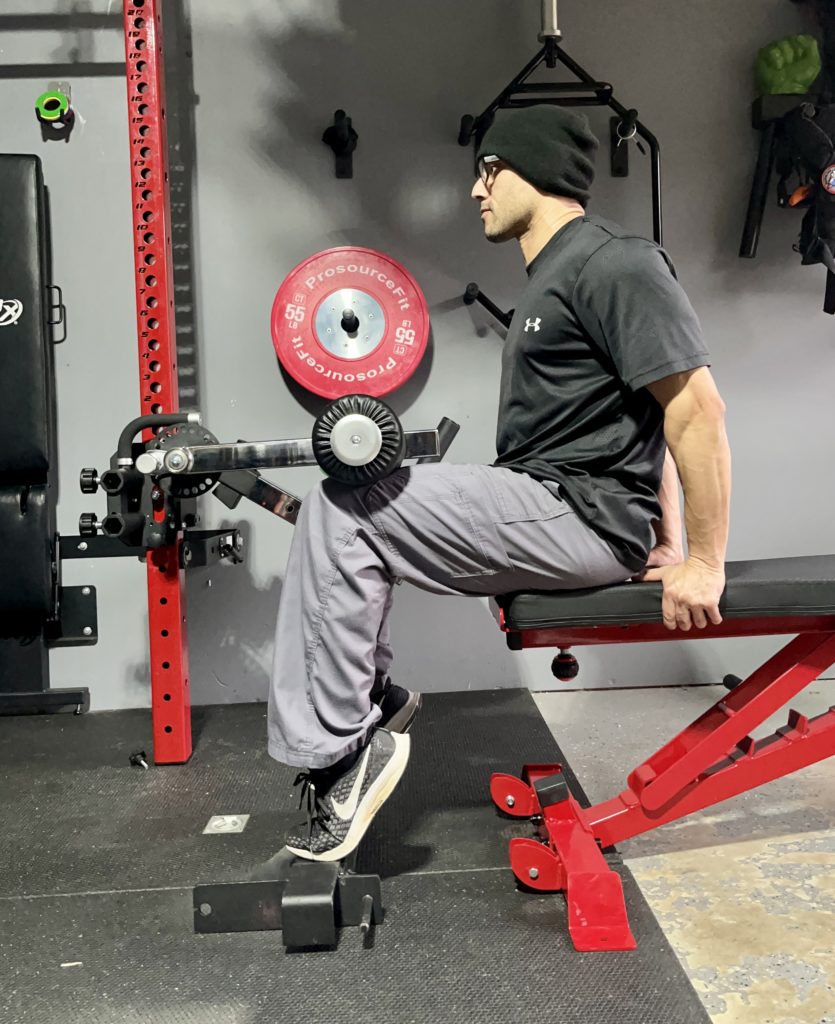
Seated calf raises are easy to set up.
I sit on my bench and have a spotter arm on the floor to get my heels off the floor.
Glutes
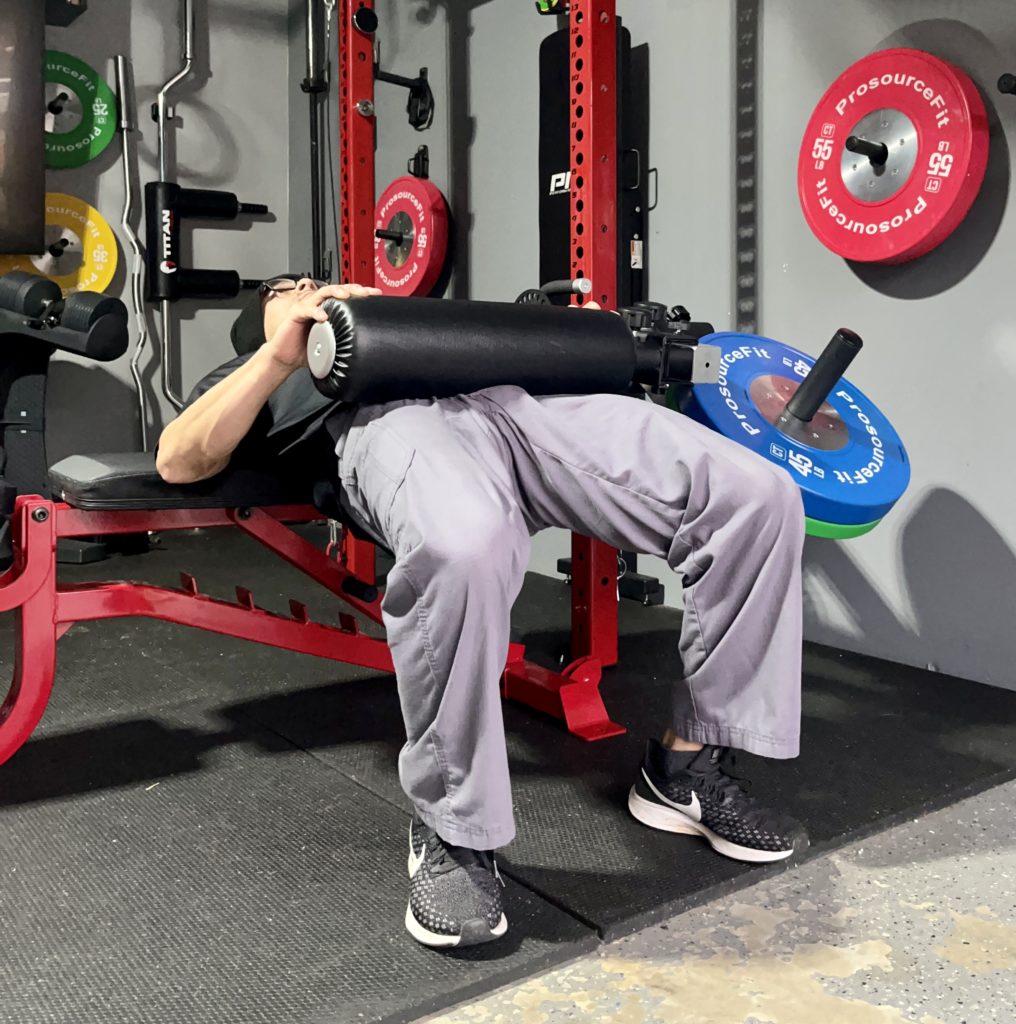
To isolate the glutes I do exercises with both rollers.
For hip thrusts I attach the long roller pad and rest my back perpendicular to my weight bench.
I’ve used a hip thrust machine before but they take up space so having the Isolator to do this is a huge space saver.
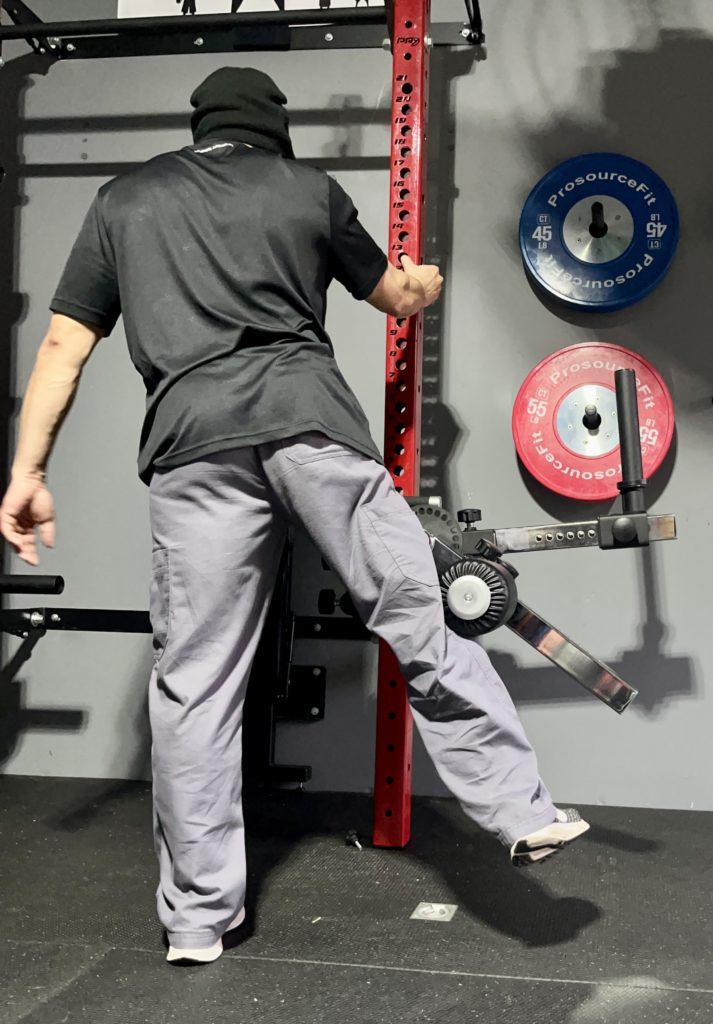
If I want to do hip abductions or hip extensions for the glutes, I attach the short roller pad.
Shoulders
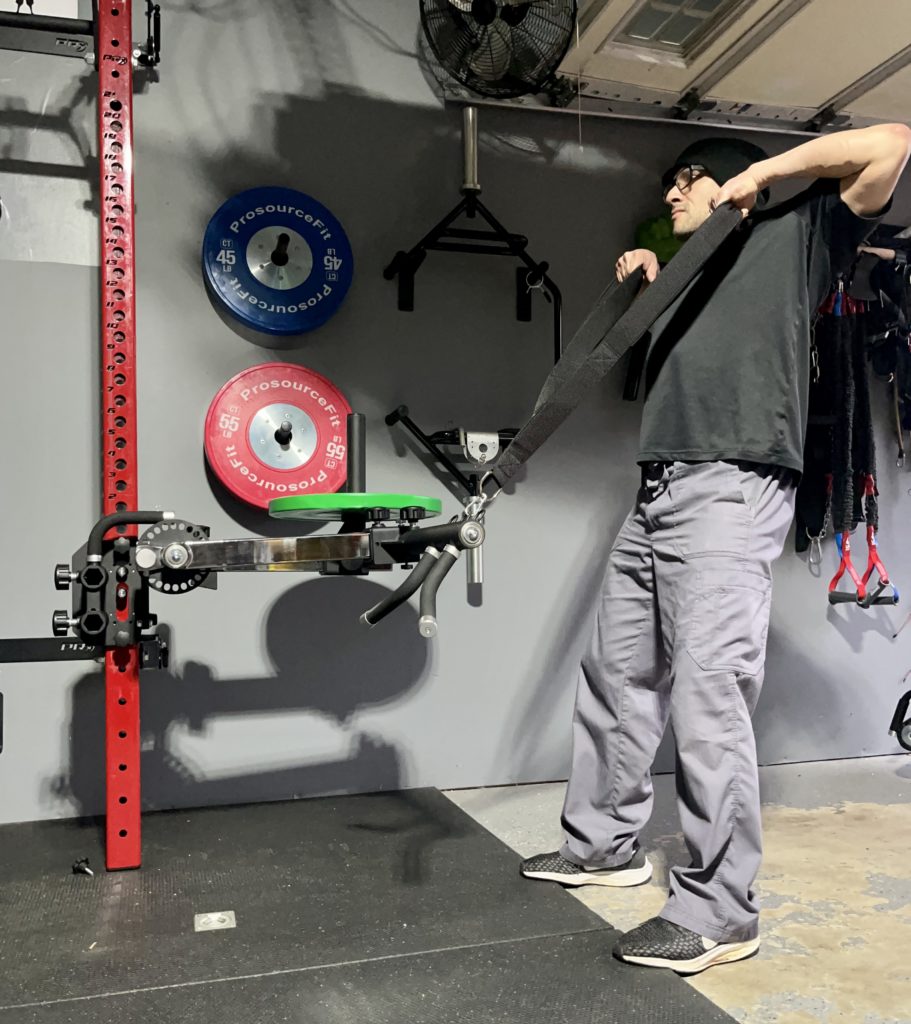
For the shoulders and traps I like to do upright rows with the Bulletproof multi-strap attachment clipped to the middle curl arm loop.
Back
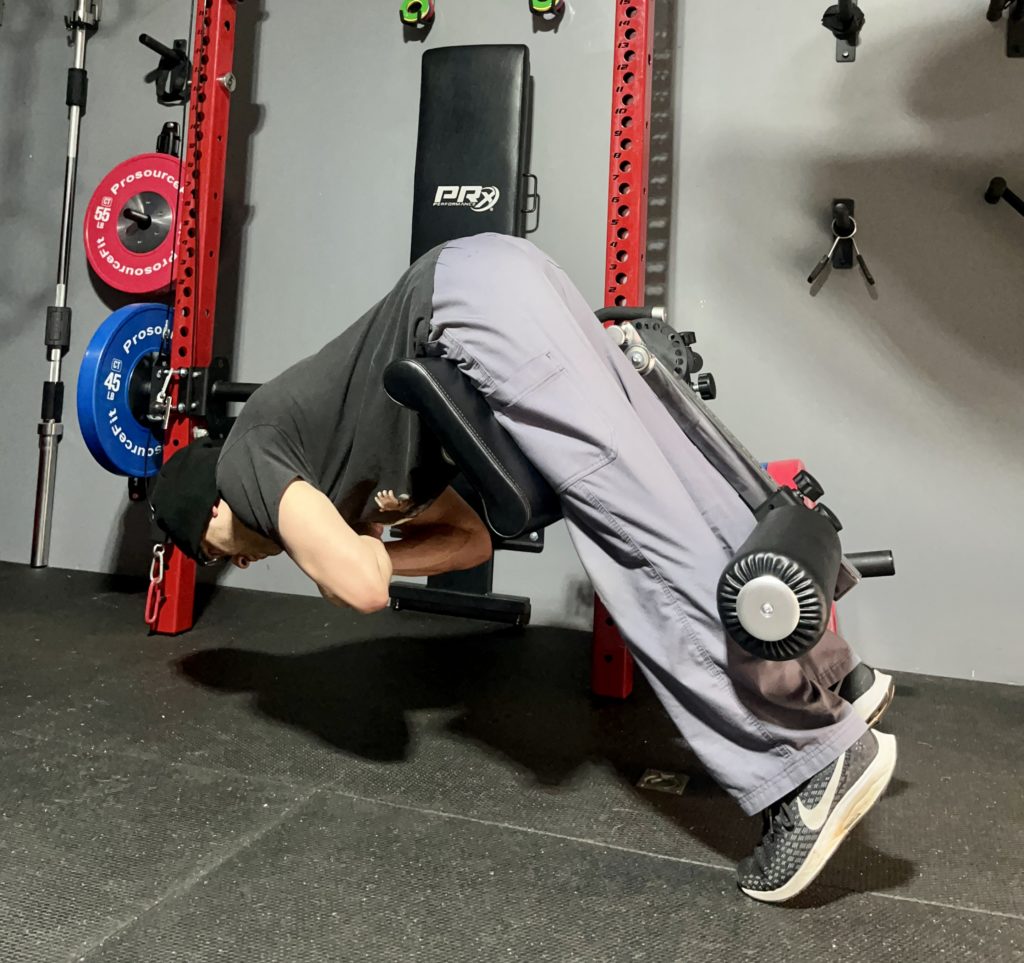
45 degrees lower back extensions are easy to set up on the Isolator.
For this I use the long roller pad with the lever arm and preacher pad angled at 45 degrees.
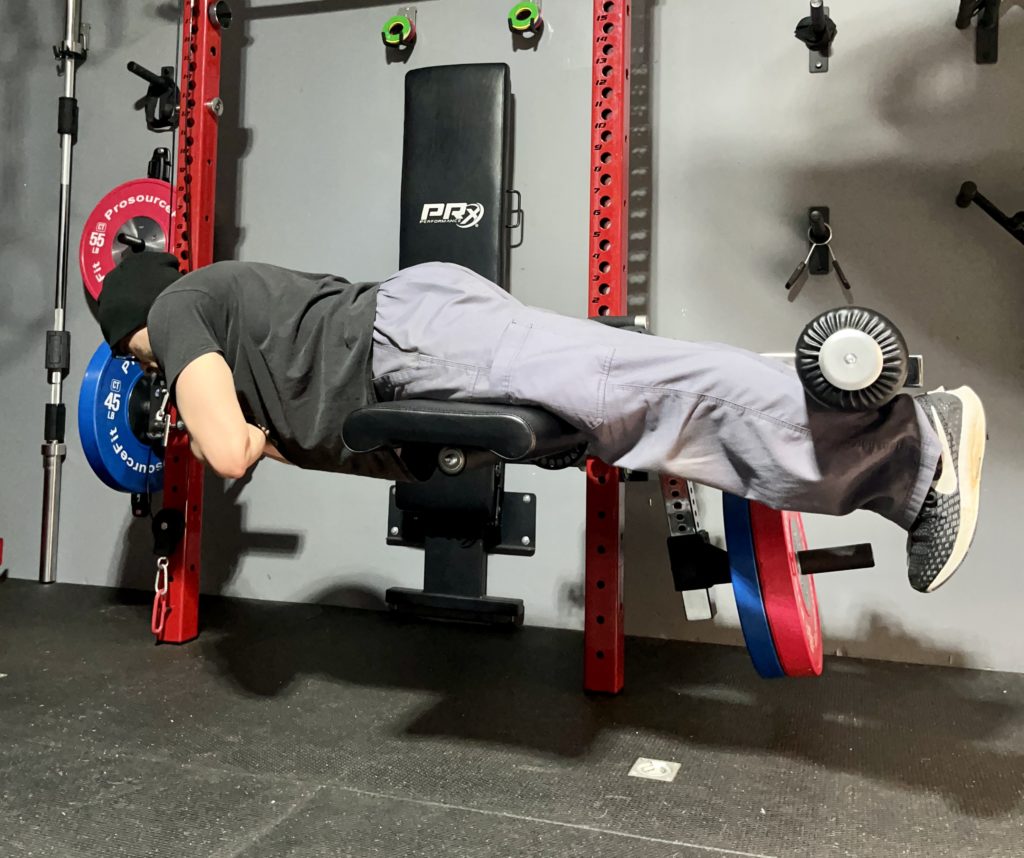
I can also set this up to do 90 degree lower back extensions like a standalone GHD machine.
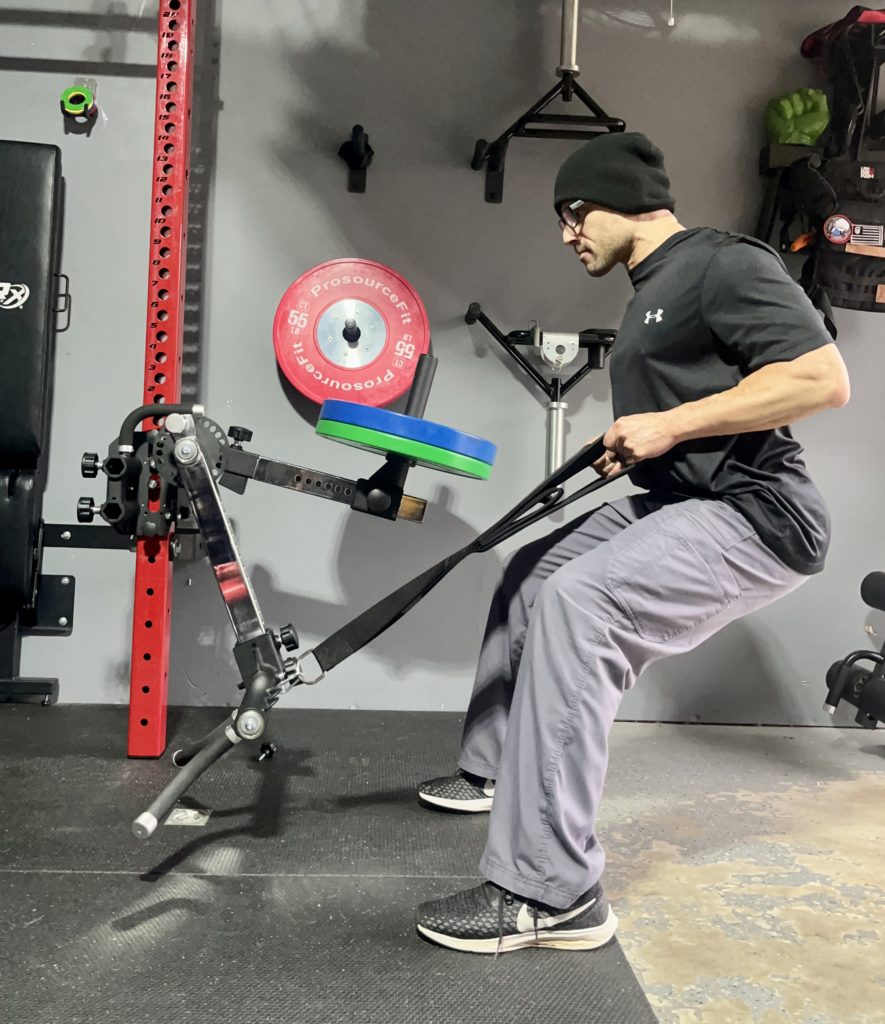
For the middle back I like to do standing rows with the multi-strap attachment.
I can also use the same set up sitting on the floor for seated rows.
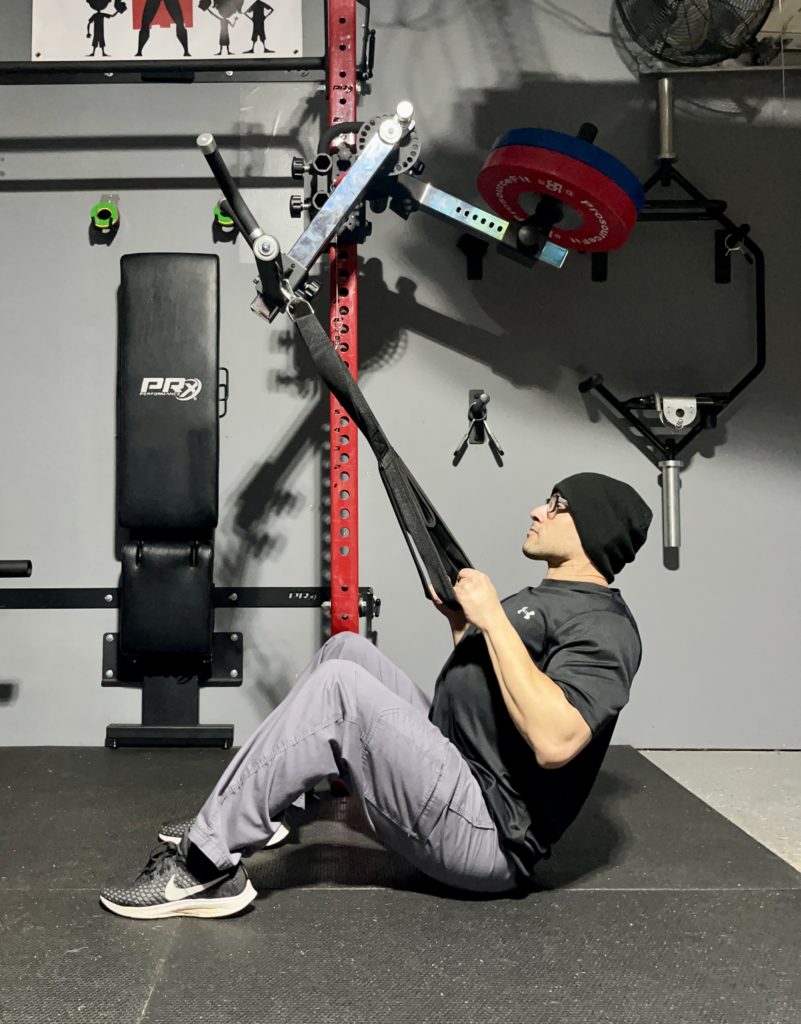
And for lat pulldowns I move the Isolator up high on my rig.
Then I get low and pull down using the multi-strap attachment.
Abs
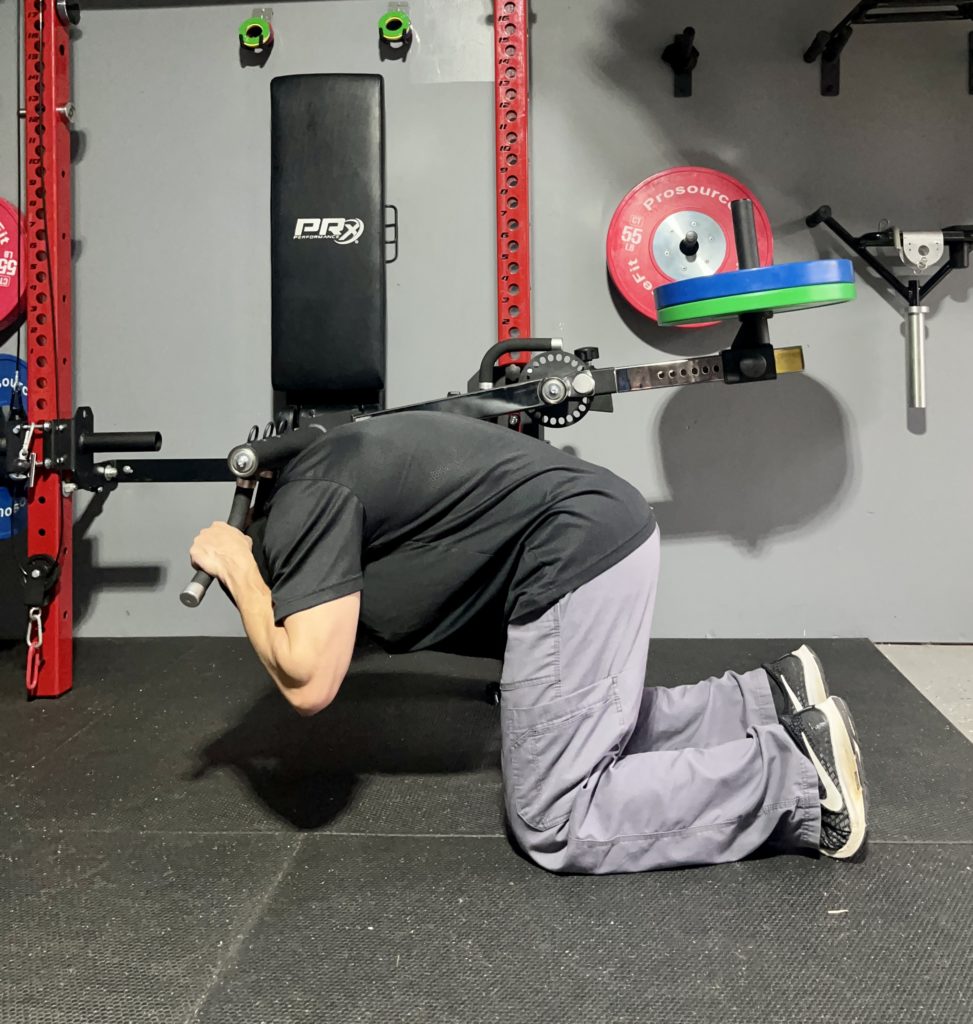
Here’s how I do weighted crunches using the curl arm.
I can also use this same set up do them with triceps ropes or the multi-strap attachment.
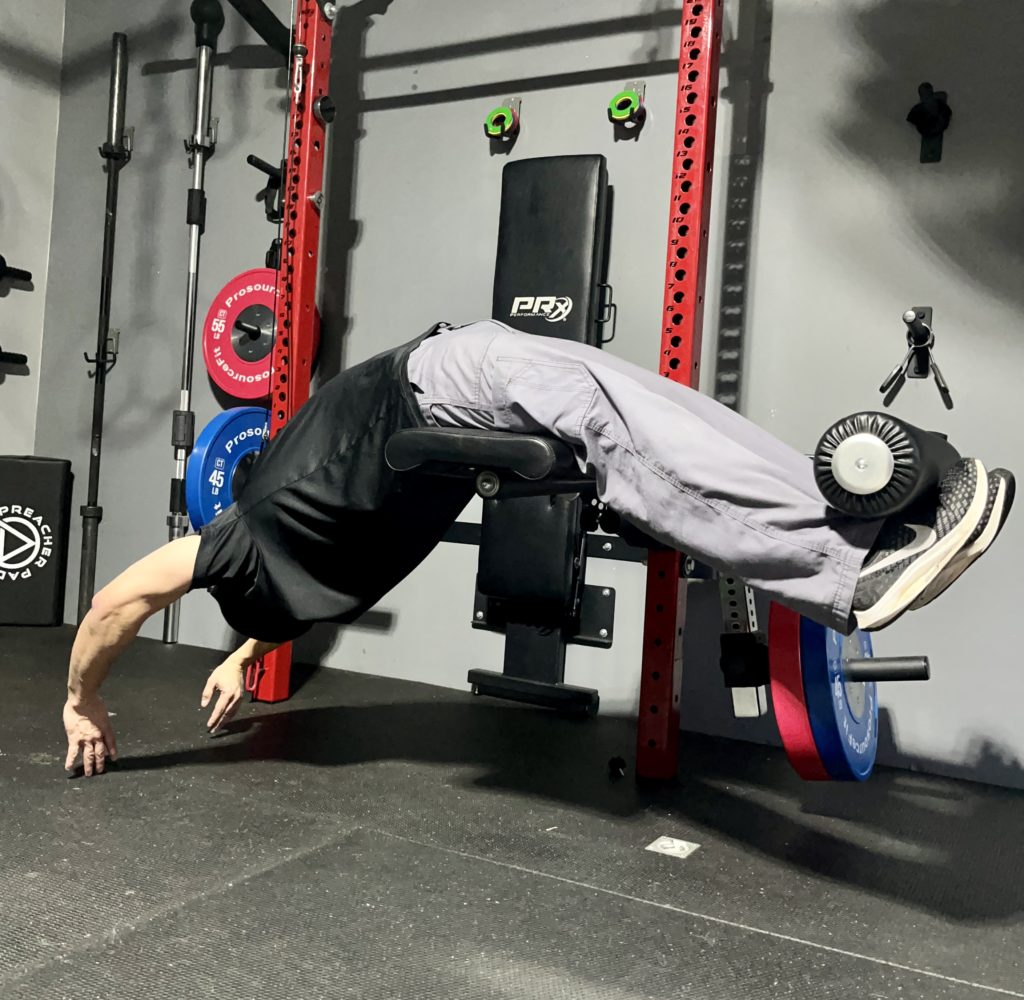
And the last exercise I’ll show you is GHD sit ups.
Easy set up with the seat pad and long roller pad.
For this I make sure to add weight on the weight horn to counter balance by weight.
Isolator vs Other Rack Attachments
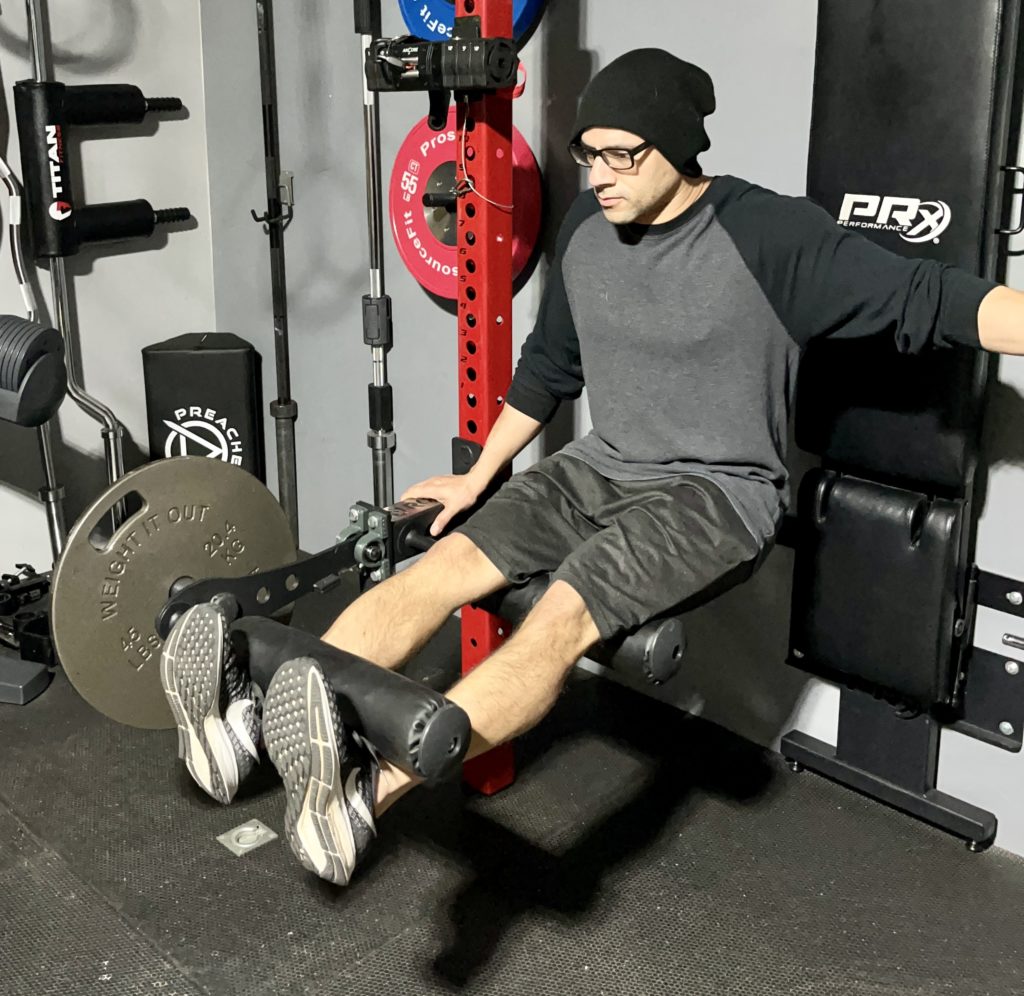
I’ve used rack mounted leg extension / curl attachments before and they really are no comparison to the Isolator.
Other rack attachments use one arm so it’s not even close since they’re not modular.
They’re ok for what they do but there’s not much versatility.
Modular
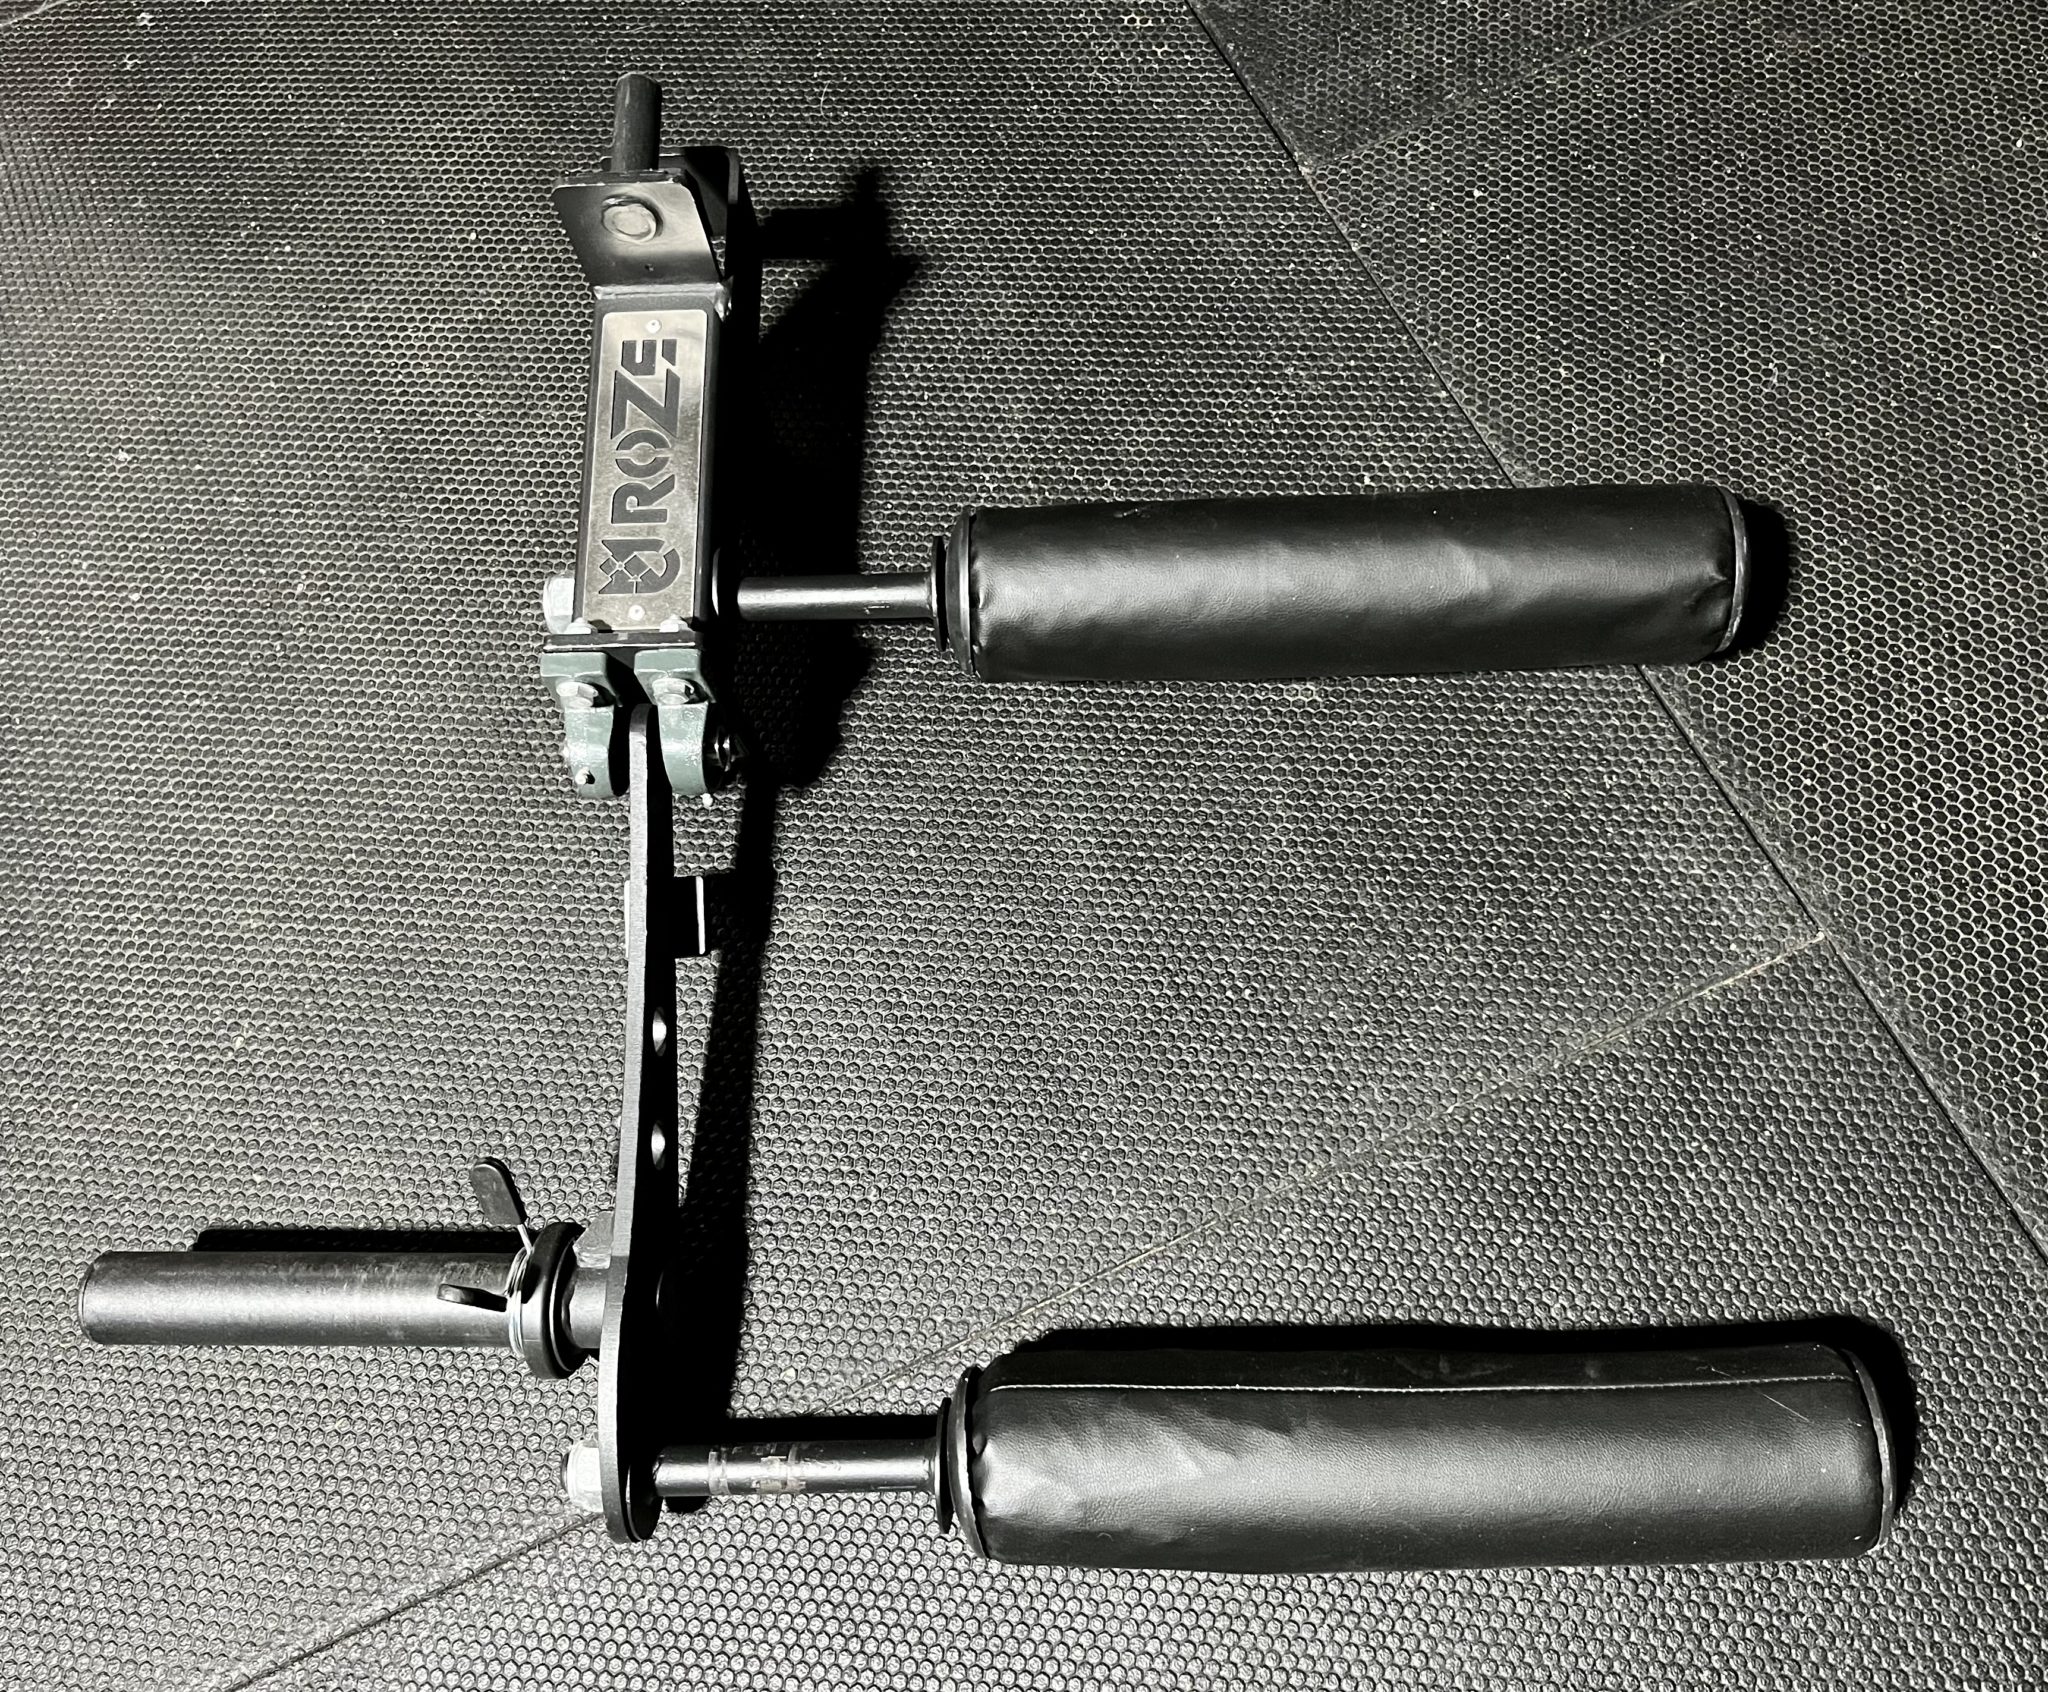
The leg extension / leg curl attachment above is from Roze Fitness (no longer in business).
Both leg rollers are bolted to the arm and the weight horn is welded on to it.
This leaves little to no room to modify it.
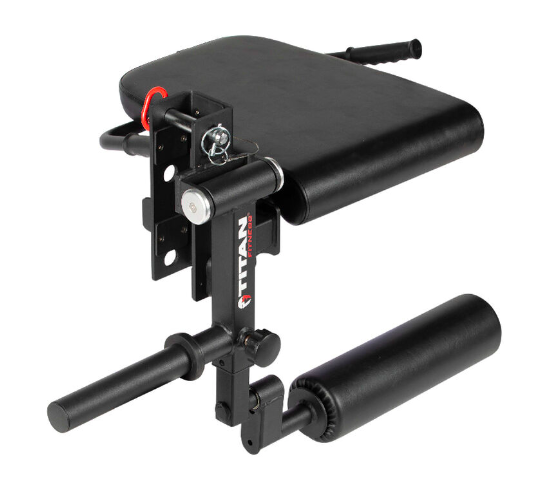
The Titan rack mounted leg extension attachment is an improvement over Roze Fitness’.
Only thing that modifies is the height of the roller and angle of the seat pad but still only does a couple of exercises.
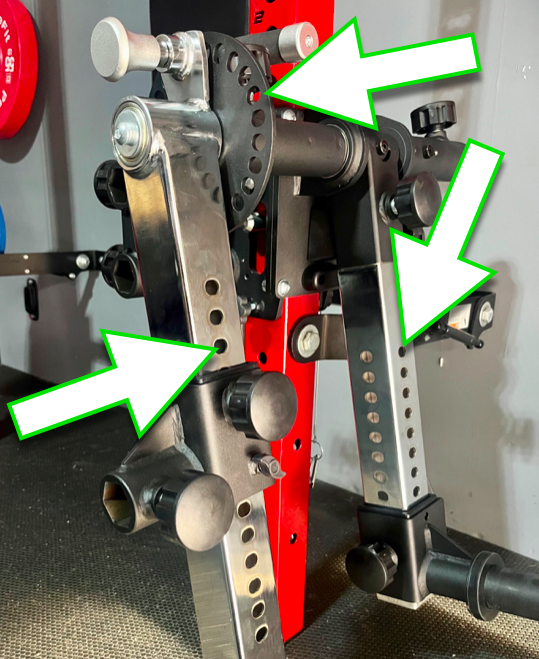
The Bulletproof Isolator has multiple holes on both the weight arm and lever arm to modify it in many ways.
Plus the lever arm and seat pad can be rotated at 360 degrees for an endless amount of exercises.
Dual Arm System
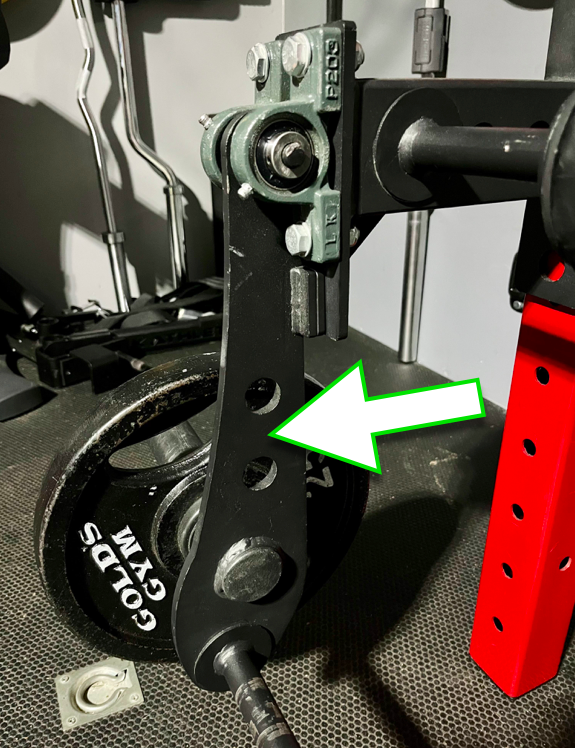
Rack mounted leg extensions share a single arm to hold the weight and lift the weight.
So I’m restricted to just doing a couple of exercises (standing leg curls and leg extensions).
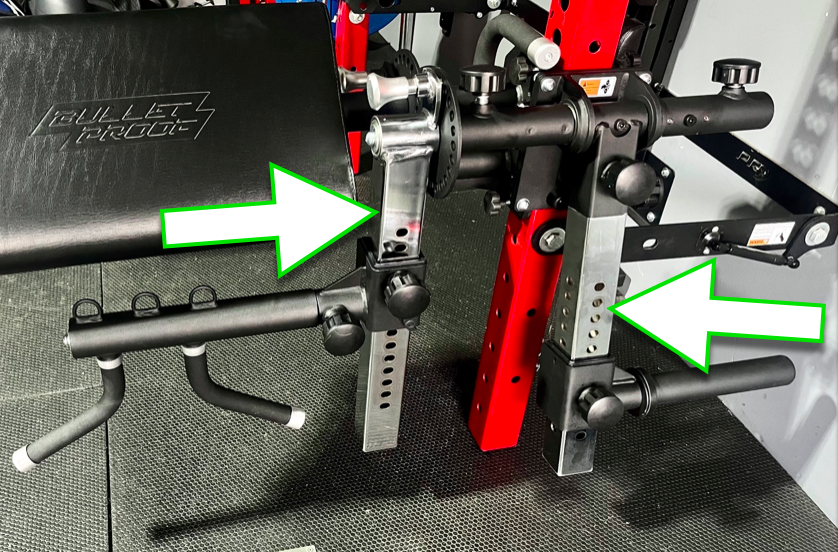
With the separate lever arm on the Isolator, I’m able to rotate that arm 360 degrees and start at any position.
The freely movable arm plus different attachments give me the versatility to recreate a lot of exercises.
Only piece of equipment I own that can do as much as the Isolator is my leverage gym but that requires more space than a rack attachment.
Hex Port System
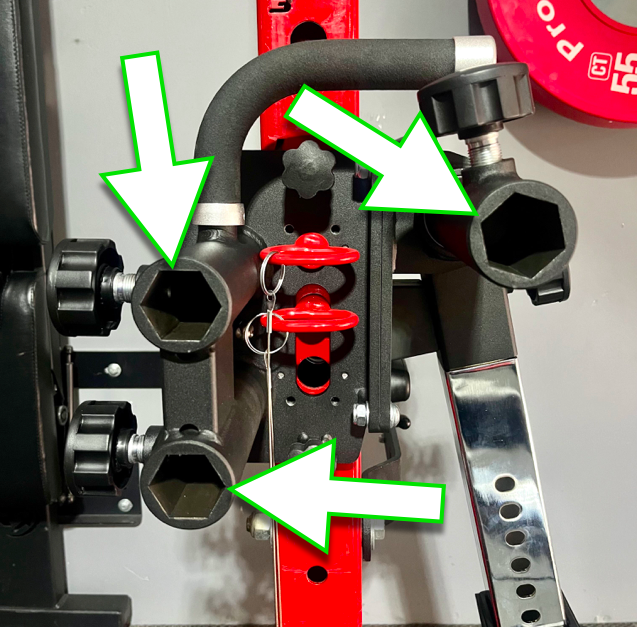
The hex port system on the Isolator makes it easy to change between attachments.
There’s four hex ports on the carriage and one on the lever arm.
I insert each attachment in the hex port until it clicks then twist the knob a few times until it’s snug and I’m done.
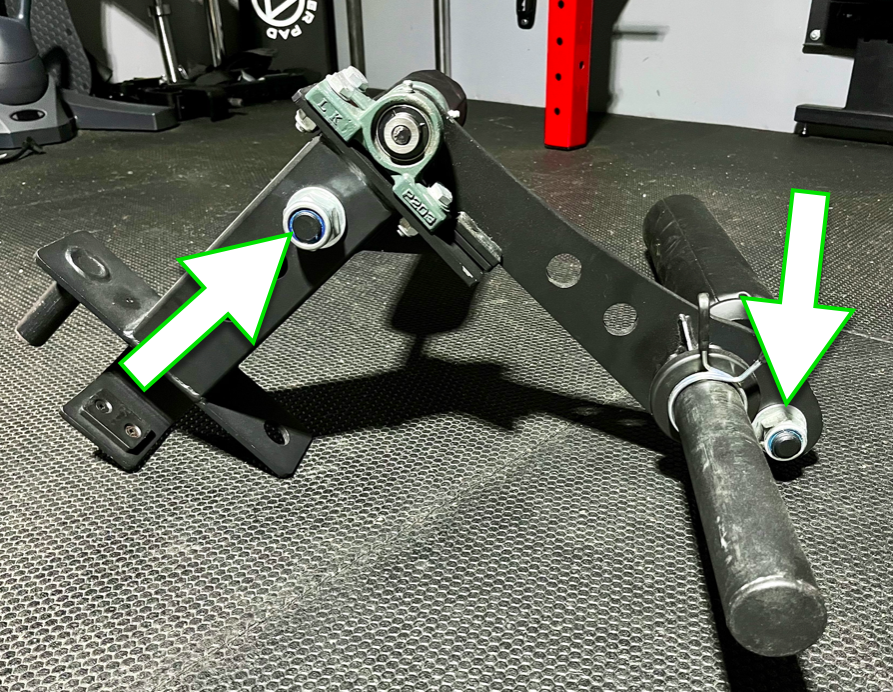
Compare that to the way the leg rollers are attached to the leg extension attachment which are bolted down.
This takes much longer to loosen and tighten, plus it doesn’t come with other attachments that I can use anyway.
Counter Torque Design
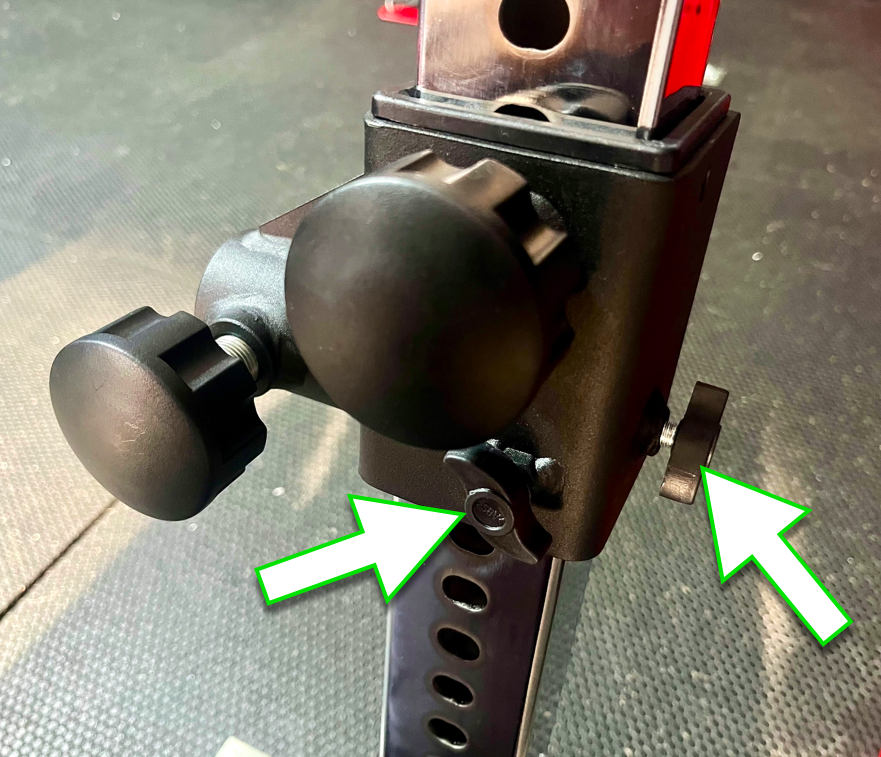
The three counter torque knobs on the Isolator lever arm play a huge role.
I can tell you this because I’ve used other rack attachments that didn’t come with this.
What ends up happening is that the attachment ends up sideways.
So one side (closest to the lever arm) ends up doing most of the work.
Having counter torque screws eliminates that so that the attachment stays level and both limbs get an equal load.
Multiple Attachments
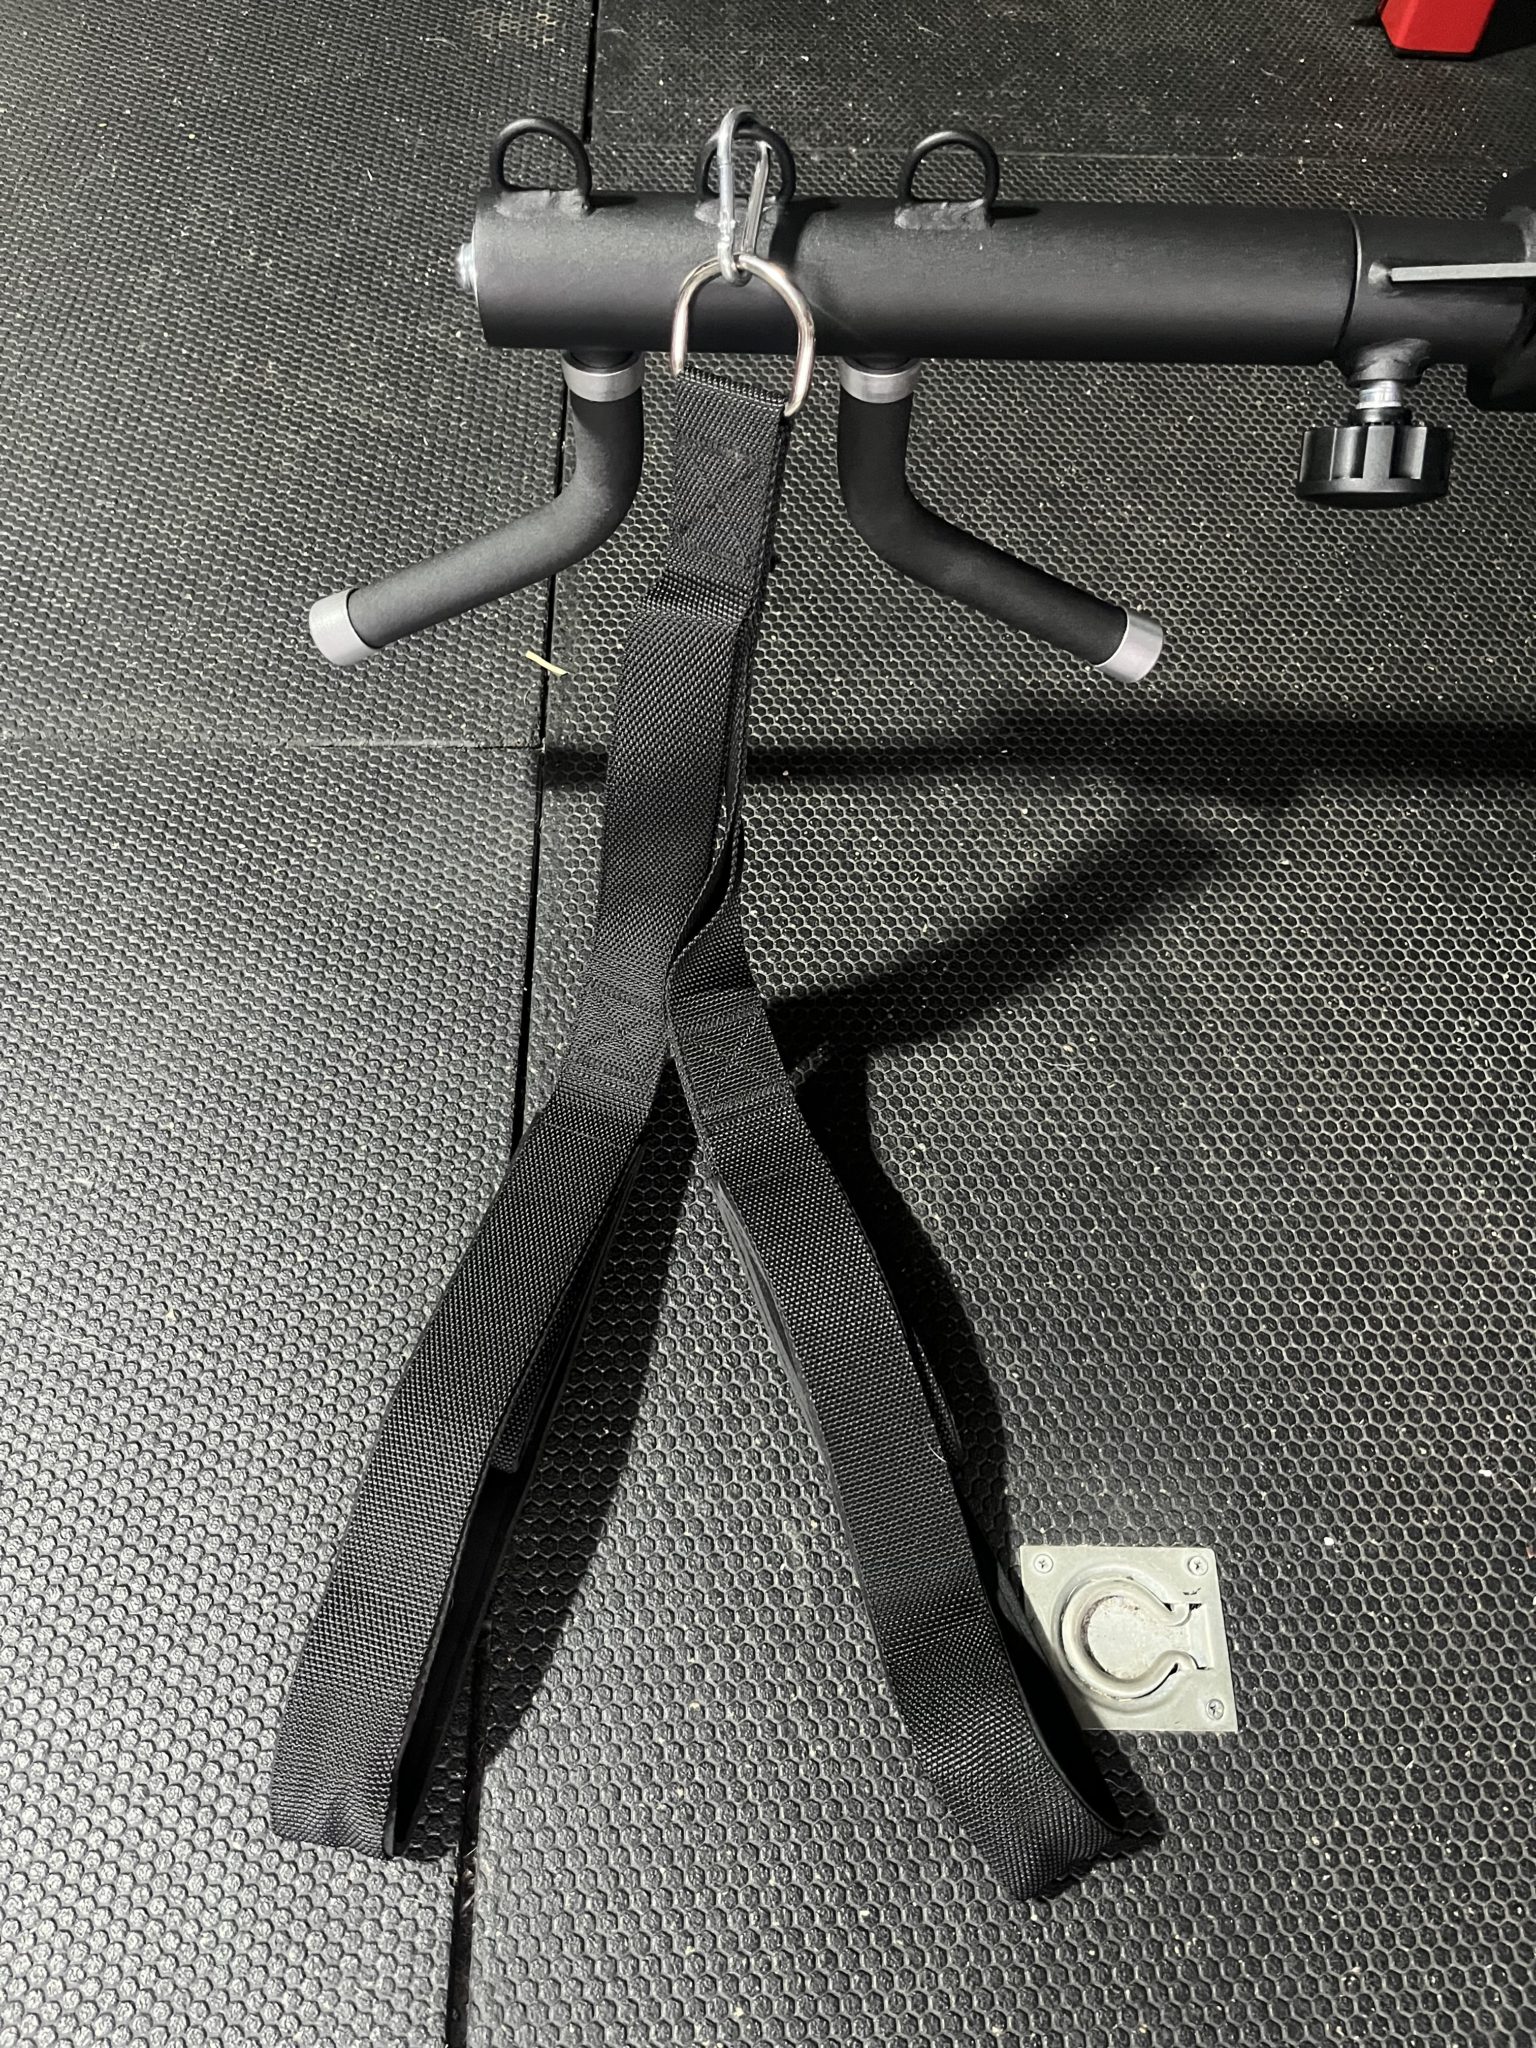
The Isolator comes with a curl bar, long roller pad, short roller pad, and seat / preacher curl pad.
And I can even add more functionality by attaching more equipment to the curl bar like I show you above.
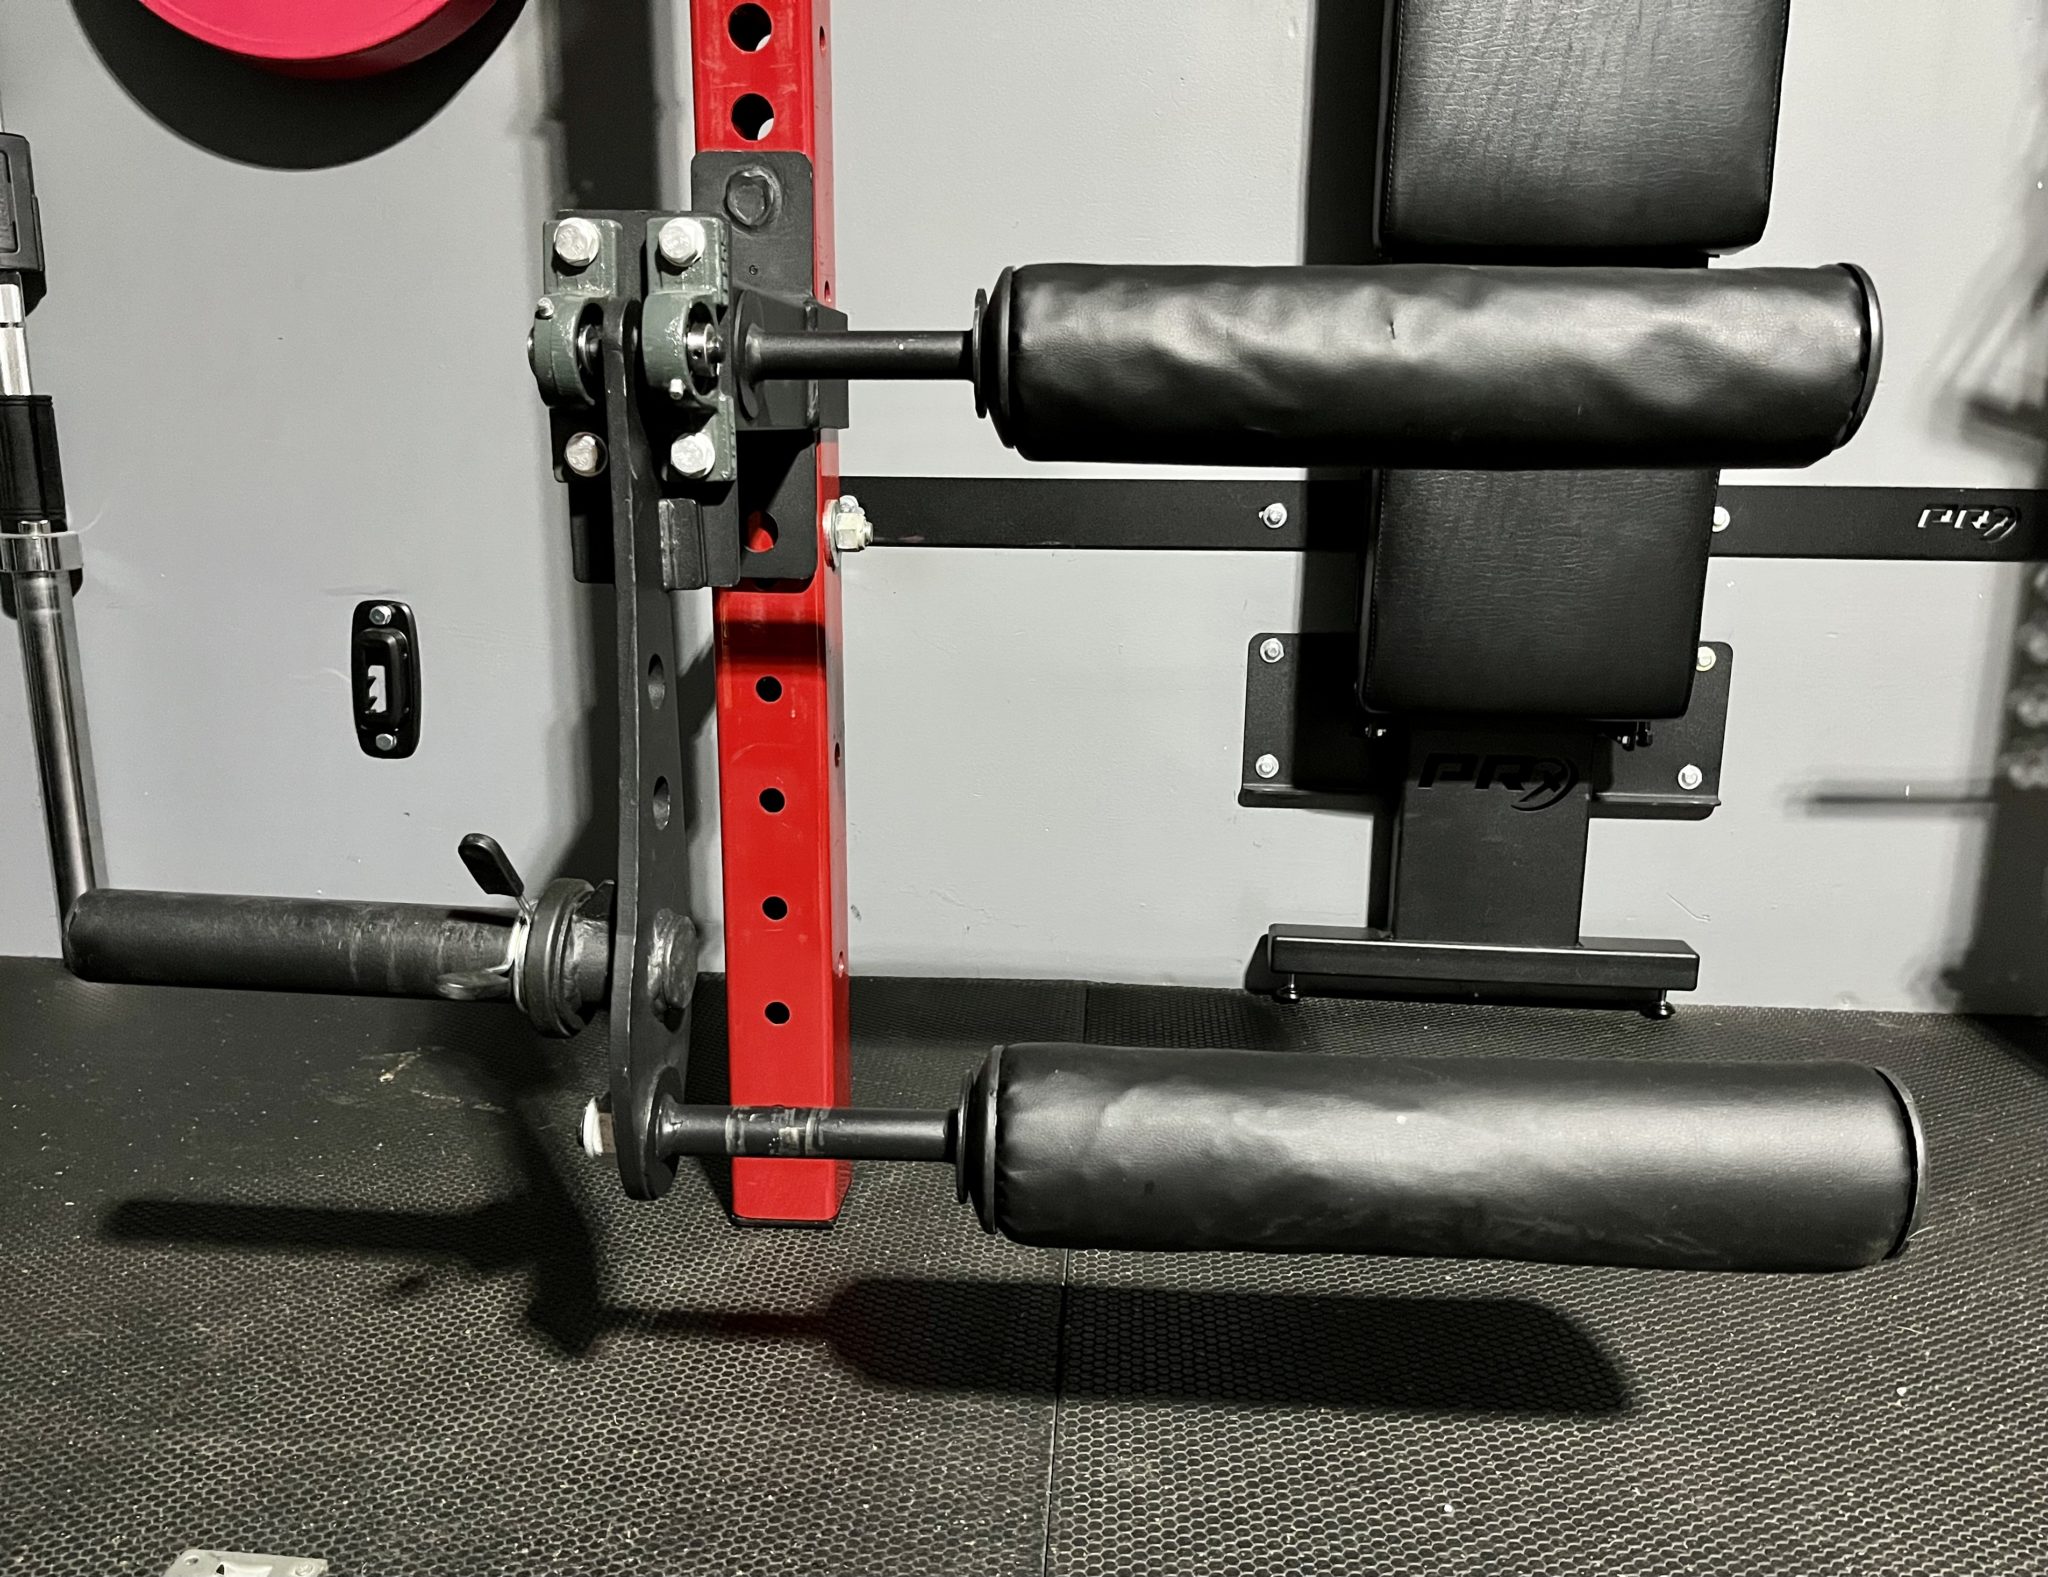
Other rack attachments like the one above, usually come with one or two leg pads that are bolted down.
Bulletproof has also mentioned that they will be dropping more attachments that use the same hex port system.
Bulletproof Tri Post Rack
Bulletproof Fitness has come out with their own weight rack, the Tri Post Rack.
This three post rack has a stand alone post for the Isolator so there’s no need to be taking it off.
That same post can be used for other attachments like a pull up bar, dip bar, or suspension trainers.
The other two posts can be used just like a traditional weight rack, for squats, pull ups, bench press, etc.
I like this idea because I do a lot of supersets so this eliminates having to take down the Isolator down if I need to use my weight rack.
Click here to check out the Bulletproof Tri Post Rack.
Bulletproof Solo Stand Deluxe
Another smaller option for the Isolator is the Bulletproof Solo Stand Deluxe, a compact single post rack.
This is a 3″ x 3″ post with 1″ holes made of 8 gauge steel so it’s beefy.
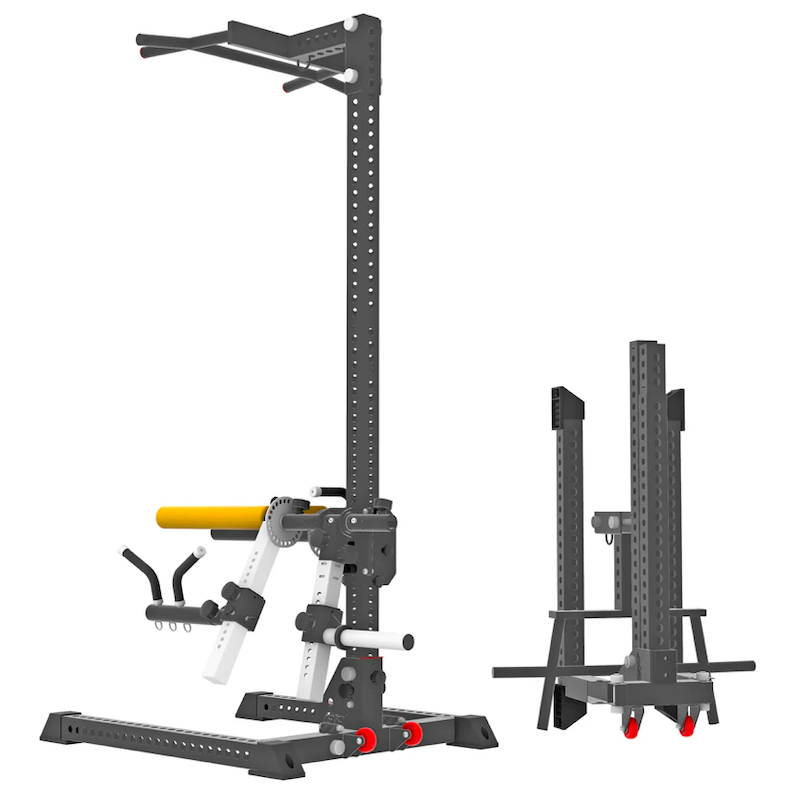
The Solo Stand Deluxe can also be upgraded to include an upright extender to make it taller.
This gives you the option to add other attachments like a dip bar or pull up bar.
And it’s built to collapse and fold away so it doesn’t take up a lot of space in your garage gym.
Pros & Cons
Pros
- All-in-one: Replaces a bunch of isolation machines
- Versatility: Any isolation exercise I can think of can be done with the Isolator (beats having a single use machine)
- Compatibility: Fits rigs of all sizes so any home gym owner can use this
- Build: The quality on all parts of the Isolator is top notch
- Space saving: Hooks up to one upright taking up minimal space in my garage gym
- Future attachments: Bulletproof Fitness will be dropping future attachments compatible with this unit to continue adding versatility
Cons
- Configurations: It can be configured in so many ways and angles so it takes time to remember the set ups for all exercises (good problem). I’m thinking about writing numbers next to the holes to make it easier to remember set ups.
- Cost: The Bulletproof Isolator is a high ticket item but it costs WAY less and takes up less space than buying all the machines it replaces
Where To Buy The Bulletproof Isolator
The Isolator is currently only sold through the official Bulletproof Fitness Equipment website.
It’s currently priced at $799 plus shipping within the U.S.
I’m not sure if they ship internationally yet.
Haven’t been able to score an exclusive discount code but if a coupon code does becomes available, I will post it here.
They also offer financing so you can get an Isolator in your hands and pay for it over time.
Bulletproof Fitness Isolator Review
The Bulletproof Fitness Equipment Isolator is by far the most versatile isolation machine I’ve ever used.
With a double arm, 360 degree angle design, there’s an endless amount of exercises I can do with it.
Built with quality, mind blowing engineering, and future attachments in the works, Bulletproof has entered the garage gym space with a bang.
If you want a space saving, affordable, and all-in-one isolation machine, this is it!
Check Out the Bulletproof Isolator Here

Shredded Dad is a home gym equipment reviewer and fitness equipment expert specializing in hands-on testing of strength and conditioning equipment.
His work has been featured by leading fitness brands and quoted by major media outlets including Yahoo Health, GQ, AskMen, LifeWire, Wales Online, and others.
ShreddedDad.com

Can these attachments be used on any rack ?
They work with most racks. They’re compatible 2×2, 2×3, and 3×3 racks and various hole sizes too.
How does the carriage intrude on using your Prx for bench press, squatting, etc.
If you’re benching with a barbell, yes it will get in the way of the weight plates
If you’re squatting you can just step back so you don’t hit it
Hello,
Love your content; keep up the amazing job! I’ve been debating about whether or not to purchase The Isolator for a month or so now. Until reading your review I had no idea that you have to detach, then retach the carriage in the opposite direction in order to do seated leg curls. This is one of the primary exercises as to why I’d purchase it. Can you provide an estimate as to how long it takes to go from leg extensions to seated leg curls please? I can’t set it up for lying leg curls because I have a wall mounted fold out rack and was advised by the manufacturer there’s not enough distance from the wall (41″-42″) to do so. I was also advised that because my rack is a 2″x3″ I can’t turn it sideways as you have in your videos.
What is your opinion on the tricep movements and lat pulldowns in comparison to a pulley system? I’ve gotten feedback that leg and bicep exercises are great, but triceps and the pulldowns are lacking a lot when put against a pulley system. Thoughts? Please let me know.
Hey Travis,
Once you get used to using the Isolator it doesn’t take very long to change it around.
From leg extensions to leg curls it’ll take I would say maybe a couple minutes just because you’ll have to take off the weight and arms to flip the carriage upside down.
They did just come out with an optional hex port that eliminates flipping the carriage if you want to do seated leg curls and other exercises.
As far as triceps you have to play around with your body position and lever arm positions to see what fits best for you since the movements is around a fixed point.
For pulldowns, you gotta play around with the height of the bench and carriage for the same reasons.
Not as smooth as a pulley system for those movements since a cable and pulley have more flexibility when they move around but something you have to play with based on your setup.
Great review.
On previous comment you stated the carriage gets in the way of bench press. Can you slide the carriage to the bottom of the rack when not using so you can bench press or does it really need to be removed? And if it does need to be removed, is it a long completely on, and/or completely off the rack process? Last question, do you still use it often having had it for a few months now? Thanks for your info.
It can be slid up or down your upright without having to take it off. And yes I still use it.
Hi! I love your reviews and content! I just had a few questions about the isolator.
1. Does this get in the way/do you have to remove this with your Prx wall rack when placing it against the wall?
2. Can you just raise it all the way to the top/bottom holes so as to avoid collision when performing squats/bench?
3. Is it worth buying the extra hex option for doing seated leg curls(is it an extraordinary workout or would the lying curls be better?)?
4. What workouts do you find are best with this besides leg extensions and leg curls?
Sorry that’s a lot haha, thank you for always making such awesome content!
Hey Toj! Here are my answers to your questions:
1. You have to remove the carriage when folding the rack. The carriage takes up space so it would hit your wall.
2. It can be moved up and down but the carriage is about 40 lbs so moving it up requires muscle. And if you move it all the way down, the hole spacing on the PRx rack is 5/8″ so it depends on the pin size you get.
3. I don’t have the hex port so I couldn’t tell you about that piece but a prone leg curls works fine for me. If you wanted to try seated leg curls, you can turn the carriage upside down and it can be done that way but that requires extra set up time.
4. I like using it for preacher curls, back extensions, pull overs, seal rows, and seated rows
Great write up! How much clearance do you need on the sides of the PRX upright for the plates to move safely during work out? Are you able to reverse it so the plates can move in between the uprights or attach to the rack so it goes outwards from the squat rack?
Hey Richard,
I have no issues with the plates moving at all.
I set the weight horn to face the same direction I’m facing.
If I set the weight horn sideways i have less space to load plates because I have the wall there.
I have done leg extensions before where I have the Isolator facing outwards and I’m seated in between the uprights but the space was tight because of my wall mounted bench.
The bench taking up inside space is the main reason I set up the isolator sideways plus outside the rack I have more flexibility.
have you noticed any damage on your wall? i’m looking for a wall mounted (foldable) rack that can take on the weight of the isolator and myself when i hop on it (i’m 5’4, 150 lbs). i’m afraid that the weight will begin to damage the wall. have you had any of those issues?
No damage on my wall since the weight goes straight down but one thing to note when using the isolator on a foldable rack is that you have to slow down the movements since the upright won’t be bolted down or stabilized at the bottom.